
Rosemary is a woody evergreen culinary herb with narrow, fragrant leaves, often easier to clone from a healthy stem than to start from seed. A successful cutting is not simply a sprig stuck into a jar: it needs a living stem with nodes, some foliage left above the surface, a clean rooting environment and a balance of moisture and oxygen. University of Georgia Extension describes several rosemary-cutting approaches, including semihardwood tips in freely draining media. This guide focuses on rooting rosemary in potting or propagation mix, rather than promising that every cutting roots in water or on the same timetable. Work with material you are allowed to propagate, and expect differences among cultivars and seasons.
Select a Healthy Rosemary Parent Plant
Start with a vigorous, correctly identified rosemary plant, commonly labeled Salvia rosmarinus or its older name Rosmarinus officinalis. Inspect for sticky residue, insects, disease lesions and severe stem dieback. Taking material from an unhealthy plant can carry trouble into the propagation tray. Avoid picking stems from a recently drought-stressed specimen; rehydrate the parent through appropriate watering before harvesting cuttings. A newly purchased, proprietary cultivar may carry plant patent or other propagation restrictions, so check permissions before multiplying plants for sale. For ordinary home-grown, unprotected varieties, vegetative cuttings preserve the traits of the plant from which they were taken more reliably than seed. If you want the full process, read how to propagate French tarragon from cuttings rather than seed.
Choose Flexible Growth That Is Not Flowering
Rosemary stems range from very soft new shoots to older woody branches. For routine home propagation, a short, firm but not brittle shoot tip is useful, with leafy nodes and no flowering head. Georgia Extension gives rosemary-specific examples of roughly 2- to 3-inch semi-hardwood terminal cuttings; its broader herb publication describes 3- to 5-inch pieces of spring or summer growth. These are guides for different conditions, not a single compulsory length. Choose enough stem to bury a leafless section while keeping foliage above the medium. Collect several healthy tips because success varies with season, temperature, humidity and the vigor of the source plant. Our walkthrough on how to root lavender cuttings sets out each step.
Make a Clean Cut and Find the Leaf Nodes
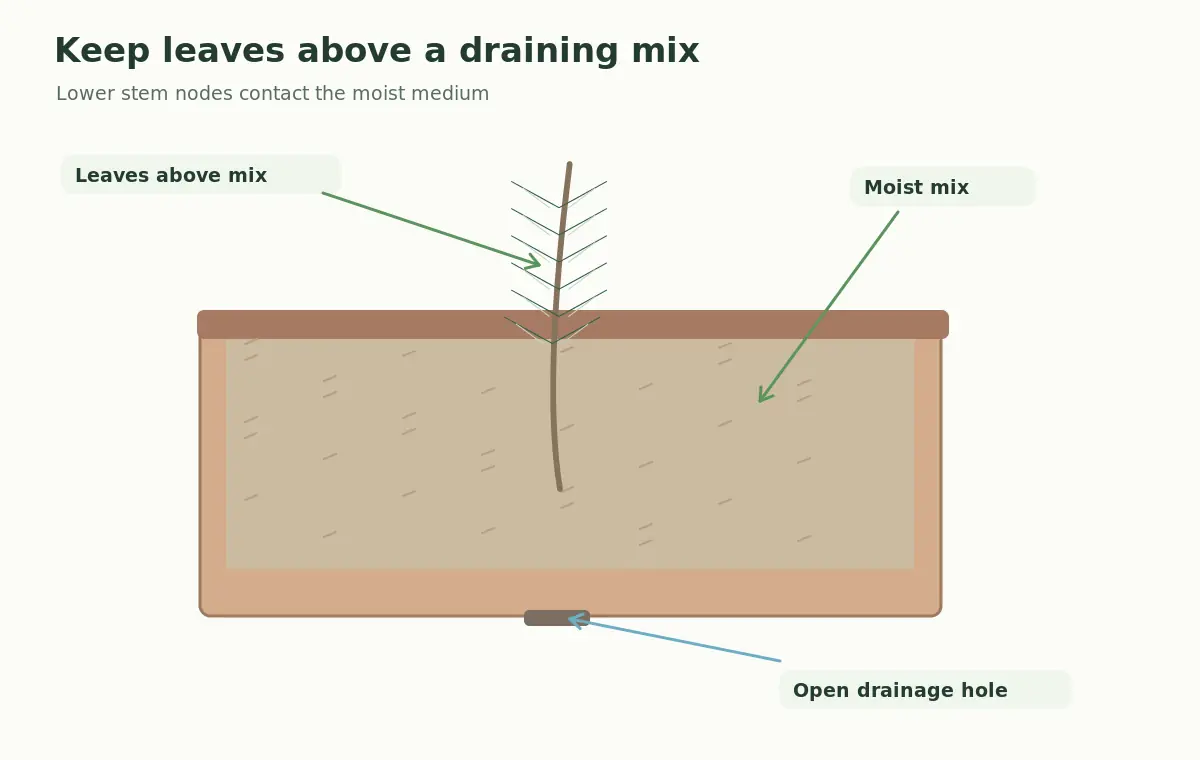
Use cleaned, sharp scissors or snips to remove a tip, ideally just below a leaf attachment point or node. On rosemary, narrow leaves appear in opposite pairs along the stem; each attachment helps you locate the nodes. Keep the cutting shaded and out of drying wind while preparing it. If the tip carries flowers or buds, remove them so the cutting does not maintain a bloom while trying to form roots. Do not mash the end with blunt scissors. The diagram distinguishes the living leafy portion above the soil from the lower stripped portion that contacts the rooting mix.

Strip Leaves From the Buried Lower Section
Remove leaves from the lower section of each cutting so no foliage will sit in wet medium. Keep healthy leaves near the top to support photosynthesis but reduce excessive foliage if it is dense. University of Georgia’s rosemary guidance describes removing roughly half the leaves from short semihardwood tips. Do not remove every needle or scrape the whole stem down to bare wood; a cutting without remaining green foliage may struggle. If using optional rooting hormone, follow its manufacturer directions and prevent cross-contamination by decanting a small amount rather than repeatedly dipping into the original container.
Use an Airy Rooting Mix and a Draining Pot
A clean pot with open drainage holes is essential. Propagation media may include coarse sand, perlite or an appropriate airy peat- or coir-based mixture; the exact components depend on what is locally available. Wet, dense garden soil can collapse around the stem and suffocate the developing root area. Pre-moisten the mix before inserting cuttings so they do not have to endure forceful watering immediately after placement. Make a hole with a pencil, insert the leafless portion of the stem and press the mix lightly around it for contact. Keep the leafy part above the surface and leave room between cuttings so leaves are not pressed together.
Provide Bright Indirect Light and Gentle Humidity
A fresh cutting has no functional new root system and can dry out quickly, but rosemary also dislikes permanently wet roots. Put the pot in bright indirect light, protected from fierce midday sun. A loose clear humidity cover can reduce water loss if your air is dry, provided leaves do not press against the plastic and condensation is aired out. Check the medium by touch: it should stay slightly, evenly moist, never swampy. If stems turn black or mushy, reassess sanitation and moisture rather than adding still more water. Good airflow and warmth, not a sealed hot box in direct sun, support healthy rooting.
Watch for Rooting Without Yanking the Stem
Rooting speed varies with the maturity of the cutting and growing environment; Georgia Extension gives several weeks as a useful expectation for many herbs, not a guarantee for each rosemary cutting. Look for steady green foliage, subtle new growth and eventually roots visible at a drainage opening or the pot edge. A very light resistance check can be informative, but frequent tugging damages fragile forming roots. Leaves that remain green for a few days are not proof that an adequate root system has developed. If a cutting collapses or rots, discard it, clean the container and review the balance of air, moisture and starting material.
Pot Rooted Cuttings Without Breaking New Roots
Once roots have developed enough to hold the medium and sustain the cutting, transfer each rooted plant to its own small pot with well-drained potting mix. Handle by the root ball rather than pulling by the stem. Set it at a similar depth, without burying the foliage or crown. Initially keep the plant in gentler light and monitor moisture as it transitions from a propagation environment to normal growing conditions. Gradually give it more sun as new growth becomes evident. Oversized containers with much constantly damp soil may stay wet too long for a little rosemary plant, so choose a proportionate pot and good drainage. If you want the full process, read how to propagate oregano from cuttings without rotting the stems.
Adapt Care to Your Winter Climate
Established rosemary prefers sun and freely draining soil, but winter hardiness depends on the cultivar, temperature extremes and drainage. In climates with sustained freezing conditions, container plants are often moved to a suitable protected site rather than assumed winter-hardy based on a vague regional label. Newly rooted cuttings are even more vulnerable to abrupt changes in light, heat and cold. Do not place a young plant outdoors after one warm day and expect it to tolerate frost overnight. Check local Extension winter guidance and your specific growing site. Reduce irrigation as growth slows while avoiding complete desiccation of the small root system. For a step-by-step method, see how to root rosemary cuttings without leaving stems in soggy mix.

Avoid Mistaking Water Rooting for the Only Method
Some gardeners try rooting rosemary in water, but water-rooting success varies and the resulting roots must later adapt to potting media. This article emphasizes a breathable rooting mix because University Extension propagation methods specifically describe it for rosemary. Do not claim that adding sugar, aspirin, cinnamon or other kitchen remedies guarantees rooting. The strongest routine is healthy tips, clean tools, good node contact, gentle humidity and careful watering. If you repeat cuttings, label each pot with the parent plant and collection date, then note which seasonal conditions produced strong roots; your observations can improve the next attempt more than an unsupported one-size-fits-all trick. If you want the full process, read how to root rosemary cuttings in a free-draining potting mix.
Related Guides
- Growing Herbs by Type: Water, Harvest, and Winter Survival Guide
- Growing Rosemary in Pots: Drainage, Pruning and Winter Care
- How to Root Oregano Cuttings and Keep the Parent Plant’s Flavor
- How to Root Culinary Sage Cuttings From Fresh Nonflowering Shoots
How We Research and Check Recommendations
Sources checked October 23, 2026. Our review compared species-specific university Cooperative Extension material with broader gardening recommendations and separated observations that apply widely from regional planting, dormancy and weather decisions. An illustration is a simplified teaching aid rather than a diagnostic image or substitute for inspecting a live plant. This guide does not report original trials, promise cultivar-specific results, endorse pesticides or make claims of sponsorship.
Sources reviewed: University of Georgia Extension — Starting Plants From Cuttings (species-specific rosemary semi-hardwood cuttings, leaf reduction and aerated medium); University of Georgia Extension — Herbs in Southern Gardens (spring/summer herb cuttings under moist, well-drained conditions); University of Illinois Extension — Rosemary (rosemary botany, seed versus cutting propagation and drainage); University of Illinois Extension — Cuttings (general nodes, clean tools, indirect light and cutting preparation). VegWin does not claim partnership with these institutions; see the site affiliate disclosure.
Yes. University Extension sources recommend stem cuttings as a practical way to make more rosemary.
Make a clean cut just below a leaf attachment node on a healthy nonflowering tip.
No. Strip the leaves from the part of the stem inserted into the moist medium.
It varies with season and conditions; allow multiple weeks rather than expecting a guaranteed number of days.
It can moderate moisture loss if ventilated and kept out of direct sun; soggy sealed conditions can encourage rot.