
Culinary sage is a woody perennial herb with gray-green aromatic leaves, but mature plants can become leggy and less productive. A cutting from a healthy plant is a practical way to grow a replacement that retains the characteristics of the parent, especially for purple, golden or other named selections. Seed-grown sage may vary, so cutting propagation offers a reason beyond simply obtaining another plant.
Wisconsin Extension describes rooting softwood sage cuttings in moist, well-drained potting mix; RHS similarly identifies shrubby herbs as suitable for vegetative propagation. The critical steps are choosing fresh growth, keeping buried leaf tissue out of wet compost, and waiting for a root system before treating the cutting like a mature drought-tolerant herb. If you want the full process, read how to root lavender cuttings in mix without losing them to rot.
Confirm that the parent is culinary sage
Use Salvia officinalis or an identified edible cultivar, rather than assuming every decorative salvia in a border is culinary sage. Salvia is a large genus with plants grown for flowers, foliage or food. The gray-green slightly textured leaves of common culinary sage are one clue, but proper identification should come from a reliable label or known plant history. Propagation is no substitute for verifying edibility.
Choose a parent that is growing vigorously and free from visible pests, blotches, or stem rot. Do not take a cutting from a collapsing plant in the hope that rooting will remove an infection. If the original plant is old and bare at its base, select fresh top growth if available, not the brittle inner framework.
Take a soft tip cutting during active growth
RHS suggests softwood cuttings from the new growth of culinary sage in late spring or early summer. Wisconsin Extension also describes summer softwood cuttings. Timing is therefore linked to the plant producing healthy flexible shoots, not to a universal day of the month. Choose nonflowering tips where available: active flower spikes divert space and attention from the vegetative shoot you want to root. If you are starting from scratch, read When to Take Salvia Cuttings and Root Nonflowering Shoots.
Use sharp clean snips, take cuttings during a cooler portion of the day, and keep them out of direct hot sun until potted. Work with a few healthy tips rather than stripping the parent plant severely. Label named cultivars before cuttings from several plants are mixed in one tray. For a step-by-step method, see how to root oregano cuttings and keep the parent plant’s flavor.

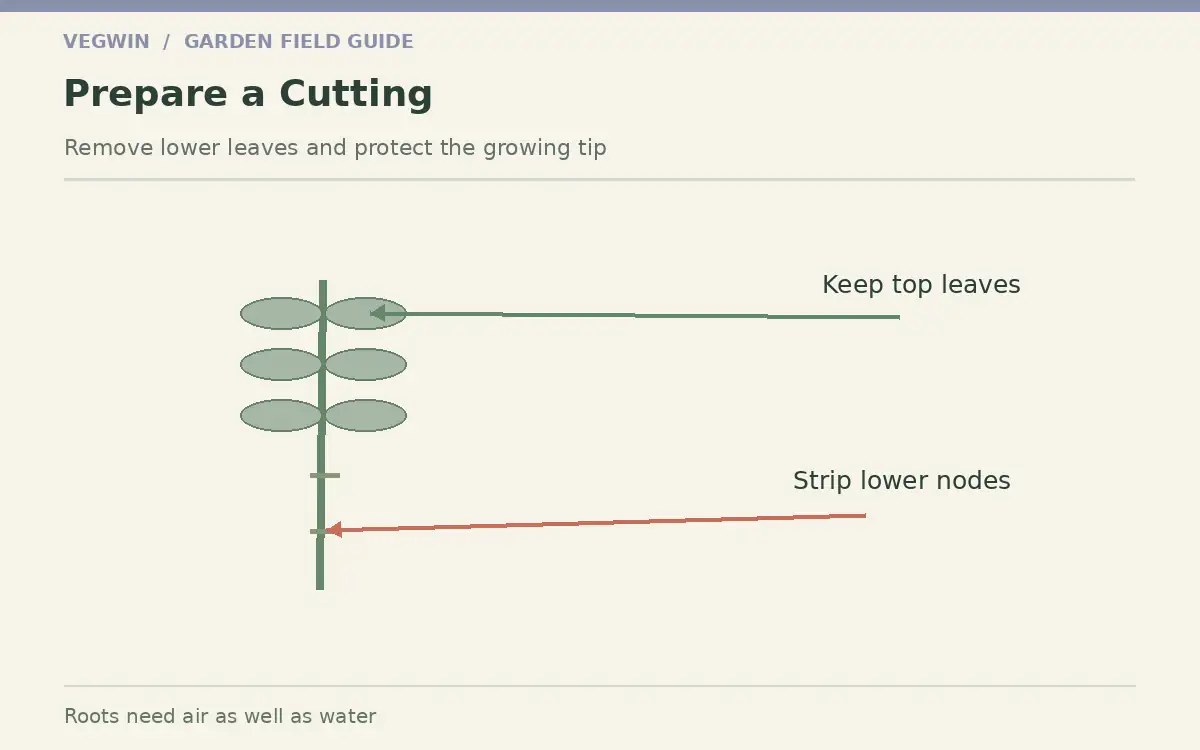
Locate leaf nodes and strip the buried section
Culinary sage normally has opposite leaf pairs at nodes. Make a neat base cut on a suitable soft shoot, leaving a few healthy pairs toward the tip. Remove the lower leaves that would otherwise end up beneath potting mix. Leaves pressed into damp medium often decay, creating a path for stem rot. Retain enough upper foliage to support growth while the shoot makes roots.
If the tip includes a developing flower head, pinch it off carefully. Avoid crushing a tender cutting with dull scissors or scraping the bark. You do not need to peel the lower stem bare or carve away healthy tissue. Prepare the cutting immediately before insertion so it spends as little time wilting as possible.
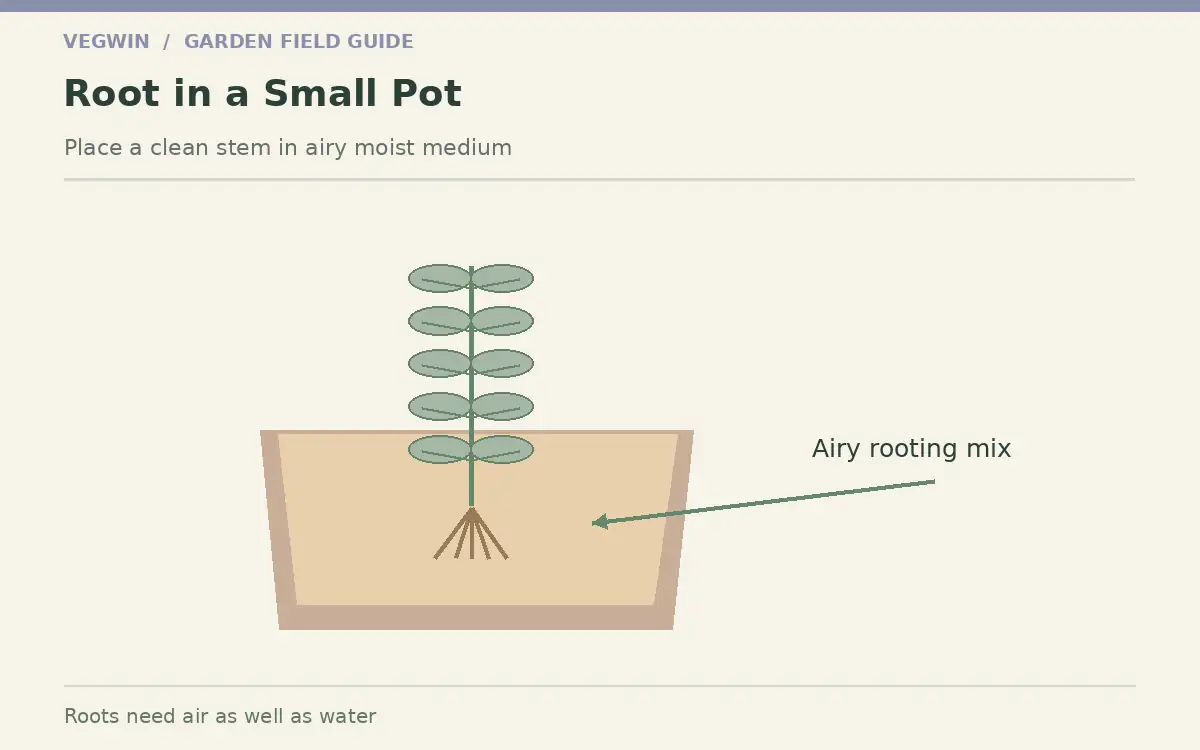
Use a clean rooting mix with drainage
Fill a small pot with moist but airy rooting mix and ensure drainage holes are open. Wisconsin Extension emphasizes well-drained potting material; do not use sticky garden soil compressed into a jar with no outlet. Make a small planting hole with a pencil, lower the prepared stem into the medium and firm gently around it. The lower node zone belongs in the medium, while upper leaves stay above it.
Water once to settle the mix and let it drain. Rooting hormone is generally not required for sage, according to Wisconsin Extension, so a failed cutting should prompt a review of stem health, drainage and humidity before another product purchase. Mark the date so you can interpret changes without digging up roots every few days.
Balance humidity against stem rot
An unrooted tip loses water through leaves before it can replace that water with roots. Bright indirect light and modest humidity can reduce stress, but a sealed plastic cover dripping water onto leaves may encourage disease. If you use a humidity dome, vent it regularly and separate foliage from wet surfaces. Keep the mix evenly, lightly moist rather than saturated.
Watch the base for dark soft patches and the leaves for persistent wilting. A wilted tip is not automatically thirsty if the potting mix is already wet. Check temperature, drainage and air movement first. Dispose of badly rotted cuttings and clean trays before attempting another batch.
Test for roots before potting up
Fresh leaves alone do not prove a rooted system has formed. Sustained new growth, increasing firmness and gentle resistance when lightly tested are more promising. Avoid tugging hard or pulling stems up to admire fine roots. When roots have spread sufficiently to hold the rooting medium, move the plant into an appropriate small container.
Transfer without burying the crown more deeply than before. A huge wet pot around a tiny cutting dries very slowly, so choose a size proportional to the new roots. Protect the freshly moved plant from strong midday sun and drying wind while it adjusts, and only then begin a gradual transition to ordinary sage care.
Harden new plants into sun and leaner soil
Established sage prefers sun and well-drained conditions and often dislikes persistent winter wet. Newly rooted cuttings are different: they have limited roots and need a gentle acclimation period. Increase light gradually, water according to the root zone rather than a rigid daily schedule, and avoid placing fresh starts into cold saturated beds. For a step-by-step method, see how to root fuchsia cuttings without rotting the soft stems.
RHS and Illinois Extension both stress sage’s aversion to poor drainage. In colder or wetter regions, a pot that can be protected in a bright frost-free location may be more reliable than planting late tender cuttings outdoors. Once the plant branches, harvest lightly at first so it can build a stronger framework. If you want the full process, read how to root rosemary cuttings in a free-draining potting mix.
| What you observe | Recommended next step |
|---|---|
| Healthy flexible tip, no flowers | Take a softwood cutting and keep upper leaves. |
| Buried leaves touch potting mix | Strip lower leaves and reset the cutting. |
| Blackened stem and wet mix | Discard rot and improve sanitation and drainage. |
| Healthy roots visible or pot anchored | Pot up carefully and gradually increase light. |
| Named variegated sage variety | Prefer cuttings over seed for true-to-type offspring. |
Choose cuttings, layering or seed intentionally
For a named culinary selection with distinctive leaves or flavor, cuttings retain parental characteristics. Seed can grow useful ordinary sage but is less dependable for preserving a named cultivar. A low branch naturally rooted where it meets soil can be layered and later separated, another method described by RHS. Choose a route based on the parent’s shape and condition.
If every fresh tip is flowering or diseased, waiting for healthier regrowth may be the sound decision. Propagation does not require a complex bench, dozens of pots, or expensive hormone. A clean cut, correctly prepared nodes, balanced moisture and patience solve most of the problems the home gardener can control.
Related Guides
- Growing Herbs by Type: Water, Harvest, and Winter Survival Guide
- How to Grow Culinary Sage in a Pot Without Wet Roots
- Propagate Lemon Verbena From Soft Tip Cuttings Without Root Rot
- How to Propagate French Tarragon From Cuttings Rather Than Seed
- Grow Real French Tarragon From Cuttings or Divisions, Not Seeds
How We Research These Garden Care Decisions
This article compares the care needs of the actual species, growth stage, season and planting context rather than relying on a universal date. The sources below were checked on October 23, 2026. Where their regional advice differs, use your nearest Cooperative Extension and the plant or seed supplier label. Inspect plants and local conditions before acting; a structural publishing validator does not verify horticultural accuracy.
Sources reviewed: hort.extension.wisc.edu horticultural guidance (Wisconsin Extension confirms named sage varieties are vegetatively propagated and softwood cuttings root in well-drained mix.); www.rhs.org.uk horticultural guidance (RHS provides sage-specific guidance on softwood and heel cuttings and shrubby herb propagation timing.); www.rhs.org.uk horticultural guidance (RHS culinary sage guide explains propagation from new-growth cuttings and variety fidelity.); extension.illinois.edu horticultural guidance (Illinois Extension recommends cuttings for culinary sage and emphasizes drainage and winter care.).
Editorial and affiliate disclosure: This page is informational. No affiliate offer or partner compensation is assumed. If commercial links are ever added after approval, review our affiliate disclosure.
Yes. Wisconsin Extension and RHS describe softwood cuttings as a practical propagation method.
Generally not; clean healthy material and well-drained medium are more important.
Take flexible new shoots during active growth, often late spring or early summer, adjusted to local conditions.
As a vegetative clone it retains the parent genotype, although light and conditions influence appearance.
Rot is possible where stems stay too wet, buried foliage decays or sanitation is poor.