
Bell peppers can look perfectly leafy yet set little fruit, or they can produce attractive fruit with a surprising pale or dark patch. The most useful approach is to follow the plant through successive decisions: choose a suitable cultivar, transplant only into favorable conditions, keep moisture steady, watch fruit set, and diagnose damage by where it begins. This guide is for home gardens in the United States; local seasons and varieties determine the exact timing. This informational guide has no paid product recommendations. See our affiliate disclosure for our site-wide policy.
Choose a Bell Pepper Variety for Your Actual Season
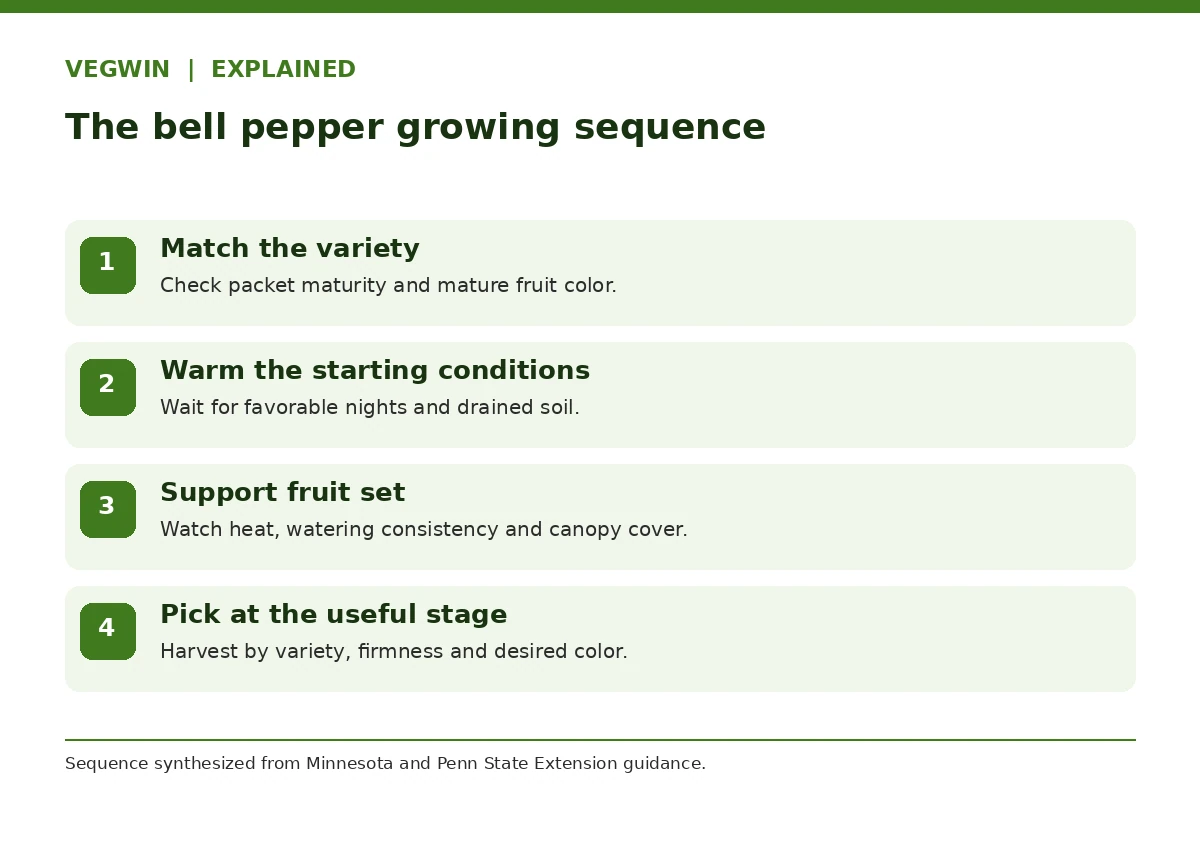
Start with the maturity information on the seed packet or transplant label, and compare it with the length and warmth of your local growing season. Bell peppers are sweet, thick-walled Capsicum types; their eventual mature color depends on the variety. Do not assume a green bell pepper will always become red, because mature-color options also include yellow and orange. For a short or cool summer, consider the regional Extension variety suggestions rather than choosing on fruit color alone. Observe plant size too: that determines whether a container, stake or crowded bed is realistic.
A healthy purchased transplant should be stocky, uninjured, and free of visible insects beneath its leaves. Avoid buying the largest, most root-bound plant just because it has buds. Pepper roots can be disturbed during transplanting, and an already stressed plant may be slow to establish. If starting from seed, use your local outdoor transplant window to plan backward, not a nationwide sowing month. Compare early growth with the packet’s cultivar instructions; peppers are not simply tomatoes that can be moved outside at the same time. Our guide to growing tomatoes covers a step-by-step plan from transplant to harvest.
Wait for Warm Nights and a Suitable Root Zone
University of Minnesota Extension advises waiting until nighttime lows are consistently above about 50°F before setting peppers outdoors. A warm afternoon does not cancel several cold nights. Soil conditions also matter: an early planting into cold, sodden ground often pauses growth and leaves roots under stress. Check your local last-frost risk, the immediate forecast and whether the garden soil is draining well. Hardiness zones indicate average extreme winter cold for perennials; they do not provide vegetable transplant dates.
Harden indoor or greenhouse-grown transplants gradually using the supplier’s or Extension’s acclimation guidance. Give them sheltered outdoor exposure before moving them straight into wind and full sun. Water the root ball before planting; set the pepper near the depth it occupied in its container rather than burying a long stem as some gardeners do with tomatoes. Firm soil gently around roots and water it in. If a cold spell is forecast, delaying transplanting can be less harmful than asking a tender pepper to endure repeated chilling.
Give Peppers Light, Drainage, and Enough Space
Use a sunny garden location and well-drained soil, and obtain a soil test before deciding that a particular nutrient is missing. Penn State’s home-garden pepper guidance illustrates around 18 inches between plants with rows at least 24 inches apart, but exact spacing must be adjusted for cultivar, bed layout and access. Adequate room allows inspection of stems and leaves and helps keep fruit under healthy foliage rather than forcing stems into a dense tangle. Small cages or stakes can protect loaded branches in windy beds without turning this into an elaborate trellis project. To go further, our guide “Heat-Tolerant Vegetables” shows how to pick crops and protect fruit set in hot weather.
Mulch helps conserve soil moisture and limit weed competition after the root zone has warmed sufficiently. Do not mistake mulch for a remedy for waterlogged soil: drainage must come first. Keep weeds from competing near shallow new roots and avoid hoeing aggressively against the stem. An annual soil test and observed growth should guide amendments. Excess nitrogen can produce substantial leafy growth at the expense of balanced fruiting, so avoid repeating fertilizer applications simply because the plant has not yet made peppers.
Keep Water Delivery Consistent During Fruit Development
Water deeply enough to wet the active root zone when needed, then check soil moisture instead of irrigating by the calendar alone. Containers, sandy soils, mulched beds and cool or hot weeks require different schedules. Wilt in severe afternoon heat may recover by evening even when soil is moist; persistent wilt and dry soil suggest a different problem. Sudden swings from dry to soaked conditions can interfere with nutrient movement while fruit tissues are expanding. A slow, soil-directed watering method is easier to assess than repeatedly splashing the foliage.
When a flower drops, investigate recent temperature extremes, drying cycles and plant stress before assuming a pollination or fertilizer shortage. Bell pepper fruit set is sensitive to unfavorable heat and cold; fruit drop in an extreme week does not necessarily mean the plant has a permanent disease. Note when new flowers form and compare weather across weeks. If a pepper forms a healthy small fruit and then develops a dark sunken patch, that is a distinct diagnostic path from simple flower drop. For the basics, see our guide: Why Tomato Flowers Drop Without Fruit.
| Observation | First plausible issue | Next useful check |
|---|---|---|
| Transplant remains stalled | Cool root zone or establishment stress | Review night lows, drainage and root ball |
| Flowers drop during extreme weather | Temperature or water stress | Log recent weather before amending soil |
| Pale patch on exposed fruit side | Possible sunscald | Inspect foliage loss and fruit orientation |
| Dark sunken fruit-end or side lesion | Possible blossom-end rot | Review watering swings and soil test |
| Spreading leaf disease or wet rot | Unconfirmed pest/pathogen | Request crop-specific Extension diagnosis |

Distinguish Sunscald From Blossom-End Rot
Sunscald often develops on fruit surfaces exposed abruptly to intense light, especially if leaves have been removed or broken. A pale, bleached-looking patch on the sun-facing side should trigger a check of foliage cover, not an automatic fungicide recommendation. Avoid removing large amounts of pepper foliage to “ripen” fruit. Protect branches from snapping so fruit remains shaded by its own leaves. Confirm the problem visually and contact local Extension if the pattern is not clear.
UF/IFAS explains that blossom-end rot is associated with inadequate calcium reaching rapidly developing fruit tissue, commonly linked with water transport rather than simply a shortage of calcium in the soil. It may create a sunken, leathery lesion at the blossom end or on the side of a bell pepper. Diagnose location, texture and the progression of damage; some symptoms overlap with sunscald and secondary rots. Stabilize moisture and review soil-test evidence before adding calcium. No foliar product or recipe should be treated as a guaranteed cure. Our walkthrough on how to prevent blossom-end rot on peppers by managing soil moisture sets out each step.
Harvest Green or Fully Colored Fruit With Care
Many bell peppers can be picked green when they reach the cultivar’s usable size, or left longer to develop their mature color if conditions permit. Mature-color peppers are not merely “overripe green peppers”: the color belongs to the cultivar and harvest stage. Fruit texture, firmness and visible damage are more informative than counting days alone. Record which plants ripen reliably in your local season for next year’s selection. Short-season gardeners may take green fruit rather than lose an entire later crop to the first freeze.
Use clean pruners or snips rather than pulling fruit sharply and breaking branches. Check pepper shoulders and underside for hidden rot, insect injury or split tissue. Remove damaged fruit from the plant rather than allowing it to decay among healthy peppers. Handle harvested fruit gently and use crop-specific food handling and refrigeration guidance. Harvesting does not remove the need for continued watering and scouting while flowers and smaller fruit remain.

Keep a Two-Week Pepper Observation Log
A short observation log makes a difficult pepper season diagnosable. Record your plant variety, transplant date, soil condition, weather extremes, whether the stem and leaves are growing, the appearance of flowers and the first visible fruit damage. Photograph the same fruit or flower cluster every few days. If plants are leafy but fail to set fruit during a period of hot days or cool nights, weather becomes a more useful lead than blaming a missing supplement without evidence. For a step-by-step method, see how to harden off and transplant pepper seedlings at the right depth.
Make one low-risk change at a time. If moisture is erratic, improve irrigation consistency; if fruit is exposed after broken branches, stabilize the plant and preserve the remaining foliage. If leaf spots spread, insects are visible or fruit tissue softens rapidly, pause the physiological diagnosis and use local Extension diagnostic services. Avoid layering fertilizer, pesticide and improvised calcium sprays on the same plant: that can conceal the original problem and create a second one.
Plan Next Year From What Actually Worked
At season’s end, compare the number of useful peppers with weather and planting decisions rather than only seed-catalog promises. Did warm nights arrive later than expected? Was the soil ready when transplants went in? Which variety remained productive under your local conditions, and which fruit stage produced the most usable harvest? This gives a more reliable decision for next year than doubling the number of plants or the fertilizer rate.
Rotate crops when practical, clean or replace worn supports, and manage infected residues according to the identified disease and local guidance. Bell peppers share pest and disease risks with other nightshades, including tomatoes, so note prior beds when planning crop placement. Keep cultivar identity with your records. The objective is a repeatable small-garden system: right starting conditions, an observable moisture routine, prompt diagnosis, and harvest at the stage that fits your kitchen.
Related Guides
- Growing Peppers in Pots: Container Setup and Fruit-Set Troubleshooting
- How to Save Pepper Seeds Without Confusing Maturity and Crosses
- How to Overwinter Pepper Plants Indoors: Resting or Growing
- How to Grow Poblano Peppers and Recognize Green Pods Versus Red Anchos
- How to Grow Shishito Peppers and Pick Thin Wrinkled Green Pods
How We Research and Check Local Exceptions
We reviewed an October 19, 2026 search-results sample for this precise query and read the cited primary university or government guidance. Before manual publication, an editor should search WordPress for the same intent, verify category placement and any claims that depend on local conditions. We did not treat advertisements, seed packet promises, or general garden myths as scientific sources.
Sources reviewed October 19, 2026: Minnesota Extension pepper growing; Penn State Extension pepper growing; UF/IFAS bell-pepper blossom-end rot. Our editorial approach distinguishes evidence from local decisions and avoids implying that sources endorse VegWin. This is general garden education, not a pesticide label, local planting schedule, or food-preservation processing instruction. Affiliate relationships for this article are not confirmed; our disclosure page describes site policy.
After local frost risk is acceptably low and nights and soil are warm enough; Minnesota Extension recommends nights above about 50°F. Check current forecasts.
No. Mature color depends on cultivar; many turn red, yellow, orange or another color, and the season must be long enough.
Heat, cool nights and inconsistent moisture can affect fruit set. Record weather and plant condition before treating a suspected nutrient problem.
No. Blossom-end rot is physiological and sunscald is environmental, though secondary infections can complicate symptoms.
Not automatically. Check a soil test and moisture consistency; calcium transport to young fruit is often the limiting factor.