
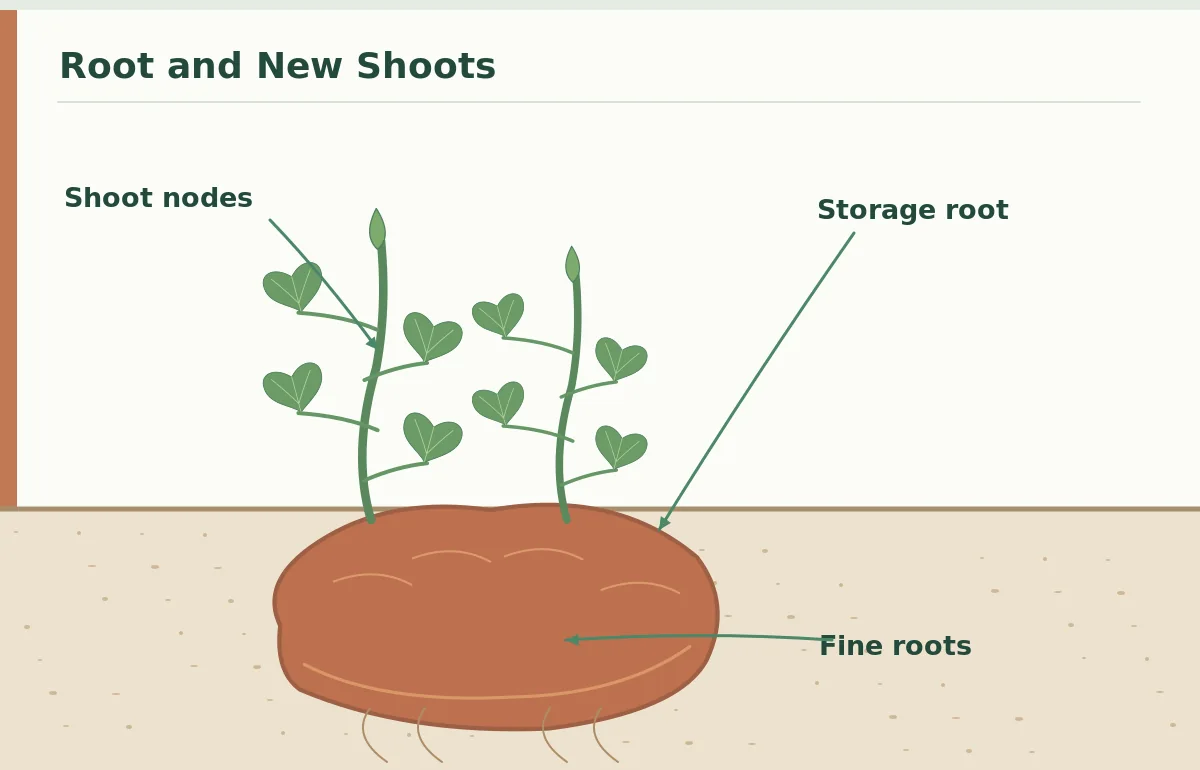
Sweet potatoes, Ipomoea batatas, are propagated from shoots grown on fleshy storage roots, not from true botanical seeds for most home-garden production. A storage root is a swollen root that stores reserves; it does not have the potato tuber’s familiar eyes. New shoots arise from suitable buds in the root tissues. A slip is the leafy green stem that develops from such a root and can later grow its own roots.
Recognize a Storage Root and a Stem Slip
Look for long petioles and usually heart-shaped leaf blades on the shoot. Each place a leaf joins the stem is a node, and nodes are important when setting the slip into a garden ridge. The illustrations distinguish that stem from the original thick storage root and the fine feeder roots. Do not confuse the original root with the harvestable planting slip; burying an arbitrary sweet potato slice is not equivalent to planting a properly prepared slip.
Choose Healthy Starting Roots and Clean Supplies
Use sound, disease-free sweet potato storage roots of a known variety, preferably from reputable planting stock. Roots with soft rot, extensive mold or an unexplained lesion are poor propagation material. Mississippi State Extension describes bedding stored roots in a warm prepared medium to induce shoots. The source root is a reservoir of carbohydrates and should be handled without unnecessary wounding when you want multiple shoots.
Prepare a tray with a clean, loose, evenly moist medium that drains well. Avoid a pot that traps standing water around the root. Label the variety because slips from different types can look similar while the eventual storage roots vary in skin, flesh and growing habit. A grocery store root can sometimes sprout, but unknown health or cultivar suitability makes it less dependable than verified planting stock.
Encourage Shoots in Consistent Warmth and Light
Sweet potatoes are a warm-season crop. Mississippi State Extension describes using warm propagation beds and covering roots with shallow medium during slip production. Washington State University provides a photo-based process that tracks green shoots from indoor production trays. The goal is a moist, aerated environment that allows buds to grow without leaving the entire root submerged in stagnant water.
Give emerging leaves appropriate bright light so the stems develop sturdy green tissue. Check the tray for dryness under the surface and water only as needed. If condensation collects under a cover or leaves press against it, adjust or remove the cover according to the production setup. Do not keep tender new shoots in darkness after emergence, and do not force growth by adding unverified concentrated fertilizer.
Count Nodes Before Taking Each Cutting
A useful slip is not merely a single leaf pulled from the root. Washington State University describes slips ready for cutting after they develop roughly five to eight nodes and advises using robust growth. The exact size depends on production conditions and variety. Count the points where leaves attach and make sure the stem is firm and green, not yellowed, crushed, or showing decay.
Inspect both sides of the leaves for pests before taking planting material into a clean growing area. A long vine can sometimes be divided into more than one slip if each portion carries enough nodes to establish. Keep the cut pieces oriented with the shoot tip above and basal end below. The diagram shows individual leaf nodes along the stem; it does not label the original storage root as a stem node.
Cut Above the Root and Keep the Shoots Clean
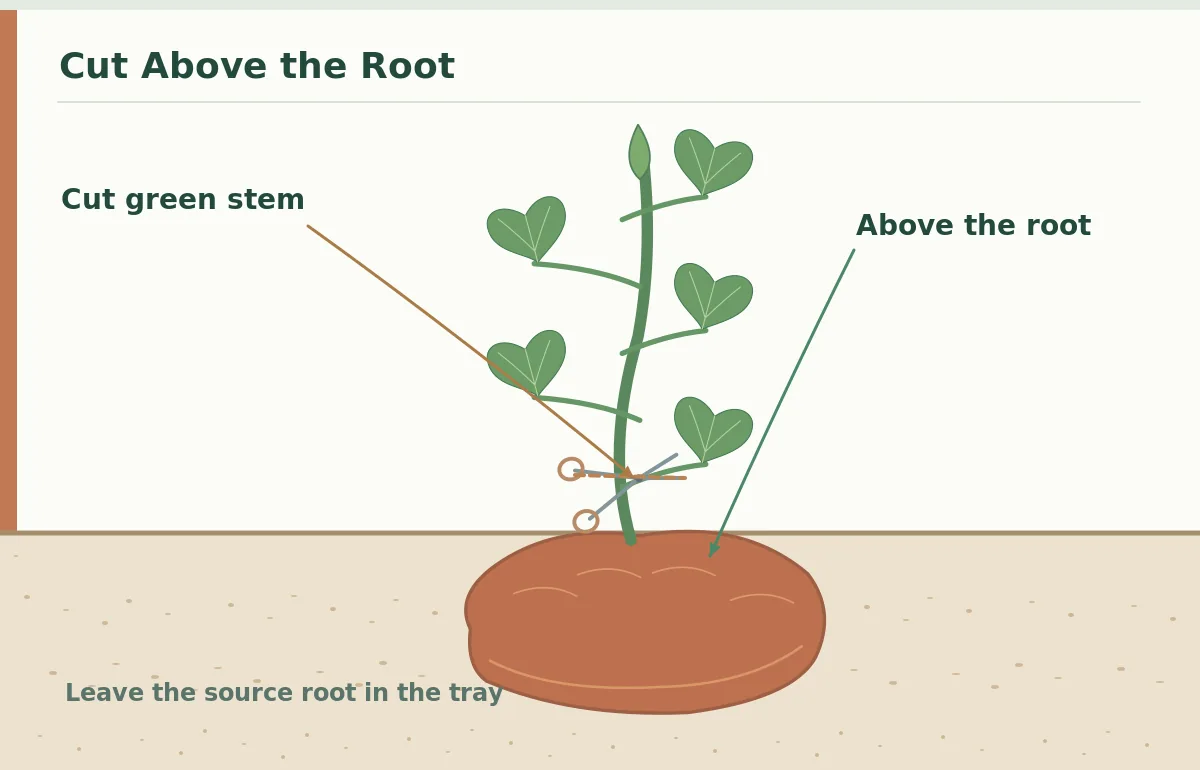
Use clean scissors to cut a selected slip just above the propagation medium or root rather than slicing soil-contaminated material along with it. Washington State University gives an approximate half- to one-inch clearance to reduce transfer of soilborne pests and disease. The scissors in the drawing cross the green stem above the original swollen root; they do not cut through the sweet potato flesh.
The cut slip may or may not have a root system already. Mississippi State specifically notes that firm green slips can be propagated as stem cuttings without attached roots. Keep freshly cut slips protected from direct heat and drying; harden them gradually before outdoor planting. Do not leave cut plants indefinitely in water or describe a jar-rooting step as mandatory for every production system.
Prepare Outdoor Soil for Root Expansion
Sweet potatoes need a frost-free, warm growing period and soil that drains well. Growing them in heavy compacted or waterlogged soil can restrict or deform storage-root development. Use local Extension guidance to plan an outdoor transplant period; a USDA winter-hardiness zone is not an annual sweet potato planting schedule. Planting into cold soil because the air briefly warmed is not a substitute for sustained seasonal conditions.
Prepare a loose bed or ridge that allows lower nodes to sit in contact with soil. Avoid packing a hard clod against the stem or bending the whole shoot underground. If your soil is very heavy, consult regional sweet potato recommendations about bed preparation and drainage before choosing a layout. Mark the original planting row so later cultivation will not sever the roots enlarging below it.
Bury Lower Stem Nodes and Leave Leaves Exposed
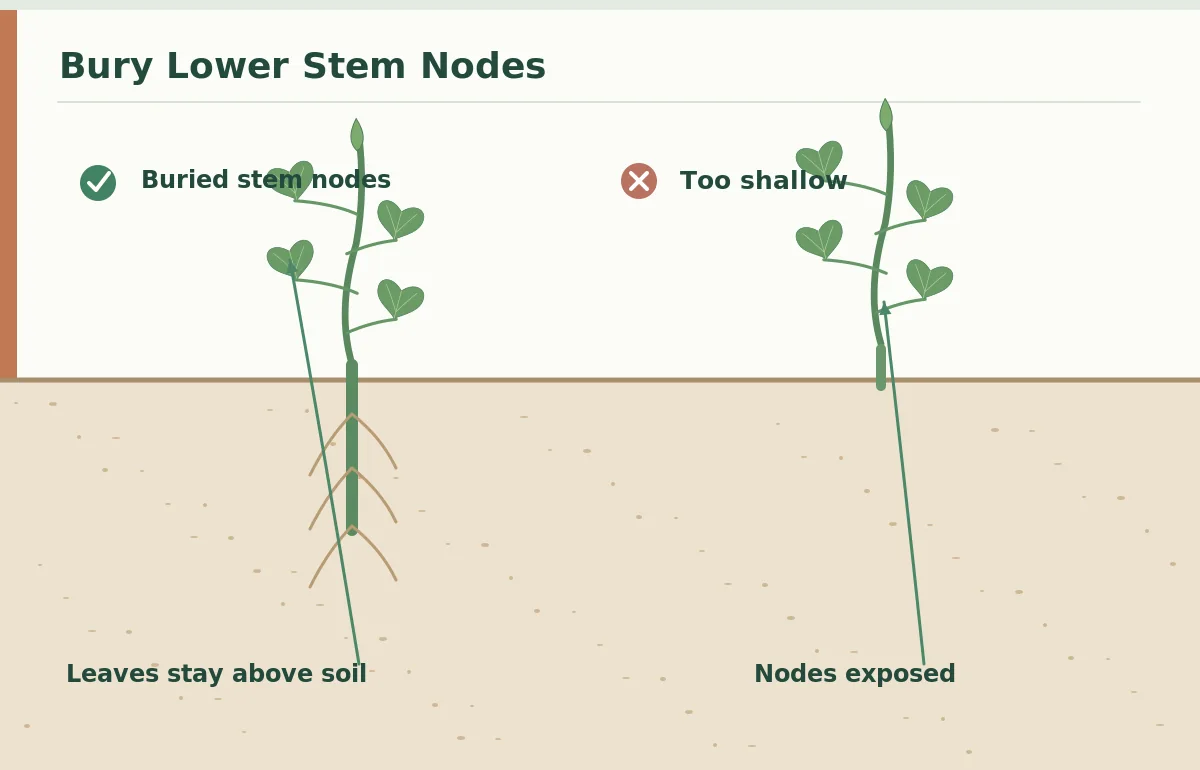
At transplanting, position the cut basal end downward and bury several lower stem nodes while keeping healthy leafy growth above the surface. South Dakota State University Extension describes planting slips with several nodes below ground. These nodes are where adventitious roots may develop; roots that later swell into storage roots form beneath the plant, not from the tips of exposed leaves.
Water the transplant to settle soil contact around the buried stem. Do not bury the leaves themselves, and do not perch a naked, unrooted cutting on the soil surface. In the comparison illustration, the correct slip has a visible green shoot above the soil line and several nodes in the moist soil; the incorrect slip is barely seated and likely to dry before it roots.
Track Establishment Without Disturbing Roots
Some drooping soon after planting can occur while a slip is establishing, but sustained collapse, blackened stem tissue or stagnant soil warrants inspection. Check moisture by touch rather than irrigating at a fixed daily interval. Protect from browsing animals where necessary and keep neighboring weeds from shading the young vines. Do not dig repeatedly to see whether storage roots have formed; the digging itself can damage them.
Record the source root variety, number of healthy nodes, cutting date and transplanting conditions. Compare survival and vigor across slips cut at different sizes, without claiming a universal production schedule. The successful outcome is a rooted vine with spreading leaves and growing underground storage roots, not the continued enlargement of the original mother root left in the tray.
Related Guides
- Sweet Potato Slips: Grow Healthy Shoots and Know When to Plant
- Harvest and Cure Sweet Potatoes Without Bruising or Chilling
How We Research This Guide
We compared plant anatomy and practical harvest or planting instructions against vegetables.wsu.edu; extension.msstate.edu; extension.sdstate.edu. These sources support the crop distinctions illustrated here. Always adapt planting timing and plant health decisions to your local climate and cultivar.
This is independently written educational gardening information, not a paid promotion. Review our affiliate disclosure. No pesticide or food-preservation procedure is endorsed; use local Extension guidance for high-stakes decisions.
No. A sweet potato slip is a shoot cutting produced by a storage root; it is not a section of a stem tuber like a regular potato.
Not always; Mississippi State notes that slips may be cut without roots and can form new roots after planting.
WSU recommends cutting about one-half to one inch above the soil or storage root to reduce soilborne transfer.
Wait until frost danger has passed and soil has warmed; consult local Extension guidance for your climate.
Place several lower stem nodes below the soil while keeping the upper leaves exposed to air and light.