
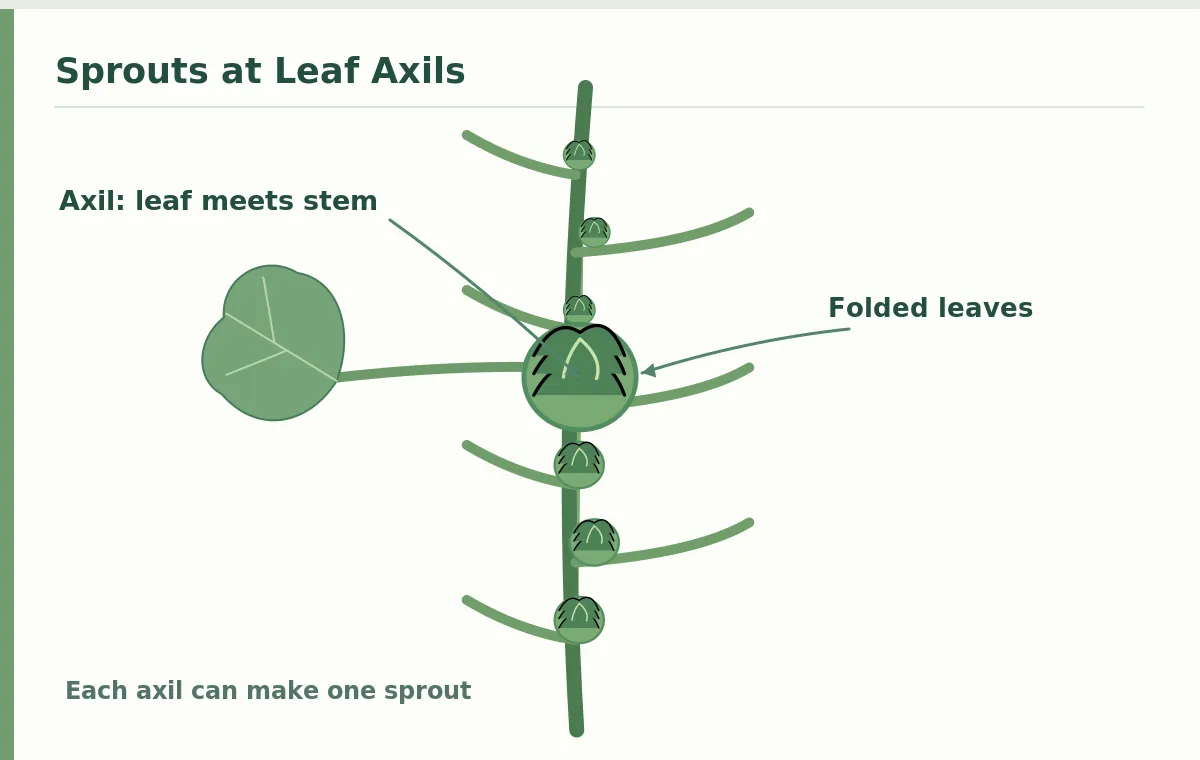
Brussels sprouts are Brassica oleracea in the Gemmifera group, a cool-season brassica that does not make a single edible head at its top. The plant forms an upright, fairly thick stem with many large, smooth, somewhat bluish green leaves. A small compact bud develops just above each leaf attachment. That junction is called the leaf axil, and each bud can become one Brussels sprout. Distinguishing this structure from cabbage leaves matters because the position of the developing heads tells you where to inspect the crop.
Recognize the Tall Stalk and Leaf-Axil Sprouts
The illustrated stalk shows compact round green heads along the center stem, not sprouts hanging from long fruit stalks or forming in the soil. Minnesota Extension describes development proceeding up the stalk, typically beginning lower down. Look for a clear main stem, leaves arching outward, and small buds fitted closely against the stem. Some buds may be hidden by their leaf bases, so look gently from the side rather than stripping healthy leaves simply to make the stalk look tidy.
Plan the Bed Around Mature Plant Width
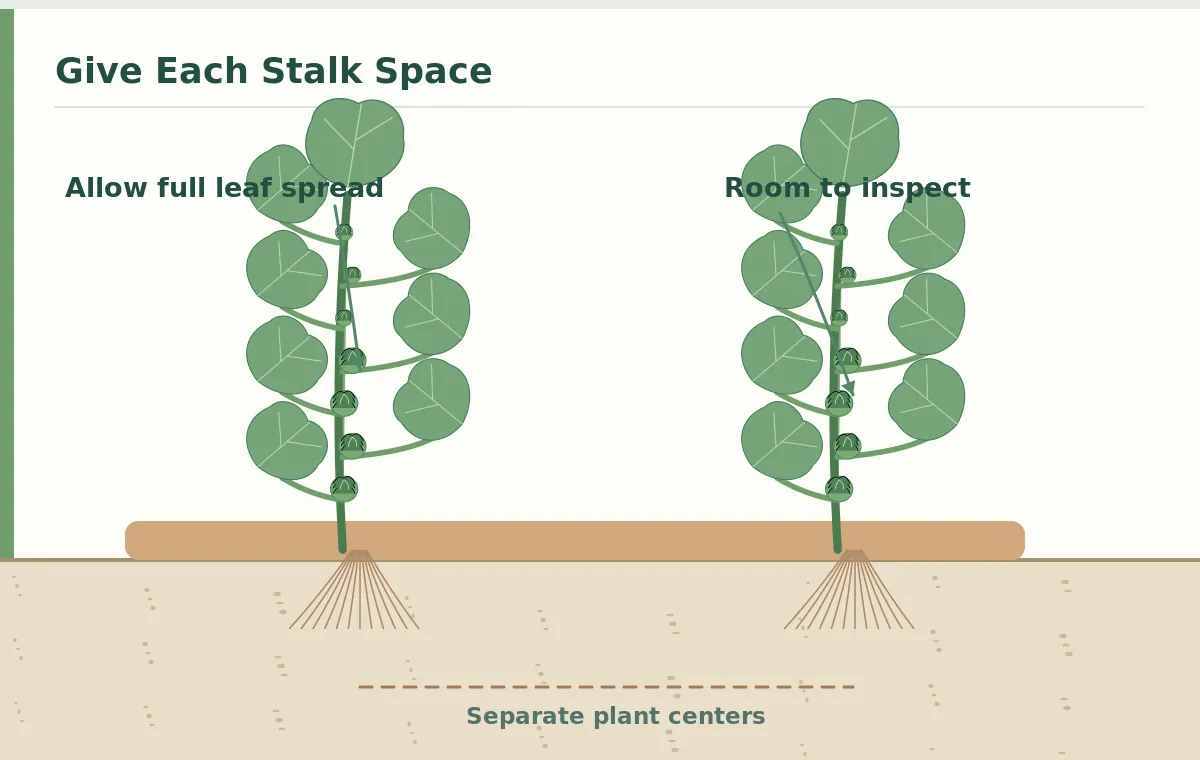
A raised bed can improve access and drainage, but it does not turn a large Brussels sprouts plant into a compact window-box vegetable. Utah State Extension discusses roughly 12 to 18 inches between plants and generous row spacing in garden production. Exact distances depend on variety, soil and how the bed is accessed. On a narrow raised bed, one staggered row of plants may be easier to manage than two crowded straight rows. Think in terms of mature leaf spread, not seedling size.
Draw the bed on paper before transplanting. Mark its usable width, the distance between plant centers and where your feet or hands will reach during harvest. A too-dense planting makes it harder to look for insect eggs, monitor bud firmness and let leaves dry after rain. If trying two rows, measure from the actual centers and allow foliage to extend beyond the bed without blocking paths. Avoid reducing spacing merely to fit more seedling plugs.
Choose a Cool Growing Window for Firm Sprouts
Brussels sprouts mature best under cool conditions. In warm regions, the useful harvest window may occur in autumn or winter, while northern gardens may start plants earlier for fall crops. A USDA perennial hardiness zone does not specify when an annual brassica should be transplanted. Work backward from local first frost and typical autumn temperatures, compare your variety maturity information, and consult local Extension calendars. Summer heat may cause loose buds or stress even when the plants appear tall.
Start with sturdy transplants or sow at the locally recommended time. Avoid oversize root-bound plants that struggle in the bed. Harden off indoor-grown seedlings before exposing them to sun and wind. If soil is hot and dry at transplant time, water the root zone and consider temporary shade while roots reestablish. The goal is sustained growth leading into cool weather, not a rigid national calendar date that can mislead gardeners in very different climates.
Transplant at the Existing Soil Line
Before making a hole, water the seedlings enough to remove their root balls without tearing them. Set each plug so its root ball is properly supported by soil, avoiding a buried crown and any large open air pockets around the roots. The diagram uses a true soil line and makes it clear that the upright stalk and leaf axils remain above ground; only the root system belongs below the line. Firm the backfill gently and water it in, then observe whether the seedling stands upright.
A tall brassica can become top-heavy in wind. Check that the bed is deep and sturdy enough to anchor established plants and that the planting does not topple toward a narrow walkway. Mulch can reduce moisture swings, but keep material from piling tightly against the stem. Do not assume a raised bed needs frequent shallow watering simply because it is elevated. Check actual moisture at the root-zone depth, not only the dry-looking upper surface.
Feed the Crop Without Forcing Loose Growth
Brussels sprouts need sustained soil moisture and adequate fertility, but too much available nitrogen late in sprout development can encourage overly leafy or split buds. Utah State Extension specifically cautions against heavy nitrogen during sprout formation. Start with a soil test where practical and adjust amendments according to its recommendations. Healthy leaf color and steady stem development are more useful signs than a routine habit of adding fertilizer at every garden visit.
Water deeply when the soil and weather require it, then allow appropriate drainage. The moisture goal is even growth rather than constant saturation. In a raised bed, check at several spots since edges may dry differently from the middle. Inspect for cabbage worms, aphids and other brassica pests, especially on the undersides of big leaves. Use row covers where suitable and a verified IPM approach; never apply a generic pesticide schedule without a diagnosis and a label that permits the intended edible crop.
Inspect Each Sprout Before Harvesting
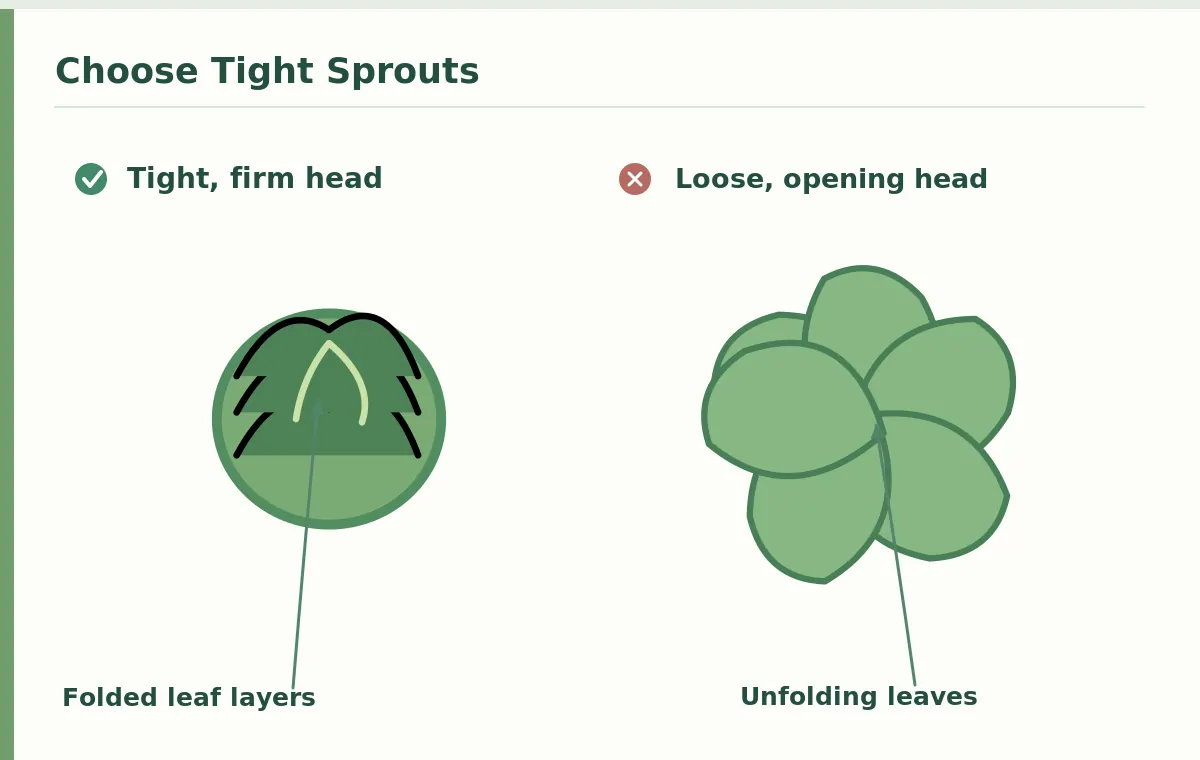
Lower sprouts are often ready before upper ones. Choose buds that feel firm, with leaves packed in tight layers and little splitting. Size alone is not the whole test; cultivar and temperature change the eventual diameter. The correct/avoid diagram shows a tightly folded head next to one opening into loose leaves. Loose is a quality observation, not proof that every plant has a pest or disease. Remove a sprout carefully without tearing the supporting stem or damaging the next bud.
Minnesota Extension explains that sprouts form in leaf axils, so look between leaf attachment and stalk. Some lower yellowing leaves may be removed during picking if they are declining, but do not assume all upper foliage is disposable. Leaves support growth and make carbohydrates. Keep harvest records about which sections of the stalk matured first and whether a brief cool spell improved quality. This gives a more reliable guide for next season than memorizing one advertised harvest day.
Handle Cool Weather and End-of-Season Cleanup
Brussels sprouts often taste best after cool weather, and established plants tolerate more cold than warm-season crops. However, the ability to remain outside depends on how low temperatures fall and how long exposure lasts. University of Minnesota provides regional limits for Minnesota conditions, not a universal promise for exposed beds everywhere. For a hard freeze forecast, consider local advice on protecting or removing stalks. Check soil drainage as fall rain increases so roots do not sit in standing water.
After your final harvest, remove heavily diseased residue rather than leaving it to serve as a source of reinfection. Rotate brassicas when possible, and note which variety produced dense buds in your actual conditions. Save measurements of bed width, plant center spacing, first firm lower buds and harvest period. A raised bed earns its place when it gives you room to inspect and manage each plant, not when every square inch contains foliage.
Related Guides
- How to Grow Brussels Sprouts and Harvest From Bottom to Top
- When to Harvest Brussels Sprouts and Pick Firm Buttons From the Bottom Up
How We Research This Guide
For this guide we compared illustrated anatomy and reader actions with extension.umn.edu; extension.usu.edu. Sources were checked October 28, 2026. A specific crop and local season require local Extension guidance rather than a universal weather calendar. Illustrations teach the described action, not an endorsement of particular products.
We do not receive compensation for the actions described here, and no brand or treatment is recommended. Read our affiliate disclosure. Diagnose plant problems before attempting an intervention, and follow locally applicable food-safety recommendations and product labels.
At leaf axils, where large leaves attach to the upright main stalk; they are not separate underground bulbs.
Only if the mature plants will have sufficient sideways room and the layout matches your cultivar and local extension guidance.
Heat, uneven growth, crowding or excess nitrogen during sprout development may contribute; examine the plant before adding fertilizer.
Usually harvest firm lower sprouts first; upper sprouts often develop later.
Brussels sprouts tolerate cool conditions, but severe or sustained freezes and local climate risks still require planning.