
A mature shallot planting looks different from a row of single grocery-store onions. Around the base of each plant, several narrow bulbs may develop in a clustered group, and the leaves gradually yellow, bend and dry. Those changing tops are more dependable than a fixed number of days to harvest. Careful lifting matters because the bulb necks and thin outer skins are easily bruised; proper drying matters because damp skins are unsuitable for long storage. This guide shows how to recognize a mature clump, loosen it without a fork through the bulbs, cure in air and separate sound storage candidates from bulbs that should be used soon.
Recognize a Multiplier Shallot Cluster
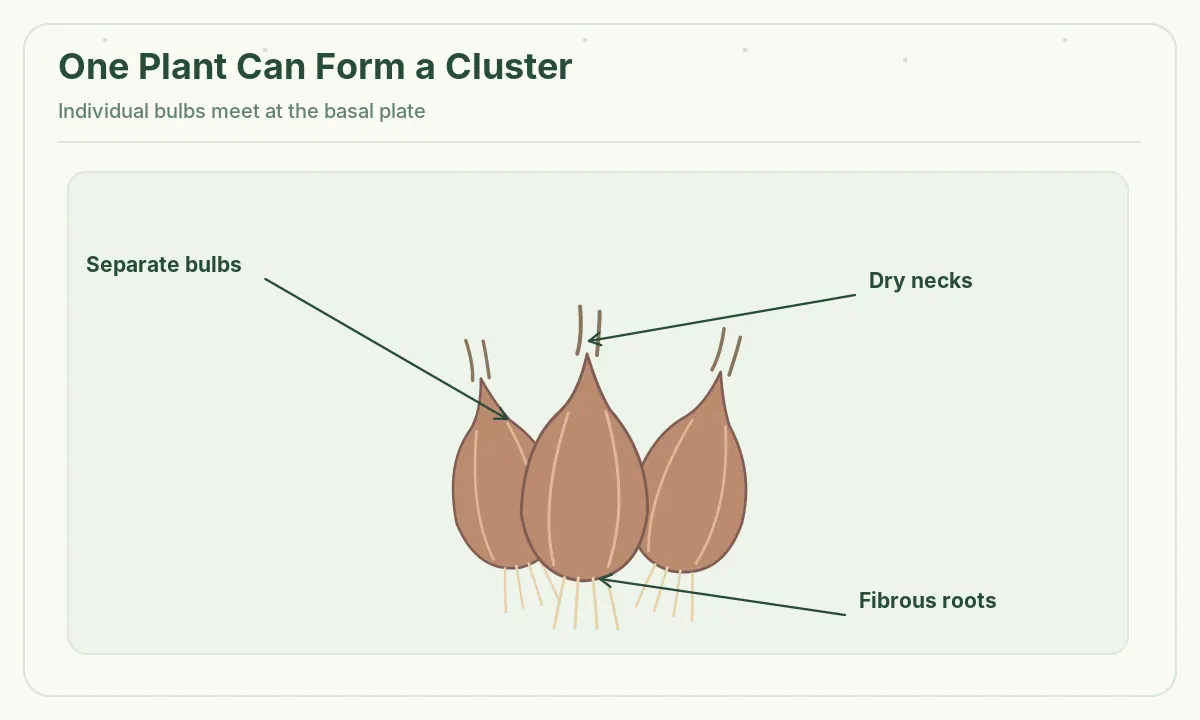
Many traditional shallots are multiplier onions in the Allium cepa Aggregatum Group. One planted shallot may make a cluster of several elongated or teardrop-shaped bulbs, each covered with papery skin when mature. Some shallots are grown from true seed and behave differently, so plant material and spacing affect the final form. Your drawing should show narrow tubular leaves emerging from the basal area and a ring of individual adjacent bulbs, not a garlic head containing many cloves within one common skin.
The bulb cluster may be partly exposed near the soil surface. Do not heap wet soil onto the neck to imitate a root crop. During active growth the leaves are green and upright; at ripening they soften, yellow and collapse. A plant with fresh green tops usually needs more time if dry-bulb storage is the goal.
Use Top Dieback Rather Than Just Calendar Days
Utah State Extension recommends harvesting dry shallots after the tops have fallen over. Iowa State adds yellowing and drying foliage as practical signals. Inspect more than one plant because clusters in a bed can ripen unevenly. Some green tissue may remain at the outermost plants, but extensive active upright growth suggests they are not ready for curing. Rain, cultivar and local season affect the ideal day for lifting; a USDA zone is not a precise harvest date.
Do not forcibly bend lush green tops simply because you have a convenient weekend. That can injure the plant and does not replace natural ripening. If prolonged wet weather approaches, select reasonably mature plants and move harvested bulbs promptly into a protected, well-ventilated curing space.
Loosen Soil Beside the Bulbs Before Lifting
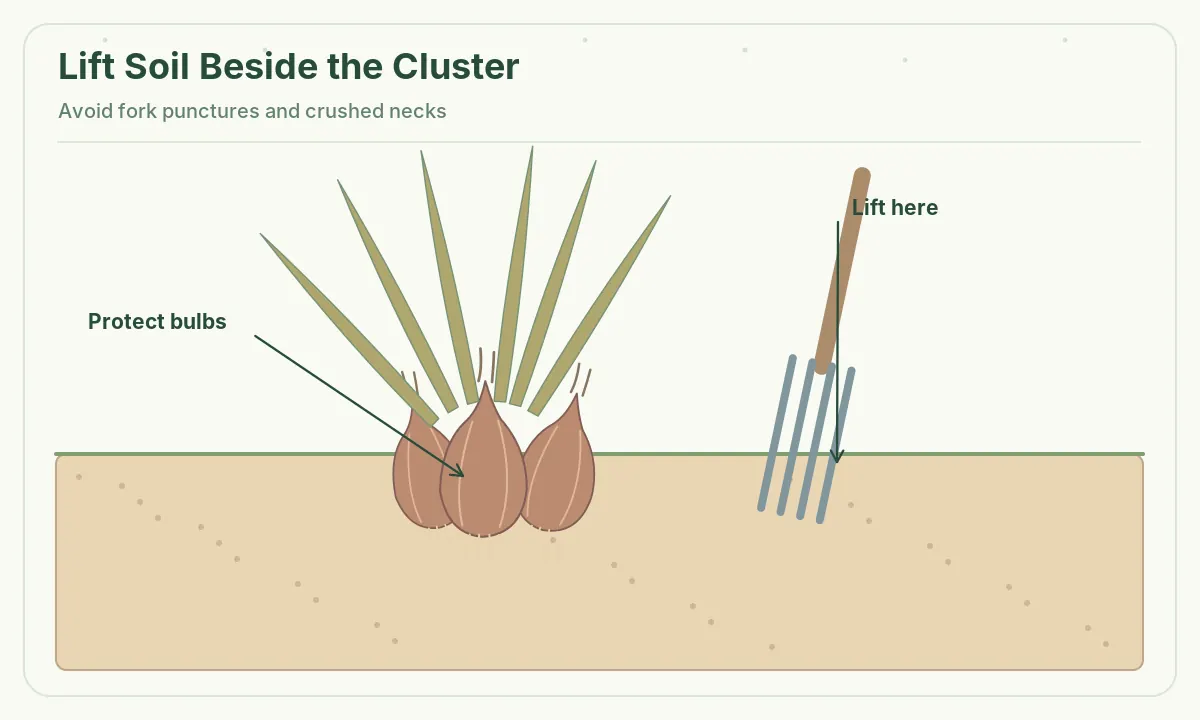
Insert a garden fork or trowel outside the visible cluster, angled gently away from the bulbs. Lift a section of earth and support the base of the plant as you free it. Driving tines straight down through the cluster can puncture several bulbs in one motion. Handle the necks gently; vigorous pulling on brittle dry leaves may tear the plant before the bulbs are loose. Brush excess soil off lightly, leaving protective outer skins in place.
A practical diagram should show three or four separate bulbs still attached at their bases and a tool passing beside the group. Roots hang below the bulbs; the bulbs do not grow at the ends of individual deep taproots. Keep harvest batches labeled if comparing cultivars.
Cure With Airflow and Protection From Rain
Iowa State Extension advises curing shallots in a warm, dry place for one or two weeks, while Utah State explains that the skin should become papery and the leaves fully dry. Spread intact bulbs in a single layer on clean mesh, slats or trays in a well-ventilated, sheltered place. Avoid leaving wet clusters packed in a bucket, and protect them from rain and repeated dew. Air movement is more useful than baking bulbs on a scorching surface.
If weather is humid, drying may take longer. Check the underside of the bulbs and reposition clusters if moisture collects. Do not wash them before curing: scrubbing or soaking can remove protective skins and add unwanted water. Dirt can be brushed away after the skins have dried.
Separate Clusters and Inspect Each Bulb
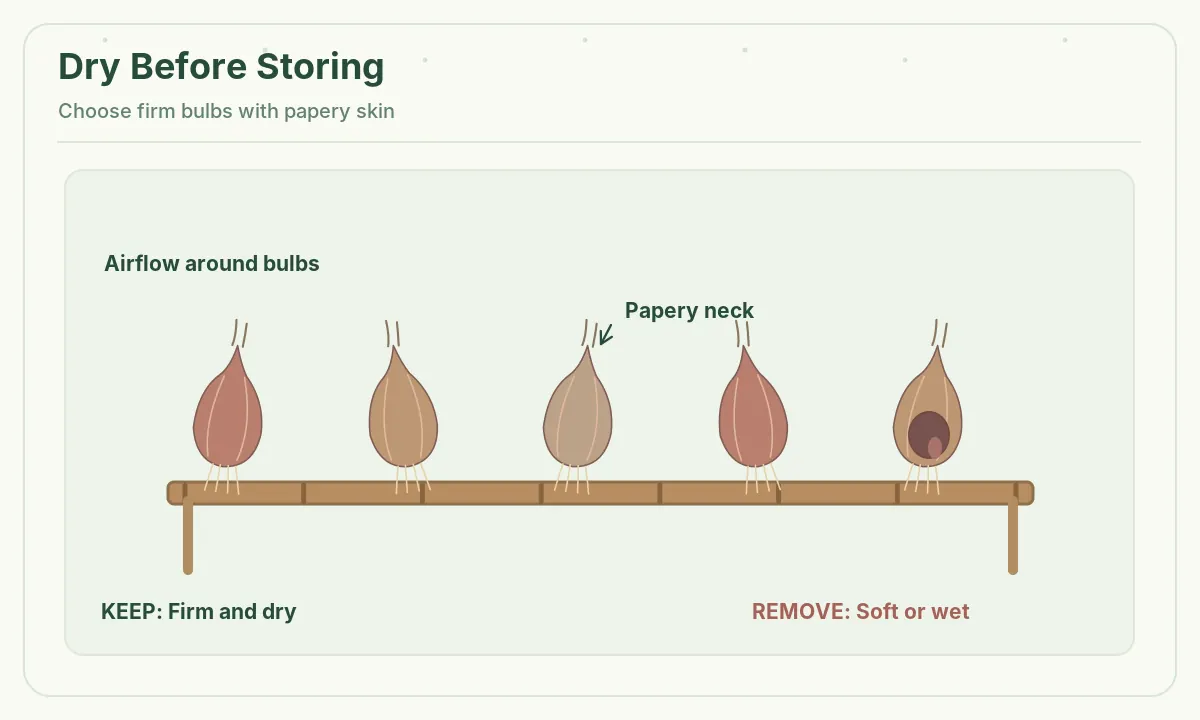
Once curing is complete, gently separate bulbs as appropriate without stripping sound protective skins. Trim completely dry foliage above the neck rather than cutting into live, thick tissue. Sort through each piece by hand. Good storage bulbs are generally firm with a dry neck and intact papery wrapper. Punctured, soft, wet, moldy or strongly off-smelling bulbs should not be placed among sound bulbs; discard decaying material, and use superficially bruised but otherwise sound bulbs promptly after careful kitchen inspection.
Dry roots can be trimmed if needed for clean storage. Do not remove every outer layer for cosmetic uniformity. A comparison visual should feature a firm bulb with a papery neck versus a visibly soft or dark spoiled bulb; avoid diagnosing one exact pathogen from appearance alone.
Choose Cool, Dry, Ventilated Storage
Utah State and Iowa State Extensions recommend cool, dry, well-ventilated storage for fully cured shallots, commonly in mesh bags or breathable containers. Keep air moving through the pile; solid plastic bags trap moisture. Inspect periodically and remove bulbs that show decay before nearby healthy bulbs are affected. The precise storage life varies with cultivar, maturity, curing quality, humidity, temperature and handling injury, so there is no guarantee a particular harvest will last for a fixed number of months.
Store sound bulbs away from wet produce and direct sun. If you reserve small dry bulbs for future planting, label the lot and follow regional guidance for planting time. Commercially treated planting bulbs should not be assumed suitable for eating unless their label says so.
Use Green Shallots Differently From Dry Bulbs
Young shallots harvested with green tops are edible but are not automatically suited to the same prolonged dry storage as completely mature, cured bulbs. The objective determines the moment of harvest. A green shallot can be used promptly like a mild onion; a storage shallot needs finished ripening and drying. If you want both, harvest a few younger clumps for the kitchen and leave the rest to mature naturally. Do not confuse a fresh leafy bunch with a cured, papery dry harvest simply because both came from the same crop.
Label the two groups after lifting. Keep green onions and wet bulbs refrigerated as per normal food-safety practices and plan to use them promptly. Do not try to cure bulbs that already show breakdown or slime.
Troubleshoot Split, Wet, or Damaged Bulbs
Shallot clumps can be uneven because of soil conditions, density, moisture and planting stock. Small bulbs are not necessarily defective if skins have matured normally. However, a cut neck, fork wound or persistent damp spot makes storage riskier. If a crop is curing poorly, check whether the room is too humid, whether bulbs are stacked too thickly or whether residual soil remains soaked. Improving ventilation and sorting damaged bulbs is safer than applying unverified sprays or excessive heat.
Next season, record when the first tops bent, when you lifted, how long the skins took to dry and which storage location worked. The illustrated chain of ripening foliage, side-lifting, airy rack and dry bulb should make the entire sequence easy to follow.
Related Guides
- When to Harvest Shallots and Cure the Bulbs for Reliable Storage
- How to Grow Shallots From Sets or Seeds and Cure Bulbs
- How to Plant Shallot Sets With the Root Plate Down and Tip Up
How We Research This Guide
We reviewed specialist sources on October 27, 2026, including extension.usu.edu (Utah State Extension describes lifting clusters when tops fall, curing until skin is papery and storing dried shallots.); yardandgarden.extension.iastate.edu (Iowa State Extension advises harvesting yellowing tops, curing in a dry area and ventilated cool storage.); www.pubs.ext.vt.edu (Virginia Cooperative Extension describes dry shallot harvest after leaf dieback and avoiding bulb injury.). These references describe typical botany and cultivation, not a promise that every cultivar and climate will perform identically. Check current regional Extension recommendations where applicable.
No affiliate products or paid placements are recommended in this article. Review our affiliate disclosure for site-wide policy. Follow any local regulations and applicable label directions before using gardening treatments.
When most tops yellow and fall over and bulbs have largely finished maturing, adjusted for weather and cultivar.
No. Gently brush away soil and keep their protective skins dry during curing.
Yes, traditional multiplier shallots can form clusters of individual bulbs from one planting bulb.
The leaves and neck should be dry and the outer bulb skins papery before storage.
It is better to sort them out for prompt use if otherwise sound, and discard bulbs showing rot.