
A daylily clump can keep growing for years, but its crowded center may eventually produce fewer flowers or become hard to weed. The plant is not a true lily bulb: it grows as fans of long straplike leaves attached to a crown and fleshy roots. Successful division keeps these parts together. Divide during a suitable cool period, avoid drying exposed roots and reset the crown near its original soil level. Healthy sections can recover even if flowering is reduced in their first season.
Look for Crowding Before You Lift the Clump
A large daylily is not automatically in need of division. Inspect whether the clump is expanding into nearby plants, has a bare or congested center, or is blooming less than it used to despite suitable sunlight and care. Minnesota Extension suggests that many daylilies can be divided every three to five years, but the timing is a guide rather than a deadline. If the plant has good flowers and enough room, leaving it alone is also reasonable. Poor bloom can result from shade, stress or weather, so do not assume every disappointing season means the roots need to be cut.
Pick Early Spring or the Period After Flowering
University of Minnesota Extension identifies early spring before strong growth and immediately after flowering as favorable daylily division windows. Those windows avoid some of the stress of lifting a leafy, flowering clump in peak summer heat. Autumn division is also practiced in suitable regions, but the transplants need time to reestablish before severe cold. Use actual regional weather and soil conditions, not USDA hardiness zones as a precise calendar. Plan a cloudy day or work in the cool part of the day. If the soil is dusty and dry, water the area beforehand to make root lifting gentler.
Recognize the Leaf Fan Crown and Fleshy Roots
Each fan consists of a V-shaped group of straplike leaves rising from a short crown near the soil surface. Numerous thick, sometimes swollen roots extend downward and outward; they are roots, not individual onionlike bulbs. These structural distinctions matter when splitting. A leaf fan separated without enough roots is more vulnerable, while a knot of roots with no live crown or shoots is not a useful replacement plant. Lay the lifted clump in shade and identify the natural divisions before cutting. Removing loose soil can reveal where fans connect, but do not wash so aggressively that roots and small growing points break.

Lift From Outside the Main Root Mass
Use a garden fork or spade to loosen a broad circle around the clump rather than jabbing through the crown. Raise the entire root mass slowly and move it onto a tarp. If a few long roots break during lifting, that is not automatically fatal, but preserve as much healthy root system as practical. Brush or shake loose soil gently so you can see which sections belong together. For extremely large clumps, two forks placed back to back may help spread sections apart; use controlled pressure and protect your hands. Keep roots moist and shaded while you work so fine roots do not desiccate.
Make Divisions With More Than One Healthy Fan
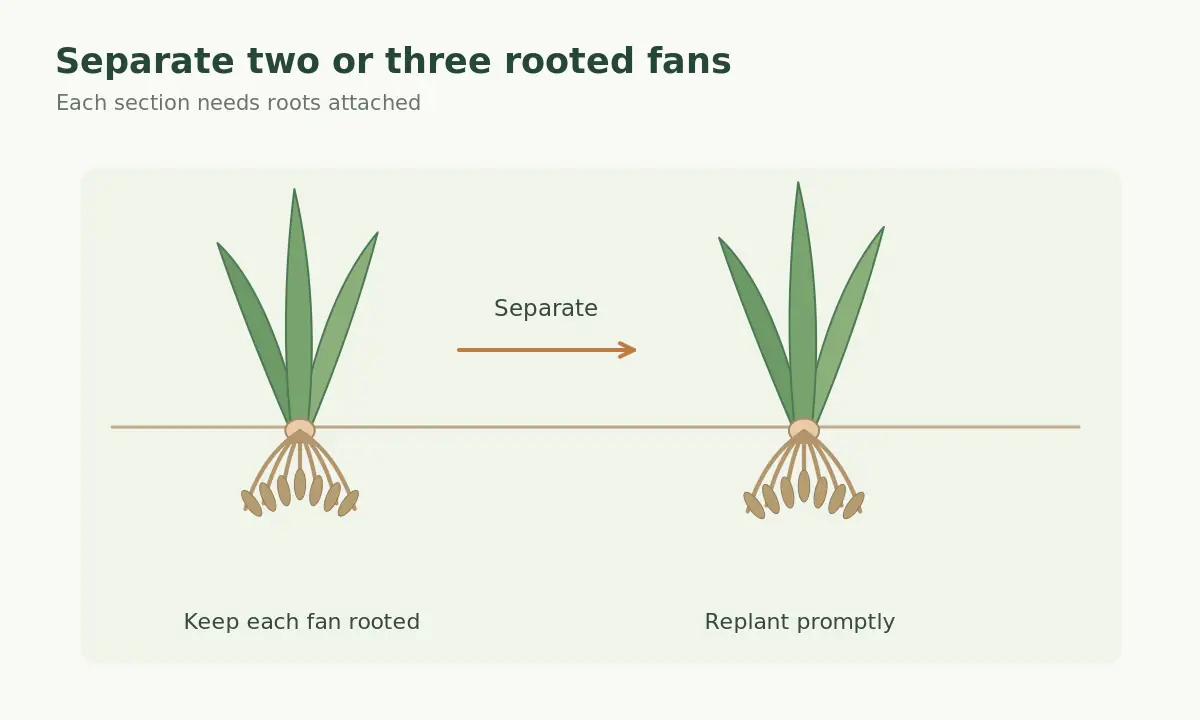
Minnesota Extension specifically recommends daylily divisions containing two or three stems or fans, each with roots attached. This makes a useful, well-established-sized transplant for home gardens. More general perennial guidance may describe larger shoot counts, but a daylily fan is the plant-specific unit to follow here. Pull apart natural seams where possible; use a clean sharp knife to separate tightly joined tissue when needed. Discard rotting or clearly dead central parts. Avoid cutting every fan into the smallest possible piece if rapid flowering and resilience are more important than producing the maximum number of plants.
Shorten Excess Leaves Without Cutting the Crown
Long leaves can make newly divided fans top-heavy and increase moisture loss during establishment. Minnesota Extension advises cutting daylily foliage back to about five or six inches when dividing. Make the cut through the blades, above the crown, and keep each fan recognizable. Do not shave the base where new leaves emerge or cut off the attached roots. Remove dead or damaged foliage from the ground before replanting, but leave healthy root tissue intact. Leaf trimming does not substitute for watering or appropriate planting depth. A modest, compact fan is easier to set upright in loose backfill.
Set the Crown at the Recommended Soil Depth
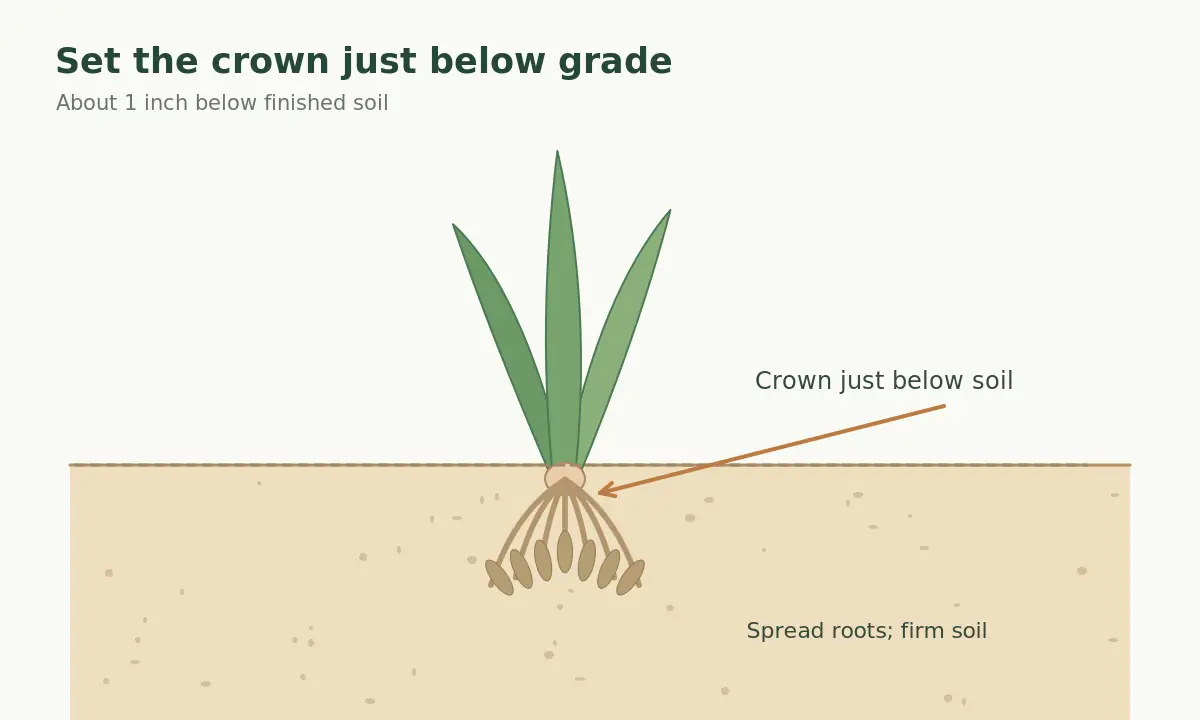
Dig a hole wide enough to spread fleshy roots downward without circling or sharply bending them. Minnesota Extension recommends setting the daylily crown about one inch below the finished soil surface. This means the short junction of the leaf fan and roots belongs just under grade, not several inches down in a deep trench. Build a small soil mound under the crown if the hole is too deep, then spread roots around it and backfill carefully. Gently settle the soil and check the final level after watering. Do not leave the fleshy crown exposed on top of the bed or bury it deeply under extra mulch.
Water Divisions Thoroughly and Watch Recovery
Water the replanted sections well so soil makes contact with the roots. Continue monitoring root-zone moisture during establishment, especially in windy or warm conditions, without leaving roots waterlogged. Mulch lightly to limit weeds and drying, but do not heap wet material directly over the young crowns. New foliage should eventually emerge from healthy fans. A division made in early spring may not flower that same summer, as Minnesota Extension notes; delayed bloom does not automatically mean failure. Judge initial success by firm crowns and new growth, then by flowers in later seasons. Protect transplants from drought while their reduced roots recover.
Avoid Moving Problems Into Another Border
While the clump is out of the ground, inspect leaves and roots for unusual lesions, mushiness, extensive dead tissue and unwanted weed roots. Remove weeds trapped inside the original clump before distributing divisions elsewhere. Daylilies may occasionally show rust or pests; unidentified symptoms deserve diagnosis rather than automatic chemical treatment. Clean tools between suspect plants and separate visibly diseased material from healthy divisions. Check local restrictions on planting potentially problematic daylilies, especially species or cultivars that spread readily in your area. In sensitive habitats, avoid moving daylilies into natural areas simply because spare divisions are available.
Record Which Divisions Establish Best
Label each new clump with cultivar name if known and keep a simple map. Mark where the crown sits before and after soil settles, and revisit that level a week later. If one transplant wilts while another grows, compare planting depth, drainage, shade and watering before blaming the original cutting technique. Group several robust fans when you want a faster visual display; use fewer when you are patiently expanding a border. Resist dividing again immediately if growth is slow. The goal is to create stable, healthy crowns, not to multiply pieces at any cost. Once established, standard daylily care usually resumes. If you are starting from scratch, read When to Divide Daylilies.
Related Guides
- When and How to Divide Siberian Irises Without Losing Healthy Fans
- When to Divide Catmint Clumps and Keep Rooted Shoots Alive
- When to Divide Coral Bells and Replant Rooted Heuchera Crowns
- How to Divide Bearded Irises and Replant Healthy Rhizomes
- How to Divide Hostas Without Damaging Crowns or Planting Too Deep
How We Research and Check the Recommendations
Our editorial process compared the plant-specific recommendations in university Cooperative Extension publications with general horticultural guidance, including information about growth stage, climatic limitations and safe handling. Claims were checked on October 23, 2026. Plant species, cultivars, exposure, regional climate, and local regulations can change the best action. This guide is educational, not a substitute for advice from a regional Extension specialist or a laboratory diagnosis.
Sources Used and Editorial Disclosure
Sources consulted and checked: extension.umn.edu: Division in spring or postbloom, two to three fans, crown one inch below grade and aftercare. extension.umn.edu: Safe division timing, root handling, shade, moisture and splitting methods. extension.illinois.edu: Daylily fleshy roots and possibility of spring or fall division.
Disclosure: No paid brand placement, approved affiliate recommendation or product sponsorship is claimed in this article. See the VegWin affiliate disclosure. Explanatory illustrations show typical plant structures and methods; follow plant-specific labels and current local guidance when making irreversible cuts or applying garden treatments.
Early spring before strong growth or just after flowering are dependable windows; adjust to local weather.
Two or three healthy leaf fans with attached roots make a practical division.
Set the crown about one inch below the finished soil surface, spreading its fleshy roots.
It may, but spring-divided plants sometimes skip or reduce flowering while establishing.
Yes, a sharp clean knife can separate attached crowns when gentle pulling does not work. Keep roots with each fan.