
Plume Celosia (Celosia argentea Plumosa Group) rewards close attention to real plant structures rather than a one-size-fits-all calendar. The guide below distinguishes what to recognize, what to leave intact and when to act. Any seasonal dates from a university Extension source belong to that source’s region; use your own forecast, growing conditions and seed or plant label to make the final decision.
Choose the plume type rather than a crested head
Celosia describes several ornamental forms. This guide focuses on the plume group of Celosia argentea, which carries upright branching stems and fluffy, flame-shaped terminal flower clusters. Crested cockscomb makes a folded, comb-like head, while wheat-type celosia has more slender cylindrical spikes. Maryland Extension distinguishes these types and notes that some seed-grown plume forms do not reproduce a parent plant’s exact color or shape. Check your packet label before expecting the plumes in this guide.
A young plume celosia does not look feathery at first. It begins with seed leaves, then simple elongated true leaves arising along the stem. A mature plume is built from many small flowers, not from the leaf tips turning into orange petals. Plan the intended bed or container space from your cultivar height, which can differ greatly among compact bedding selections and tall cut-flower forms. Mixing different groups in one sowing chart makes transplant spacing and pruning advice unreliable.

Set the calendar by frost and indoor light
Plume celosia is tender and performs best with genuine warmth. Maryland Extension describes sowing celosia several weeks before the final frost for cut-flower production, while Minnesota Extension places it in a roughly five-to-six-week indoor-start group in its regional calendar. These are examples for different conditions and production systems, not a universal sowing date. Work back from a safe, warm outdoor planting period and the amount of good indoor light you can provide.
Beginning far too early can leave seedlings crowded, rootbound and eager to bloom in tiny cells. Starting far too late can shorten a cool-region flowering season. Use your local frost history and the selected cultivar’s seed instructions to settle the timing. Always inspect the outdoor forecast near transplanting, because a brief daytime warm spell does not mean cold-night risk has ended. A plant held indoors for a little longer with ample light is often preferable to a frost-damaged plug outdoors.
Sow fine seeds shallowly in separate cells
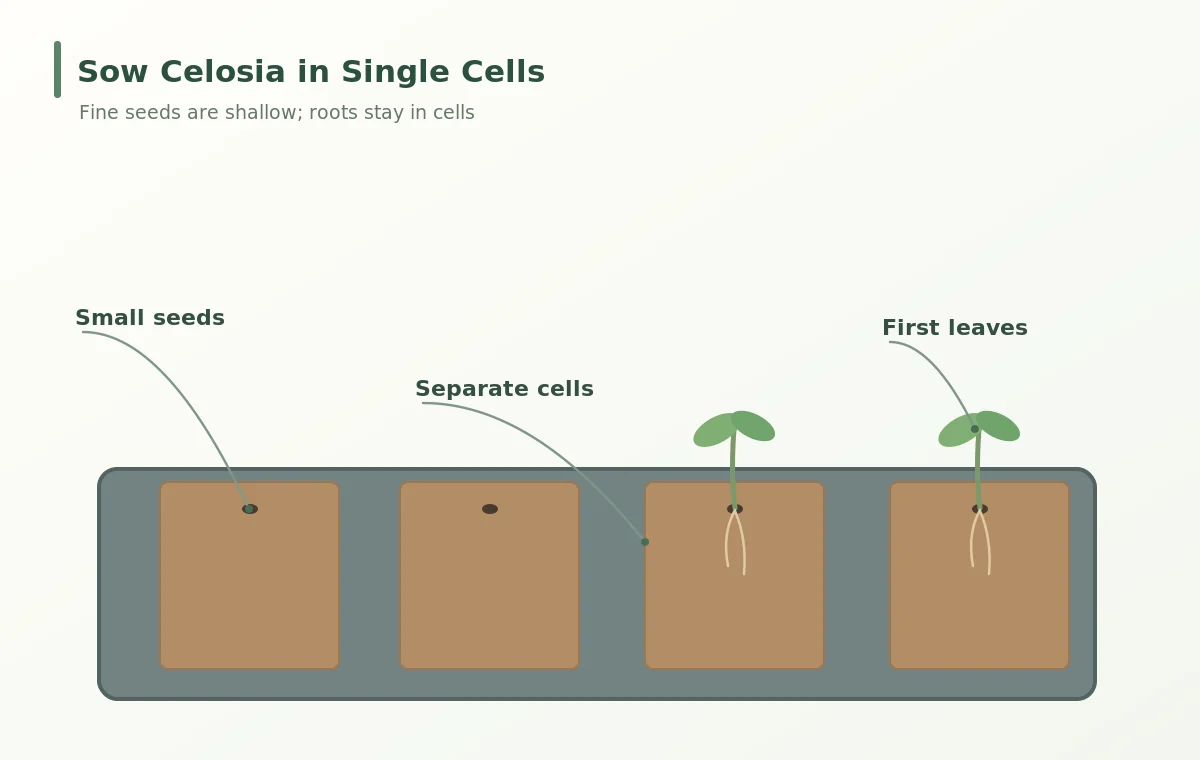
Celosia seeds are very small. Maryland Extension recommends sowing in individual cells or pots because the young roots are sensitive to rough separation. Prepare clean, fine, evenly moist medium with drainage holes. Place the seed close to the surface and use only a light covering if the particular cultivar guidance calls for it. Avoid pressing the seed to the bottom of a deep planting hole, where a tiny seedling might not reach the light quickly.
Extension recommendations differ on whether germination requires light: Maryland describes light covering without a strict light requirement, while Mississippi State’s plume guide describes a light requirement under its production system. The safe practical rule is to follow the cultivar packet and keep the covering extremely light rather than imposing deep burial. All sources agree that seedlings need good light promptly after emergence. Label the container separately and use mist or gentle watering so the seeds do not wash into corners.
Hold humidity without damping off seedlings
A just-sown cell must remain evenly moist through germination, but its root environment also needs oxygen. Use a drained tray and check it daily. A temporary humidity cover may help prevent the surface from drying, but ventilate and remove it as seedlings emerge. Maryland Extension notes that celosia seedlings are vulnerable to damping-off. Wet, crowded still air is therefore not a favorable shortcut. Avoid leaving a layer of water standing beneath the cells.
Place new seedlings under suitable bright light with air movement that does not whip the stems. A seedling that keeps leaning toward a distant window is signaling insufficient or uneven light. Thin an overfull cell by clipping the weaker shoot at soil level rather than pulling both seedlings out. Handle true leaves gently and keep the tiny stem base exposed. Do not try to disguise a stretched stalk by mounding soggy mix over the first leaves.
Develop a compact transplant with intact roots
As new pairs of leaves expand, each plant fills its own plug. You should eventually see a cohesive root ball when the plug is ready, with healthy pale roots below the soil surface and no soft brown stem at the neck. Avoid squeezing the crown when handling the tray. A celosia plug with only cotyledons but no developed roots is not ready for an outdoor wind test; a rootbound plug that has remained in a cell too long also needs attention.
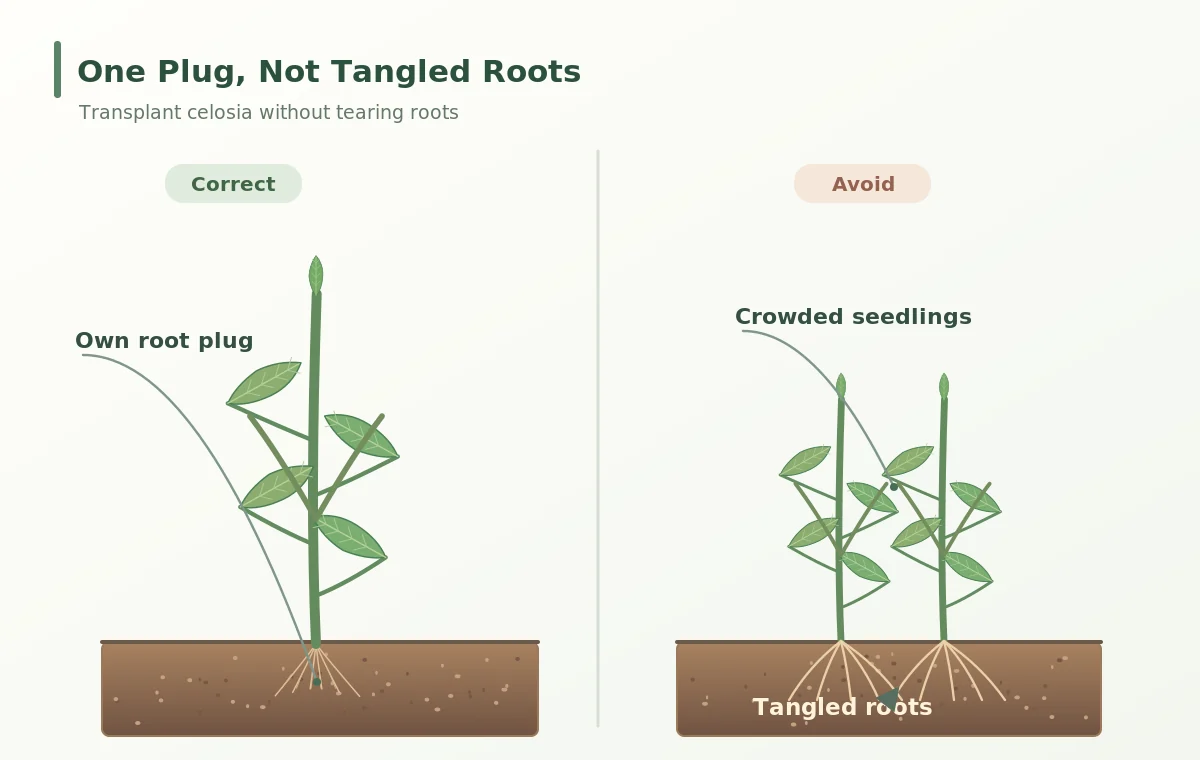
If more room is needed, slip the entire root plug into a larger draining container with minimal disturbance. Maryland Extension emphasizes sensitivity to transplant handling. Maintaining steady development is more useful than repeatedly digging up seedlings to inspect every root. If foliage becomes pale, review light and moisture first, then follow a suitable nutrient recommendation for established plugs rather than adding concentrated feed to unsprouted seed. Keep cultivar height in mind as the little stems start branching.
Transplant after frost to full light and drainage
Gradually harden plugs under mild conditions by increasing outdoor light and wind exposure while avoiding frost and persistently cold nights. Maryland Extension warns that exposure to temperatures below about 60°F can stunt celosia and promote premature flowering in its cut-flower guidance. Use that as a warning for tender young plants, not an absolute threshold that overrides all cultivars. Plant outdoors once the local weather is reliably suitable.
Prepare a well-drained bed, then set each intact plug at its previous soil level. Roots should point down into the soil and the leaf-bearing stem should remain in air. Firm the edge gently and water the root zone. Give each plant the space indicated by the seed packet and its final habit; a compact bedding variety should not automatically receive the spacing for a very tall commercial plume. Provide sun and airflow without letting new plugs dry out immediately after setting.
Read a true plume and adjust future sowings
A plume is the densely clustered flowering structure at the top of a stem, not a colored cabbage-like leaf or a single large petal. Small branching plumes may grow along side shoots depending on selection and care. Maryland Extension discusses pinching some plume types to increase smaller heads, but pinching should follow the intended bloom size: removing a terminal tip is the wrong method if the purpose is one large unbranched show head.
If the plant flowers prematurely while still very small, revisit cold exposure and root confinement rather than calling the short spike the plant’s normal mature height. Stretched pale seedlings indicate a different starting issue, often light or crowding. Keep notes on sowing, germination, visible true leaves, the date you moved intact plugs and the first plume. That evidence will improve the next sowing far more than a decorative calendar. The useful image sequence shows fine seeds, correctly oriented roots and leaves, and an actual feathery terminal flower head.
Related Guides
- When to Start Celosia Seeds and Grow Stocky Summer Transplants
- How to Transplant Celosia Seedlings Without Burying the Stem Base
- How to Save Celosia Seeds From Dry Flower Heads Without Keeping Chaff
How We Research and Check Plant Details
We read the following primary horticulture and Extension resources on 2026-10-29: extension.umd.edu; extension.umn.edu; www.accessibility.extension.msstate.edu; www.nparks.gov.sg. We checked plant identity, anatomical placement and the steps illustrated here against these descriptions, and compared published practices where the sources differ. Regional calendars and cultivar-specific practices are not universally transferable. The ready-to-publish intent was checked against the supplied B153–B183 archives and publicly available VegWin search results, but hidden WordPress drafts cannot be established by public searching.
This educational article is independently written and contains no claimed paid recommendation or sponsorship. Read the VegWin affiliate disclosure for the existing site policy. Illustrations are explanatory botanical drawings, not clinical identification or a substitute for local Extension diagnosis.
Use a several-week window before safe warm outdoor planting; Maryland and Minnesota Extension schedules vary with region and production method.
Guidance differs by production system. Follow the seed packet and sow very shallowly; provide bright light as soon as seedlings emerge.
Young celosia roots are sensitive to disturbance, so a single cohesive plug is easier to transplant safely.
No. Harden them gradually and plant after frost danger and cold-night risk have passed.
It is a dense terminal cluster of many tiny flowers, unlike the folded comb head of crested celosia.