
Sweet corn is Zea mays grown for tender ears of kernels. A tall stalk produces a tassel at the top that sheds pollen, while ears develop farther down at nodes along the stem. Each ear is wrapped in overlapping leaf-like husks and has long silks extending out its tip. Those fine threads are styles connected individually to developing kernels. This is why a poorly pollinated ear can have missing kernels even if the outer husk looks full.
Identify the Ear, Husk, Silk and Tassel
The botanical cover keeps the ear attached laterally to the stalk and the silk emerging from the pointed husk tip. Corn does not produce pods hanging by ordinary fruit stalks or root vegetables under the soil. The broad blades arise from sheathing leaf bases at distinct nodes. Understanding these features makes harvest easier: inspect ear fullness and silk color at the correct structure instead of mistakenly judging the pollen tassel as an ear readiness signal.
Look for Brown Silks and a Plump Ear
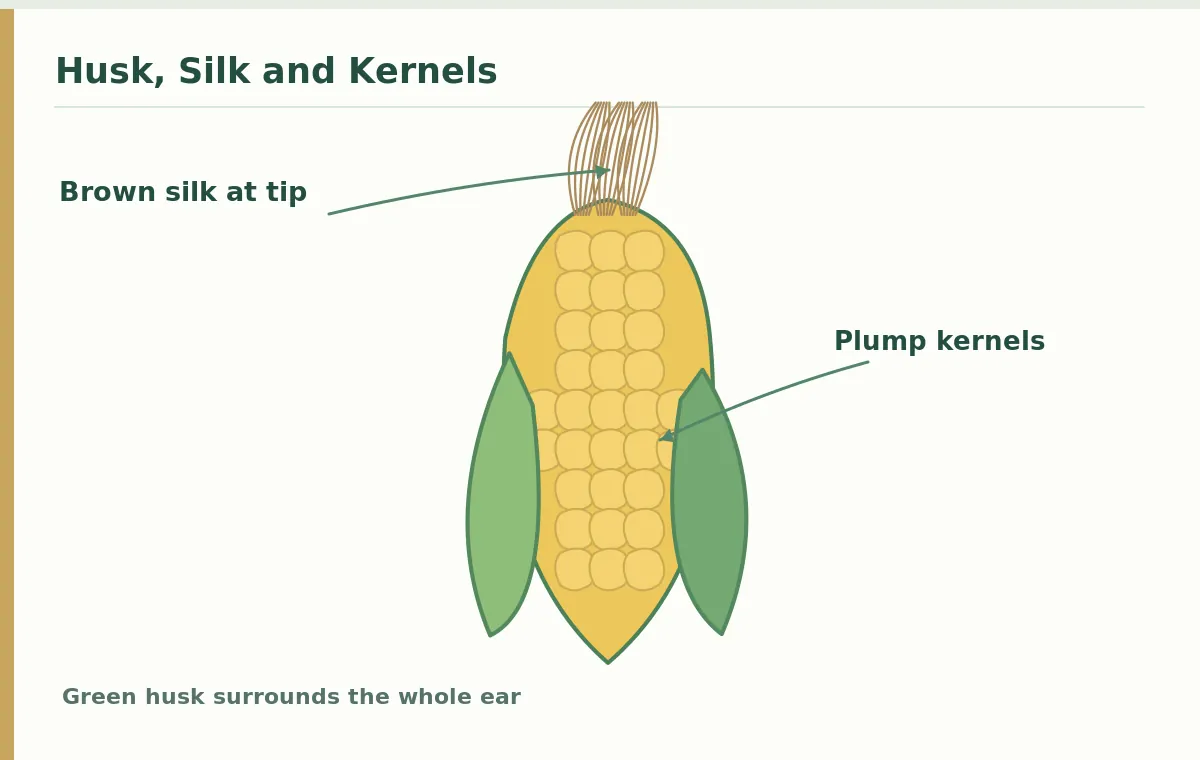
University of Minnesota Extension notes that harvest-ready sweet corn often has silks drying and turning brown while the husks remain green. Feel the ear gently through its husk: it should be comparatively full along its length. A dry tassel above the plant is not enough, and brown tips alone can occur with varying pollination and weather. Consider the color of both husk and silks, plus whether the upper ear feels well filled.
In many gardens, ears become ready roughly a few weeks after first silking, but exact timing varies with temperature and genetics. Resist treating the published number of days after silk as a guarantee. Different sweet corn cultivars can retain quality for different periods, and a heat spell can shorten the ideal window. When several ears look ready, test a sample rather than ripping open the husks on every ear and exposing all of them to pests.
Check a Kernel for Milky Juice
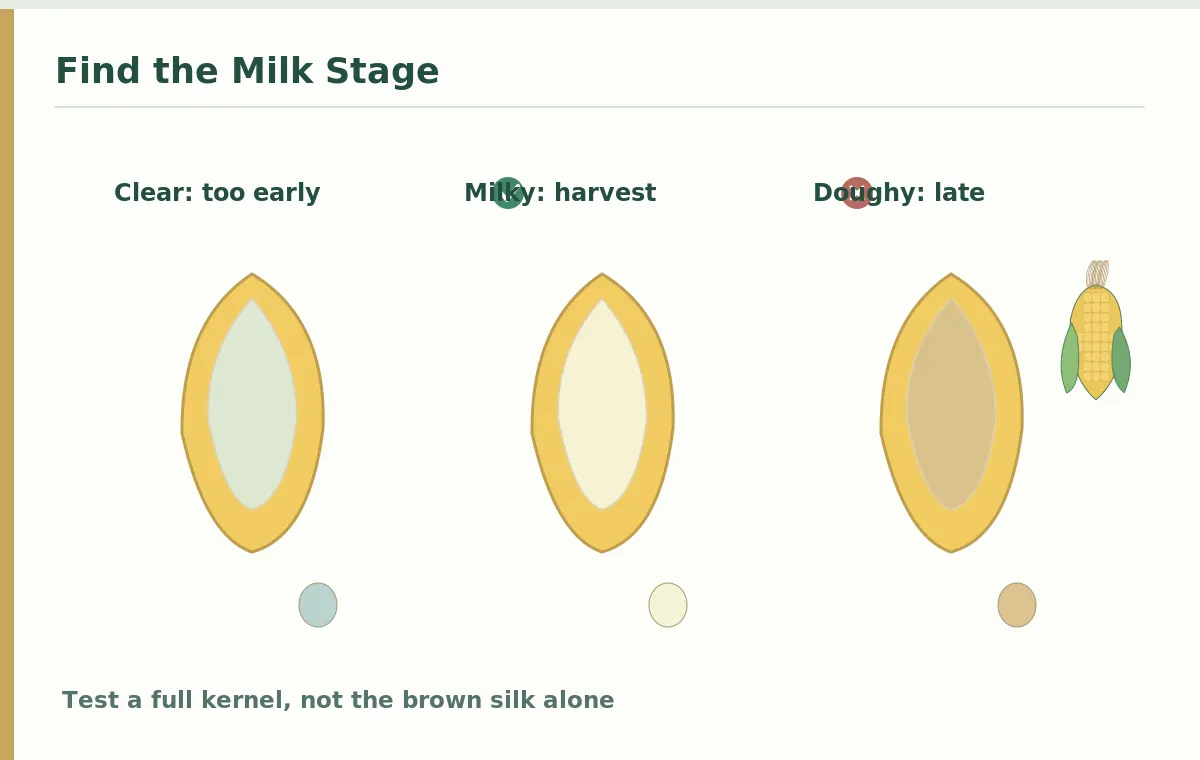
The strongest home harvest cue is the kernel condition. Carefully pull back a small part of the green husk at the upper ear and inspect the developed kernels. Full, tender kernels at the milk stage release white or milky liquid when one is punctured, as both Minnesota Extension and Utah State Extension describe. If juice is watery and clear, development may be early; if the inside is thick and doughy, the ear may have passed prime sweet-corn tenderness.
Our close-up distinguishes the protective husk, brown silk and several neat rows of plump kernels. Do not draw a milky flow from silk or from a bare corn stalk; it comes from the inside of a pierced kernel. If you open one sample ear, fold the husk back carefully and plan to use that ear promptly. A single dry or damaged kernel does not represent the whole patch, so compare multiple observations when conditions are unusual.
Compare Pre-Milk, Milk and Dough Stages
Sweet corn quality depends on a brief developmental stage before kernels accumulate much more starch. Utah State Extension describes a progression from a clear-juice pre-milk phase through the desired milk phase toward an older doughy stage. The comparison drawing shows three kernels cut open, each paired with a tiny droplet or texture cue. These are teaching examples, not chemical tests or separate species. The labels explain texture you can actually see.
A milky kernel should still be tender and fully developed for the variety. White, yellow and bicolor varieties may all be ready at the same functional stage; color alone is insufficient. Supersweet and other genetic types may hold sweetness differently after harvest, so consult seed descriptions and avoid making a universal storage promise. Once a sample shows doughy contents, waiting longer normally makes fresh eating quality worse, not better.
Snap the Ear Down at Its Stalk Junction
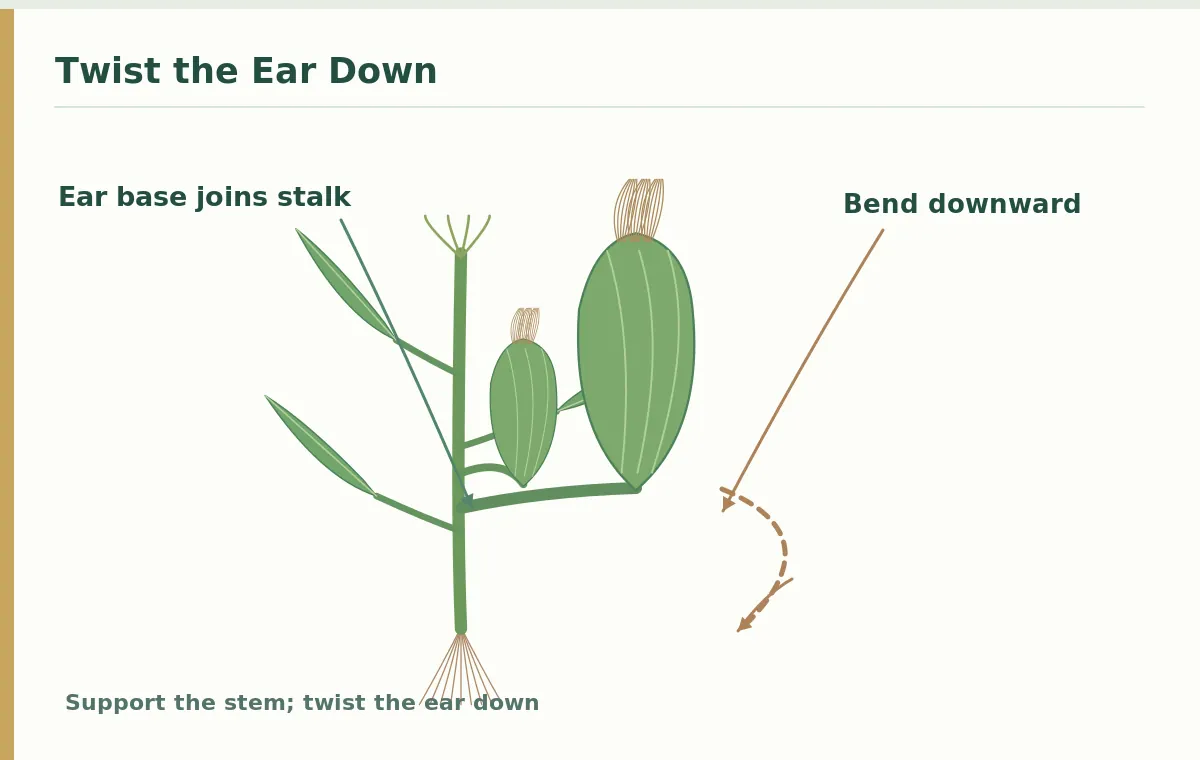
When the ear is ready, support the main corn plant with one hand if necessary. Grasp the ear firmly through its husks and bend it downward with a modest twist so it breaks at the natural attachment to the stalk. Utah State Extension recommends this downward twist rather than pulling vertically upward on the ear. The action image locates the ear base against the stalk and shows the direction of movement; the silk stays at the opposite tip.
If the stem joint is unusually stubborn, stop forcing the plant and use an appropriate tool rather than wrenching the whole stalk from the ground. A tall corn plant may support another immature ear, so protect the rest of the stalk. Harvest in manageable batches so picked ears do not sit in warm sun. Keep husks on for the trip to the kitchen unless you have a specific reason to remove them immediately.
Cool the Crop Quickly for Better Quality
Sweet corn starts losing its peak eating quality after picking, especially standard sugary types kept hot. University of Minnesota Extension and Utah State Extension advise using or cooling ears promptly. Bring the harvest into shade, keep it out of a hot vehicle and refrigerate if it cannot be cooked soon. The speed of sweetness decline varies by genetics, but fast cooling is a broadly useful habit that does not require a new gadget.
Do not assume fresh sweet corn is automatically safe to preserve in a sealed jar with boiling water. Low-acid vegetables require a tested pressure-canning process if home canned; use current university or USDA guidance for any preservation decision. This growing guide concentrates on crop maturity and fresh handling. Discard ears with serious decay or contaminating damage, and inspect for insect feeding before bringing heavily affected material into the kitchen.
Troubleshoot Missing Kernels and Uneven Ripening
If a developing ear contains empty sections, look first to pollination and plant stress rather than assuming it is simply unripe. Each silk should receive pollen for its associated kernel to develop. Drought, extreme heat during silking and poor pollen movement in a tiny planting can lead to patchy fill. The form of the ear can differ across varieties, but missing rows or large bald patches can signal uneven fertilization. Planting corn in a block rather than one isolated line supports pollen movement.
Mark the dates of first silk emergence, the first brown silk and the first milky test in your local garden. Compare early and late ears without stripping every one. Keep soil adequately moist during ear development and inspect for pests using local IPM guidance rather than applying treatments without identification. A well-pollinated, filled ear with brown silks and milky kernels is the goal; the calendar is only a guide to when to start checking.
Related Guides
How We Research This Guide
For this guide we compared illustrated anatomy and reader actions with extension.umn.edu; extension.usu.edu; extension.usu.edu. Sources were checked October 28, 2026. A specific crop and local season require local Extension guidance rather than a universal weather calendar. Illustrations teach the described action, not an endorsement of particular products.
We do not receive compensation for the actions described here, and no brand or treatment is recommended. Read our affiliate disclosure. Diagnose plant problems before attempting an intervention, and follow locally applicable food-safety recommendations and product labels.
Brown silk is a helpful cue, but check a few kernels for full size and milky liquid before picking.
Each fine silk strand connects to a developing kernel inside the ear; silks extend outward from the ear tip.
Grasp the ear and snap it down with a gentle twist at its attachment to the corn stalk.
The ear may still be immature; check again as it develops and compare with the variety and weather.
Yes. Prompt cooling helps preserve tenderness and sweetness, especially for standard sugary varieties.