
Malabar spinach is not ordinary cool-season spinach. It is a fast-growing tropical vine with fleshy, glossy leaves and succulent stems, sometimes green and sometimes red-purple depending on the selection. The leaves are typically oval to heart-shaped and attach at nodes along a twining stem. These visible leaf junctions are important because adventitious roots can form where stems touch moist soil or while a cutting is rooted.
Identify the Vine and Its Leaf Nodes
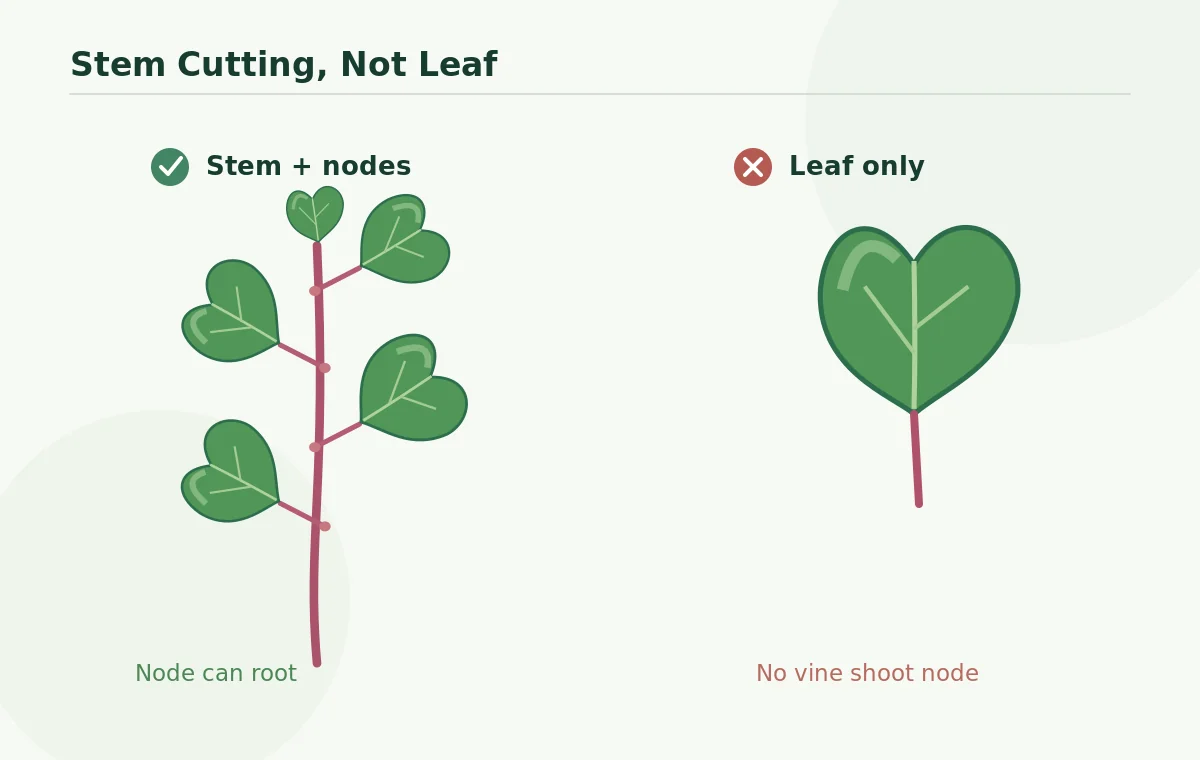
Start with a healthy vine that is correctly identified as Basella alba. Do not mistake one isolated leaf blade for a propagatable stem cutting: a detached leaf lacks the same arrangement of connected stem nodes. Find the point where a petiole meets the stem, then follow that stem toward the tip. A successful cutting has at least one intact node and living growing tissue, not merely a piece of leaf stalk.
Choose a Healthy Tip and Make a Clean Cut
Take a non-wilted, actively growing section from a disease-free Malabar spinach vine. Select a tip with several recognizable leaf junctions so you can leave some foliage above the rooting zone while exposing a lower node. University of Guam Extension describes cutting below a growing node; that placement leaves the node on the piece you keep, where new roots can develop.
Use clean sharp snips to make a smooth cut through a stem internode below the lowest intended node. The cut itself is not the same as the node: the node is slightly higher, where leaves attach. Avoid crushing the succulent stem. The exact length may vary with the size of the shoot, but a short manageable cutting that fits a jar without submerged leaves is more useful than a very long floppy vine.
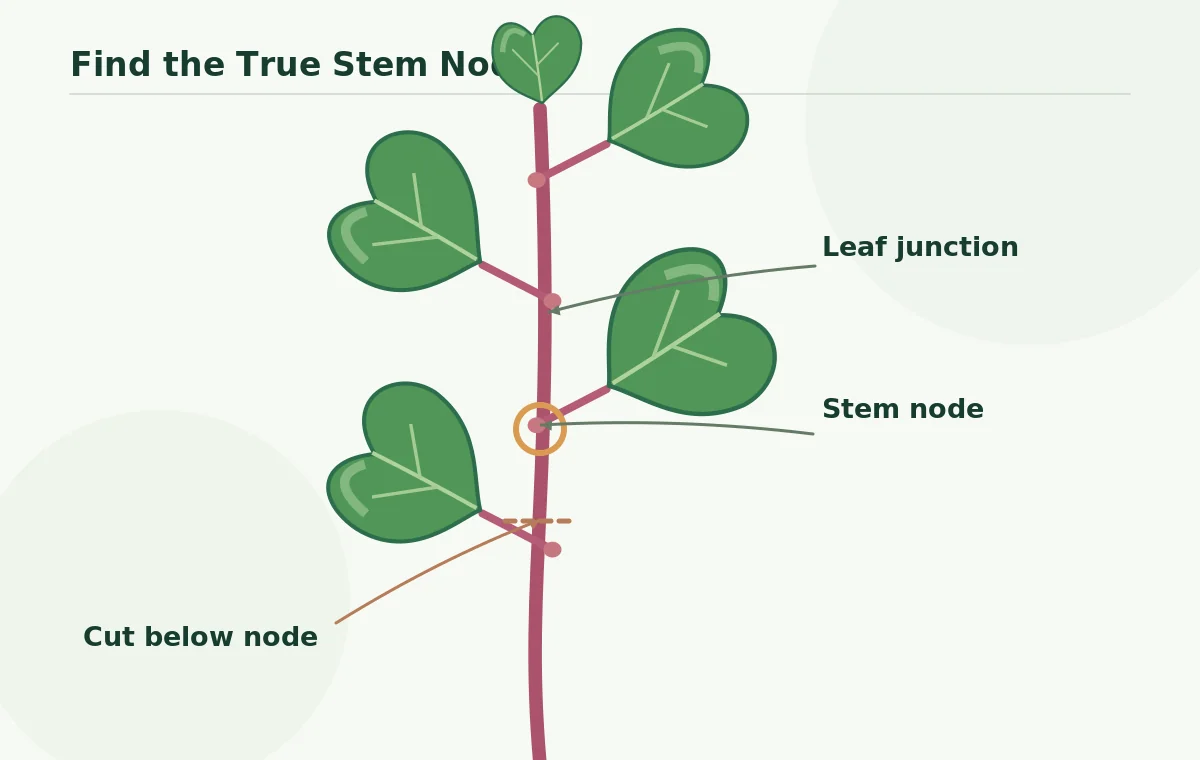
Expose the Lower Node Without Stripping the Tip
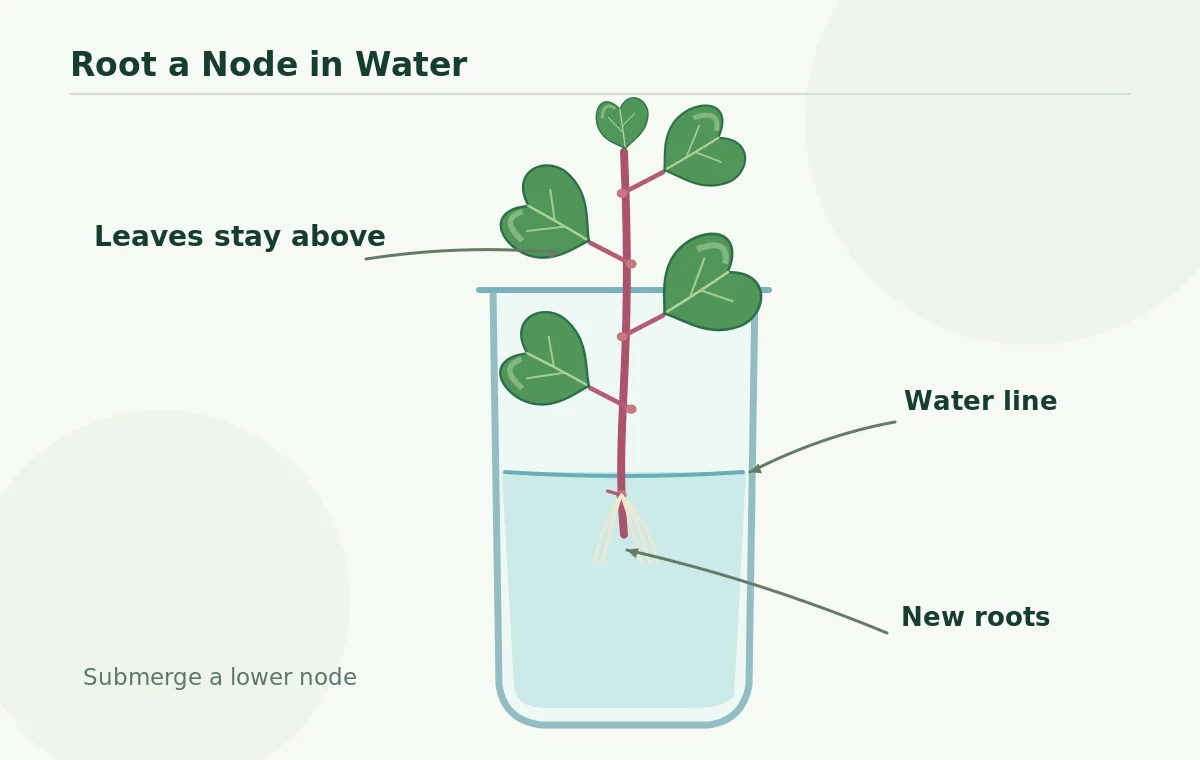
Remove only those lower leaves that would sit below the water surface, leaving the node and a short length of bare stem available for rooting. Keep several healthy upper leaves so the cutting can remain active, but do not leave an enormous canopy that wilts from water loss. In a red-stemmed selection, the green blades and colored stalk make the node especially easy to locate.
Do not bury or submerge the topmost growing tip. The practical drawing shows a lower node below the water line, stripped of its leaf blade, while the next leaves remain above. A common mistake is calling any bend in the vine a node; trace the petiole attachment or a small lateral bud to confirm that you have the real stem junction.
Place the Node in Clean Water
A narrow jar or glass can support the cutting upright. Add enough clean water to cover at least one lower node while keeping all retained leaves above the surface. Put the jar in bright but initially gentle light and a warm location, away from cold drafts or intense midday sun through glass. University of Wisconsin Extension notes that Malabar spinach tip cuttings readily root in water.
Refresh the water when it becomes cloudy and inspect the stem for decay. No chemical rooting hormone is required for the basic technique described by Extension. Roots may start at or near the submerged nodes and stem base, but do not promise an exact rooting day. Temperature, vine vigor, light and cutting condition affect how quickly new roots are visible.
Recognize Real Root Growth Before Potting
A cutting that stays green in a jar is not necessarily rooted. Look for firm pale adventitious roots extending from a node or stem base. As those roots lengthen and branch, they can support a move into moist potting mix. Avoid interpreting a submerged petiole as a root; true roots lack the flat leaf blade and grow as new threadlike structures from the stem.
If the base turns soft, dark and slippery, do not place that damaged cutting into an otherwise healthy pot. Take a fresh tip from a vigorous stock plant and use clean water. Conversely, a cutting with roots should not remain in stagnant water indefinitely when it is destined for soil; move it while the root system is still easy to handle without snapping.
Pot the New Plant at Its Natural Depth
Fill a pot with a loose, well-drained mix and make a hole that accommodates the new roots without folding them sharply. Set the stem upright with the previously rooted node at or just below the mix surface and the retained leaves clearly above. Firm gently, water to settle the mix and give the plant a short adjustment period away from harsh exposure.
Roots grown in water must adapt to soil conditions. Keep the mix evenly moist during this transition but do not leave the container in a standing pool. Watch for new leaf growth rather than forcing the cutting with heavy fertilizer. If you plan to plant outdoors, wait until warmth is reliable; NC State Extension describes Malabar spinach as frost sensitive and a warm-season crop.
Compare a Correct Node and a Leaf-Only Cutting
The effective cutting contains a length of genuine stem and at least one node below the healthy tip. In the avoid example, a single detached leaf has only a petiole, with no stem node to produce a vine shoot. A leaf can remain attractive briefly in water without becoming a complete new vine. That is why the cutting diagram marks both the node and the intended cut below it.
Another failure is submerging the whole leafy tip, which increases the chance of soft tissue deterioration. Likewise, a jar set in a chilly window may stall because the species thrives with warmth. Use the plant’s real anatomy as the troubleshooting key: stem, nodes, roots and leaves each have different roles in propagation.
Grow the Rooted Vine With Heat and Support
After establishment, Malabar spinach benefits from a warm location, moisture-retentive but well-drained soil, and a sturdy support for climbing. The vine can grow strongly in hot weather when true spinach would struggle; in cool nights it may remain slow. Choose the actual selection you have, since red-stemmed and green-stemmed forms look different although both are grown as Malabar spinach.
Harvest tender leaves and young shoot tips from a growing plant without stripping every node. As growth resumes, you can make additional cuttings from healthy vines and label them for your own records. If using the leaves as food, wash them and follow normal fresh-produce handling; the propagation jar itself is a growing tool, not a food-safety test.
Related Guides
- How to Root Malabar Spinach Cuttings Without Burying the Leaves
- How to Grow Malabar Spinach on a Trellis for Summer Harvests
- How to Germinate Malabar Spinach Seeds From Dark Ripe Berries
How We Research and Check the Drawings
We compared university Extension and horticultural guidance with the plant’s visible structures rather than assuming all varieties behave alike. Sources checked October 28, 2026: Wisconsin Extension Malabar spinach guide; NC State Extension plant profile; University of Guam propagation bulletin. Where climate, variety, or growing conditions can change the answer, the observations below take priority over a single fixed calendar date.
This independent educational article contains no sponsored product endorsements or confirmed affiliate links. See our affiliate disclosure. Use local Cooperative Extension recommendations when your weather, soil, or pest pressure differs from the examples shown.
For reliable propagation, use a cutting with genuine stem nodes and a growing shoot, not a detached leaf blade alone.
Cut cleanly through the stem just below a node so the selected node remains on the cutting.
No. Remove lower leaves and keep the rooting node in water while the remaining leaves stay above it.
Look for new pale roots emerging from the stem or submerged node, not simply for leaves that remain green.
Only after warm growing conditions are established and frost risk has passed; Malabar spinach is cold sensitive.