
How to Start Strawflower Seeds Indoors With Light for Germination starts with the living plant, not a one-size-fits-all calendar. Look for the exact stem, leaf, root or symptom before using scissors, moving soil or changing how you care for the crop. The practical checkpoints below draw on named University Extension, RHS and IPM resources as relevant. Weather, cultivar, stage of growth and regional conditions may require a different schedule; a clear observation is safer than an assumed date. Use the diagrams as learning aids and check the real growing points on your own plant.
Confirm the Botanical Name on Your Packet
Strawflower is commonly sold as Xerochrysum bracteatum; older labels may say Helichrysum bracteatum. RHS identifies this papery-flowered annual as a useful cut and dried flower. Do not confuse it with statice, which may be called a similar everlasting flower but is a different genus with different seed traits. Strawflowers make daisylike heads in warm colors, carried on branching stems with narrow green leaves. Knowing the species matters because a seed tray that works for large bean seeds is poorly suited to small light-requiring strawflower seed. Keep the cultivar or color mix noted on your plant label, as seed packets can differ in height and flowering period.
Count Back From Suitable Outdoor Transplant Weather
Utah State University Extension recommends starting strawflowers indoors several weeks before transplanting under Utah conditions, with four to six weeks as a useful reference for its program. Plan backward from a locally safe time to plant a warm-season annual outdoors, not from a universal calendar date. Frost risk, greenhouse warmth and available lighting affect when seedlings will be ready. Direct sowing can work in places with long warm seasons, but starting inside protects a longer production window in cooler regions. Do not let seedlings sit root-bound in a tiny cell for weeks while waiting for unexpected cold. Use regional frost data rather than a USDA perennial-zone number alone.
Use Clean Shallow Cells and Fine Starting Mix
Fill clean seed cells with a fresh, light, well-draining seed-starting medium. Utah State’s trials used a peat and perlite type soilless mix, but suitably fine commercial mixes can also provide an even surface. Dampen the substrate first so a large watering splash is not needed after sowing. Level the top gently without compressing it into a hard cake. A compacted or waterlogged tray can cause poor air exchange and damping-off problems. Do not reuse visibly diseased tray mix. Separate labeled seed varieties before you begin so tiny strawflower seed is not spilled among similar-looking flower seeds and later mislabeled.
Place Tiny Seeds Close to the Surface in Light
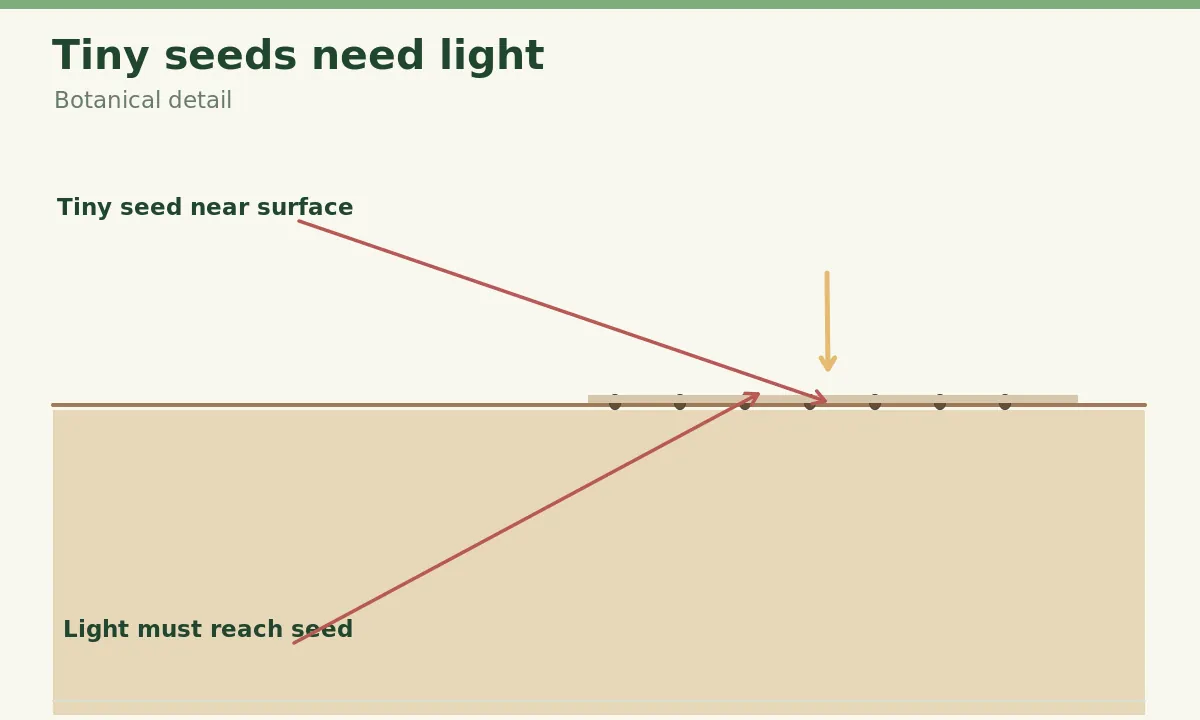
Light is required for strawflower germination according to Utah State Extension. Place two or three seeds per cell if using its trial approach, or follow the packet’s more specific directions, and keep the seeds at the surface with only a very thin layer of fine vermiculite. They must not disappear beneath a deep layer of potting soil. The covering is meant to hold moisture around the seed while allowing light to reach it. Tap the container gently to seat seeds against moist substrate. Do not press them into waterlogged mud. A drawing with a seed buried far below the surface would contradict the actual germination requirement.
Water From Below or Mist Without Displacing Seed
Before germination, tiny seeds can move easily under a forceful stream from a watering can. Utah State recommends gentle misting or bottom watering so the upper surface becomes evenly moist without washing seeds into a corner. If using a tray below the cells, allow the medium to wick up moisture, then drain excess water so the roots are not continuously submerged. Check moisture daily and adjust for humidity, temperature and airflow. The goal is moist, not saturated. A plastic cover may conserve humidity, but remove it or improve ventilation promptly as seedlings emerge and avoid allowing direct hot sunlight to overheat a covered tray.
Keep Germination Warm and Provide Useful Light
Utah State reports successful emergence in approximately seven to ten days around 70–75°F under its conditions, with natural variation by seed lot. Treat those figures as reference ranges rather than a promise. Provide a suitable lamp or bright growing environment so the seeds receive the light needed to germinate; heat alone is not enough. Track media temperature rather than only the air temperature on the other side of a window. A cold sill can delay germination even when the room feels comfortable. Seeds may also be old or poorly stored, so if only a few cells emerge, review seed viability and moisture before resowing the entire tray.

Move Emerged Seedlings Into Strong Light
After cotyledons open, a strawflower seedling needs enough light to build a short sturdy stem. Keep grow lights positioned appropriately above the canopy according to the lamp maker’s instructions and adjust as plants grow. A long pale stem leaning toward a window suggests insufficient or one-sided illumination, not a need to bury the entire young plant deeply. Give a regular dark period instead of continuous light. Provide modest air movement and avoid soggy conditions that favor seedling diseases. Remember that the cotyledons are the first seed leaves; the true leaves that follow help confirm a healthy plant rather than an accidental weed in the tray.
Thin Extras Without Pulling the Root Ball Apart
If several seeds germinate in one cell, keep a strong, healthy seedling with typical leaves and remove extras when they can be handled safely. Utah State’s production approach thins to one plant per cell. Snip surplus stems near the media rather than pulling them through the roots of the chosen plant. Turn the cell occasionally so plants do not bend persistently toward a single side of the light. Once roots occupy the small cell but have not wrapped tightly around it, plan potting on or transplanting as conditions permit. Handle seedlings by the leaves or root plug, not by squeezing a tender stem between fingernails.
Harden Plants Off Before Their Final Sunny Position
RHS describes strawflower as a full-sun, well-drained flowering plant. A seedling grown under indoor lamps has not experienced outdoor wind, temperature changes or direct sun intensity. Acclimate plants gradually in a protected location over a series of days, with the exact duration adjusted for weather and plant condition. Protect them from unexpected frost and harsh drying winds. Transplant into suitable garden soil or containers without burying the crown. Water around the root plug to settle soil, but do not leave seedlings in stagnant wet media. Choose a site with room for airflow as mature plants branch and carry flower stems.

Separate Germination Problems From Later Flower Care
Seeds that remain dormant, seedlings that collapse, and established strawflowers that fail to bloom are different issues. For poor emergence, check actual seed exposure to light, temperature and moisture. For collapsed seedlings inspect the stem base, drainage and tray cleanliness rather than adding more water reflexively. After transplanting, flowering depends on healthy foliage, sufficient sun and suitable nutrition rather than repeated deep soil covering. Avoid promising one cultivar will bloom in a fixed number of days. Check for small insects and disease only when signs are present, and rely on locally applicable Extension IPM advice instead of blanket pesticide use.
Keep a Small Trial Record for the Next Sowing
Label two cells or tray rows with sowing date, seed source and whether you used the thin vermiculite covering. Photograph the seed surface before emergence so you remember its exact depth; later pictures of the first true leaves can show whether light levels produced compact plants. Compare the percentage of cells that germinated rather than guessing based on one vigorous seedling. If a mix performs poorly, change one factor at a time in the next trial. The best result is a batch of well-rooted plants ready for a warm outdoor location, not a dramatic green tray produced too early to transplant safely.
Related Guides
- How to Start Strawflower Seeds Indoors and Transplant Strong Plants
- When to Transplant Strawflower Seedlings Without Burying Their Crowns
How We Research and Verify Plant Advice
Sources checked on 2026-10-26: extension.usu.edu; rhs.org.uk. We reviewed each institution’s plant identification, correct growth stage and relevant cultural recommendations before adapting them into an independently written step-by-step guide. Where sources are region-specific, their calendar details are not applied universally. Pictures use simplified teaching shapes and should be compared with living specimens; they are not a substitute for laboratory disease diagnosis or local climate guidance. The relevant advice is paraphrased rather than reproduced.
Safety and Independent Editorial Disclosure
This independently prepared educational article does not claim sponsorship or affiliate approval. Our category reading links are informational, not product endorsements. See the VegWin affiliate disclosure. Clean sharp tools before cutting plants, protect hands from thorns and blades, and keep cut plant material away from children and pets where appropriate. Use only locally registered plant treatments labeled for the actual crop, and observe the product label. Do not rely on unsupervised home remedies or unverified harvest-safety promises.
Yes. Utah State Extension advises a very thin vermiculite cover so light can still reach the seeds.
Do not bury them deeply. Sow near the surface under only a thin, light-permeable covering.
Use gentle misting or bottom watering to avoid displacing the tiny seeds.
Insufficient light is a common reason for stretching; adjust seedling lighting and avoid overly warm, dim conditions.
No. Strawflower is Xerochrysum bracteatum; statice usually refers to Limonium species.