
Strawflower (Xerochrysum bracteatum) has stiff papery colored bracts around a central disk, which is why it makes such a satisfying cutting and drying flower. Starting it well depends on an easily missed detail: the seed needs light to germinate. Buried seed can fail even in a warm room. Utah State University Extension recommends an indoor head start for shorter-season sites, although direct sowing can work after frost where summers are long. The process below follows the actual stages you can see in a tray: tiny seed in contact with the surface, emerging seedlings, a rooted transplant, and a branching outdoor plant.
Identify the Right Strawflower Before Sowing Seed
The botanical name Xerochrysum bracteatum is useful because “everlasting” may describe several unrelated dried flowers. Strawflowers make upright stems with narrow leaves and solitary daisy-shaped heads whose colored papery structures are bracts. A seed packet can describe a compact bedding form or a taller cut-flower cultivar; that difference determines spacing and whether support may be helpful later. The flower colors on a mixed packet do not guarantee identical colors on each seed-grown plant. Read the packet for expected height, mature spread and cultivar details, then label every tray with the proper name before the seeds are watered.
Set the Indoor Start Date From the Last Freeze
Utah State Extension suggests starting strawflowers indoors four to six weeks before the intended transplant date. For an uncovered outdoor bed, that transplant generally happens after the local last freeze risk has passed. This is not the same as counting backward from a USDA plant hardiness zone. Seek a regional last-freeze estimate, look at the local forecast as planting approaches, and allow time for gradual hardening off. Where the frost-free warm season is especially long, direct sowing after frost is possible but may delay flowers. Avoid starting months too early unless you have enough light and space to prevent lanky, tangled seedlings. For the basics, see our guide: When to Start Celosia Seeds and Grow Stocky Summer Transplants.
Fill Shallow Cells With Clean Free-Draining Seed Mix
Use a tray with drainage holes and a fine-textured seed-starting mix instead of heavy garden soil. Gently moisten the mix before sowing so the surface is evenly damp without puddles. Utah State used standard seedling flats and soilless media in its trials. A lightly firmed surface helps small seeds make contact rather than falling into large cracks. Clean reused flats before planting and write labels that will survive watering. Avoid packing the medium into a dense wet brick. A breathable, well-drained medium helps new roots access both moisture and air, which they need in order to develop normally.
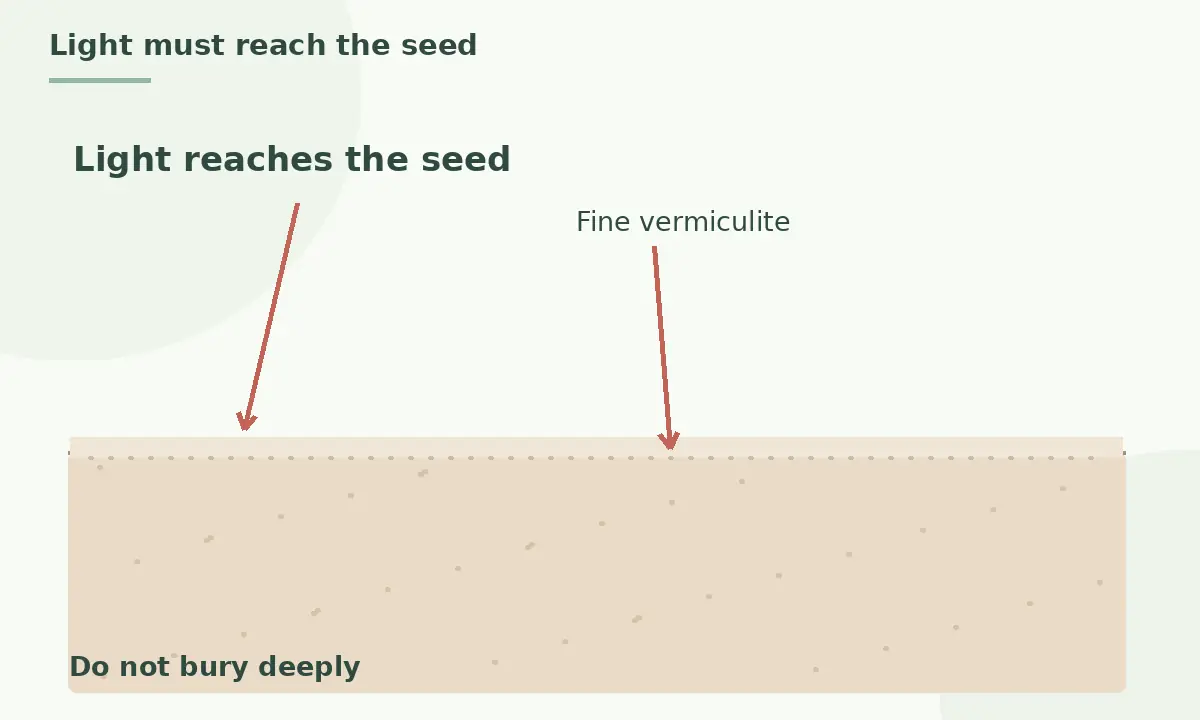
Press Tiny Seeds Near the Surface Where Light Reaches
Sow sparingly on the damp medium. Utah State recommends two to three seeds in each cell and a very thin covering of fine vermiculite because light is needed for germination. In a home tray, the lesson is to preserve light access: do not bury the seed beneath a thick layer of mix. Mist gently or bottom-water to avoid washing the seed into the corners of the cells. Keep the seed surface from crusting, and avoid stretching plastic tightly over a tray in a bright hot window where temperatures can soar. A labeled close-up drawing of the seed and thin cover is more accurate than a deep planting hole.
Give Germinating Seed Warmth Without Cooking It
Utah State reports germination in roughly seven to ten days around 70–75°F under its production conditions. These are useful trial conditions, not a guarantee for every packet. Place the tray where temperatures are consistent and where seedlings can receive light as soon as they break the surface. Check the tray daily: the moist surface can dry fast under a grow light, while an unventilated humidity dome may trap excessive water. If seedlings appear unevenly, keep the remaining cells stable rather than digging to look for seed. Read the seed company’s cultivar-specific guidance if it differs materially from general recommendations.
Thin Each Cell After Seedlings Have Established
A single strong seedling per cell usually gives the transplant room to develop. Utah State recommends thinning to the strongest plant after germination. Snip extra seedlings at the medium surface rather than pulling roots through a shared plug and disturbing the one you want to keep. Seed leaves appear first; the true leaves that follow gradually show the plant’s adult shape. If stems stretch dramatically toward the light, improve light intensity and duration rather than pouring on fertilizer. Yellow, collapsed stems at soil level may indicate a seedling disease or wet growing conditions and should not be confused with ordinary thinning.
Move Young Plants Into Brighter Growing Conditions
After emergence, keep seedlings in bright light and allow excess water to leave the tray after a thorough but controlled watering. Shallow frequent splashing can keep the surface wet while the interior of a cell remains dry, so check the plug rather than judging only by its color. Good air circulation can reduce stagnant humidity. If seedlings fill their cells before outdoor conditions are suitable, shift carefully into a slightly larger pot without tearing the roots. Do not push the crown deeper to hide a long stem. Keep records of temperature, watering and light so a second sowing can avoid problems seen in the first tray. If you are starting from scratch, read When to Transplant Morning Glory Seedlings Without Damaging Their Roots.
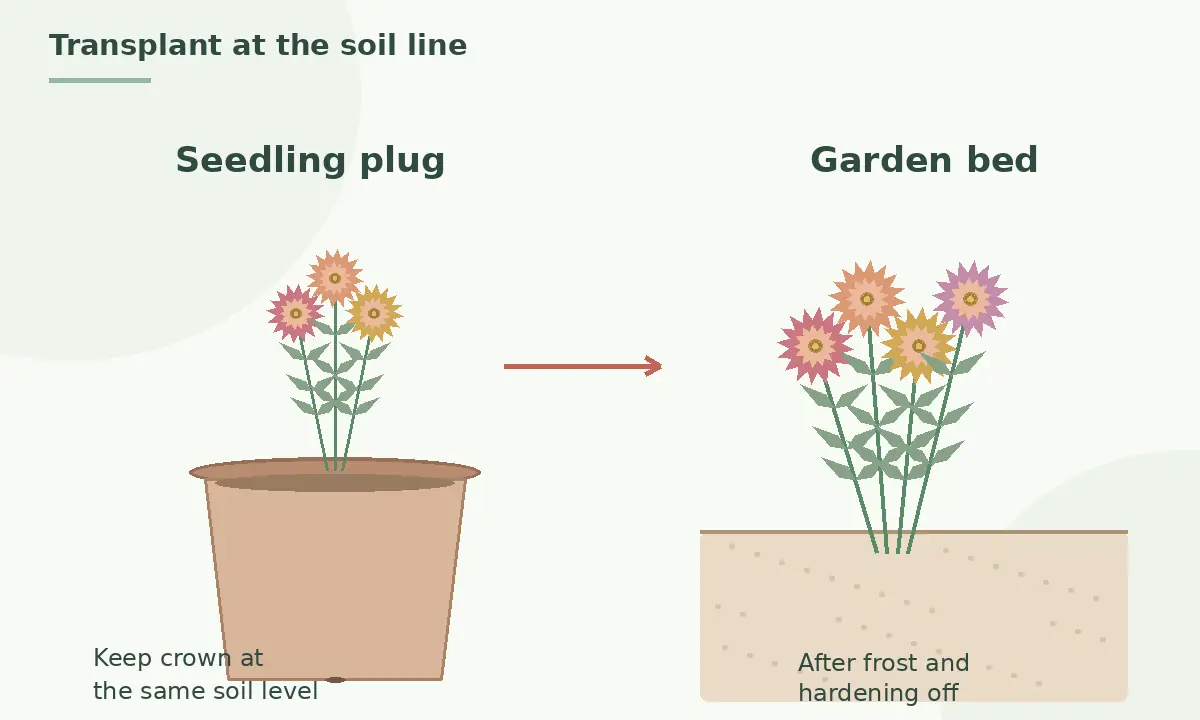
Harden Off Then Transplant After Frost Danger
Move indoor-grown strawflowers to outdoor conditions gradually. Start in a sheltered, bright but not scorching location, then increase direct light and wind exposure across several days while bringing plants in if frost is forecast. Utah State stresses hardening off and planting into open field after the last freeze. Set the intact root plug at approximately its existing soil level in well-drained ground. Do not bury the crown to compensate for a stretched stem. Utah State trial spacing commonly fell near nine to twelve inches for cut flowers, but the spread of your specific compact or tall cultivar can justify a different spacing listed on the seed packet.
Pinch and Support Only When the Plant Is Ready
For cut-stem production, Utah State recommends pinching well-established plants around twelve inches tall, removing the upper central portion to encourage branching. This temporarily removes the growing tip and can delay the first flower while increasing side shoots. Pinching is optional for small bedding plants or when you specifically want the first bloom as soon as possible. A tall cutting variety in a windy garden may benefit from horizontal support netting installed before stems crowd the bed. Position support around living stems without binding or cutting them. Avoid applying these recommendations to a just-transplanted weak seedling that is still recovering. Our walkthrough on how to start ornamental sweet peas from seed without weak seedlings sets out each step.
Harvest Papery Blooms at the Right Opening Stage
The colorful “petals” people notice are dry bracts surrounding the center. Utah State suggests cutting when several layers of bracts have opened and the center is just becoming visible; very immature heads can flop, while fully open heads may not store or dry as attractively. Cut with clean snips, leave leafy nodes to produce further shoots and move flowers promptly into clean water if displaying fresh. For dried arrangements, hang suitable stems in a dry ventilated space away from harsh light. A closed bloom in rain may look younger than it is, so evaluate on a bright day and compare more than one stem before collecting a full bouquet.

Related Guides
How We Research and Verify Garden Recommendations
Our editorial review compared the listed university Extension and specialist horticultural guidance for the identified species, growing stage and practical question. We checked the source pages on October 24, 2026, distinguished field trial results from universal instructions and noted when cultivar or local weather may change an outcome. The instructional artwork was created to explain morphology and gardening actions, not copied from published photos or presented as evidence of a particular experiment. We have not run a controlled garden trial for this specific article; readers should use local Cooperative Extension assistance for uncertain symptoms or regional restrictions.
Sources and Editorial Disclosure
Sources reviewed October 24, 2026: Utah State University Extension — Utah State Extension: strawflower requires germination light, lightly covered seed, temperature, transplant and pinch guidance.; NC State Extension Plant Toolbox — North Carolina Extension Plant Toolbox: species identity and plant characteristics.; NC State Extension Plant Toolbox — North Carolina State Extension: papery bracts, narrow leaves, flowering period, and cultivation as annual.. Source links do not mean these organizations endorse VegWin.
Disclosure: No sponsorship or affiliate payment for a specific product has been verified for this article. Site information is available at VegWin Affiliate Disclosure. Follow current local regulations and the instructions for your cultivar or any registered product.
Yes. Utah State recommends only a very light vermiculite cover so light can reach the seeds.
Commonly four to six weeks before transplanting after local freeze danger; adjust for your climate and growing setup.
Yes, after freeze danger in climates with a long enough warm season, but blooms may come later.
Cut extras at the surface so the roots of the remaining seedling are not disturbed.
Not always. Pinching can increase branching on vigorous cutting plants, but it may postpone the first blooms.