
A seed potato is a living stem tuber with dormant buds called eyes. New leafy stems grow from those eyes, while later underground stolons develop additional tubers. Planting at the right depth gets the stems started; hilling soil later keeps young potatoes shaded so they do not turn green. This guide separates those two operations with a simple cutaway view, making clear what to cover and what green foliage must remain exposed.
Choose Healthy Certified Seed Potatoes Instead of Table Stock
Seed potatoes sold for planting are produced for propagation and may have been inspected under a certification program. Ordinary supermarket potatoes are intended for food and can carry plant diseases or have been treated to limit sprouting. Choose sound, disease-free tubers of a variety appropriate for local planting dates and the intended harvest. Avoid soft, wet, foul-smelling, or suspiciously mottled pieces. Oregon State Extension recommends seed potatoes with visible eyes rather than potatoes bought for eating. Certification reduces some risks but does not mean disease is impossible. Never plant a tuber showing a likely bacterial soft rot.
Recognize an Eye as a Bud on a Tuber
A potato tuber is an enlarged underground stem, not a true root. Small dimples called eyes are nodes from which shoots can develop. Look for several distributed over the tuber surface; some may be slightly raised or have short sprouts. Oregon State Extension explains that an eye contains bud tissue, so simply cutting any chunk of flesh will not guarantee a new plant. A viable planting piece needs sound stored tissue and buds. Distinguish white or pale sprouts from fibrous roots: sprouts extend into leafy stems, and roots develop elsewhere after growth begins. The diagram labels eyes directly on the tuber.
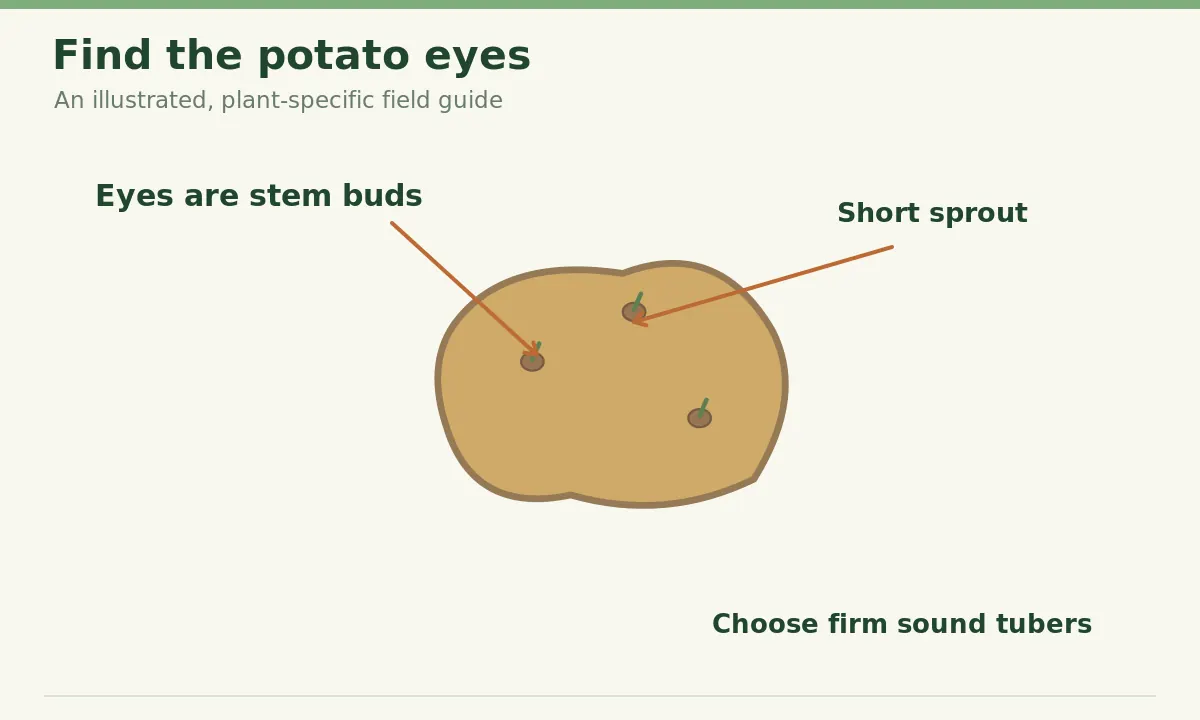
Decide Whether to Plant Whole or Cut Seed Tubers
Small healthy seed potatoes can be planted whole. Larger tubers may be divided so each substantial piece retains viable eyes, often two or three as described by Oregon State. Do not make tiny slivers that dry out or rot before establishing. Clean knives between suspect tubers and discard discolored flesh. Follow region-specific extension guidance for allowing cut surfaces to heal under suitable conditions before planting. Damp chilly planting conditions increase rot risk. Cutting is optional; gardeners with a modest number of small seed tubers may prefer fewer wounds. Do not remove buds just to make pieces look symmetrical.
Choose Workable Soil and a Crop-Appropriate Season
Potatoes prefer a well-drained, workable growing bed with steady moisture and adequate sun. Wet compacted soil can encourage rot and makes hilling difficult. Choose planting dates from a local extension calendar or the variety label, rather than treating a hardiness zone as a universal annual crop calendar. Avoid planting into frozen or persistently saturated soil. If using a trench method, prepare enough loose soil beside it for later hilling. Where drainage is very poor, improve the raised growing area before sowing. Local heat, soil temperature, expected frost, and the length of the growing season all affect establishment.
Set Seed Pieces Under Soil With Buds Facing Up
Place the seed tuber or piece in a shallow planting trench with visible sprouts or the main eyes generally pointing upward when easy to identify. Oregon State offers a useful planting depth around three to five inches for its garden recommendations; other extension systems may use somewhat different depths depending on subsequent hilling. Cover with loose soil and water as needed. Do not force long brittle sprouts to point upward if moving them would snap them. The important principles are keeping the living piece underground and providing a clear path for shoots to emerge. Space pieces according to variety and regional guidance rather than assuming one gap suits every potato.
Wait for Green Stems Before Making the First Hill
Do not bury the young plant under a tall mound before leaves have established. Once shoots emerge and reach a suitable height, draw loose soil around their bases. Oregon State describes beginning when plants are roughly six inches tall, while Minnesota Extension often begins around a foot, reflecting different systems. Treat these as examples rather than contradictory commands. Add modest amounts of soil without covering every active leaf. The upper leafy stems remain exposed so the plant can photosynthesize. Use soil from between rows gently, protecting roots and stolons. Avoid digging right beside the stem with sharp tines.

Understand Where New Potato Tubers Develop
New potatoes arise from underground stem structures called stolons rather than dangling from the planted tuber like grapes. The leafy stems appear aboveground while stolons form laterally underground. Shallow daughter tubers may reach light if the ridge erodes or cracks. Light exposure can cause green pigment to appear and is associated with elevated glycoalkaloids, which is why tubers must remain covered. The cutaway shows the original seed piece separately from later stolon-grown tubers. Do not pull the plant upward to inspect progress unless you are deliberately sacrificing the plant. Instead, watch ridge height and soil coverage.
Add Soil Gradually as the Plant Grows
Hill once or more later in the season as needed to keep developing tubers well-covered. Draw loose soil or an appropriate clean mulch from the sides into a low ridge around stems. Do not excavate deep enough to cut stolons or uncover existing tubers. Minnesota Extension describes repeated hilling during growth and a total built-up height in its conventional systems. Hilling frequency varies with soil settling, rainfall, variety, and initial trench shape. Stop building enormous ridges that bury all the active leafy canopy. A well-shaped hill shades tubers yet drains adequately, and leaves enough room for careful harvesting later.
Prevent and Recognize Green Potato Skin
Visible greening means a tuber has received light. Glycoalkaloids such as solanine are not reliably measured by green color alone, and cooking does not reliably make a green or bitter tuber safe. Do not use visibly green, bitter, or seriously damaged potatoes for eating. Check any tubers exposed by rain erosion and re-cover still-growing plants with soil. Store harvested sound potatoes in a dark place appropriate for the variety and planned use. Avoid confusing normal cultivar skin color with light-induced greening: inspect whether the new green is superficial on exposed surfaces. When in doubt about eating a suspicious tuber, discard it.

Finish With a Safe Planting and Hilling Checklist
Before planting, confirm each seed piece is firm and bears visible viable eyes. During sowing, check the planting depth against local recommendations and preserve sprout tissue. After emergence, hill only enough to cover the bases of stems while leaving the green canopy working. As the season progresses, inspect ridges after heavy rain and keep shallow developing potatoes out of the light. Water according to soil moisture and maintain good drainage, because wet soil can promote rot. At harvest, dig from the outside of the hill to reduce cut or pierced tubers. These observations are more reliable than a one-date hilling schedule.
Related Guides
- Growing Potatoes at Home: Seed Tubers, Hilling, and Safe Harvests
- Potato Grow Bags: Manage Drainage, Hilling and Harvests
- How to Chit Seed Potatoes With Eyes Up for Short, Sturdy Sprouts
- How to Grow Purple Potatoes in Containers Without Exposing the Tubers
- How to Identify Colorado Potato Beetle Eggs and Larvae on Potato Leaves
How We Research and Verify Plant Advice
Sources checked on 2026-10-26: extension.oregonstate.edu; extension.umn.edu; extension.oregonstate.edu; extension.oregonstate.edu. We reviewed each institution’s plant identification, correct growth stage and relevant cultural recommendations before adapting them into an independently written step-by-step guide. Where sources are region-specific, their calendar details are not applied universally. Pictures use simplified teaching shapes and should be compared with living specimens; they are not a substitute for laboratory disease diagnosis or local climate guidance. The relevant advice is paraphrased rather than reproduced.
Safety and Independent Editorial Disclosure
This independently prepared educational article does not claim sponsorship or affiliate approval. Our category reading links are informational, not product endorsements. See the VegWin affiliate disclosure. Clean sharp tools before cutting plants, protect hands from thorns and blades, and keep cut plant material away from children and pets where appropriate. Use only locally registered plant treatments labeled for the actual crop, and observe the product label. Do not rely on unsupervised home remedies or unverified harvest-safety promises.
They are nodes containing buds on the potato stem tuber, from which new shoots can grow.
Where practical, place visible sprouts or prominent eyes upward without snapping any fragile shoots.
Oregon State gives roughly 3–5 inches as one home-garden guideline; local soil and hilling methods may alter the depth.
After leafy stems have emerged and gained some height; guidelines range from around six inches to a foot depending on the system.
Hilling helps cover new shallow tubers, preventing light exposure and green skin.