
Disclosure: Independent educational gardening content, not an advertisement. There are no confirmed affiliate approvals for this guide; review the site disclosure. The recommendations that follow distinguish crop biology from universal shortcuts. This article addresses harvest food indoors, not just seedlings, and links to source-specific Extension and federal guidance before the FAQ.
Choose an Indoor Harvest Before You Choose Equipment
An indoor vegetable garden is most successful when it is planned around what you intend to eat, not around a photograph of a fully loaded grow shelf. There are three different harvest goals: microgreens cut soon after the first true leaves appear, baby greens cut as tender leaves develop, and mature fruiting crops that need much more room and energy. Treat those as separate projects. University of Maryland Extension documents the first two as practical indoor harvests, while Minnesota Extension cautions that heat-loving fruiting crops require costly supplemental light in indoor hydroponic setups.
For a first attempt, start with one shallow tray of a single microgreen crop or a few modest pots of baby greens. A dense tray harvested once is not the same as a cut-and-come-again planting. If you want repeat lettuce or arugula harvests, thin and feed the plants for the additional growing period. Keep indoor seed starting for outdoor transplants on a different shelf or schedule; transplant seedlings are not the finished food crop in this guide. Record edible quantity rather than merely recording germination. Our guide “Seed Starting Grow Lights” goes into more detail.
Match Crop Choice to the Intended Harvest Stage
Microgreens can include radish, mustard, kale, arugula and other properly identified edible species grown for tender stems and emerging leaves. They are commonly harvested only once. Baby greens such as lettuce and arugula need more individual room and time, but they may regrow for additional cuttings when healthy. Mature head lettuce occupies more shelf space; a full-sized tomato or pepper imposes an entirely different light, temperature, flowering and pollination burden. Avoid buying a tall indoor tower based only on its capacity for tiny seedlings.
Do not treat all seeds marketed as sprouts as interchangeable with soil-grown microgreens. Sprouts are typically germinated and eaten with more of the seed and root tissue, whereas microgreens are cut above the media surface. Food-safety handling differs. Use food-crop seed from a reliable supplier and avoid ornamental, unknown or treated seed. When mixing crops, their rates and heights differ, so a separate tray per species gives clearer observations and easier harvest timing. Make a simple three-column plan: species, harvest stage and next intended sowing.

Design the Shelf Around Light and Drainage
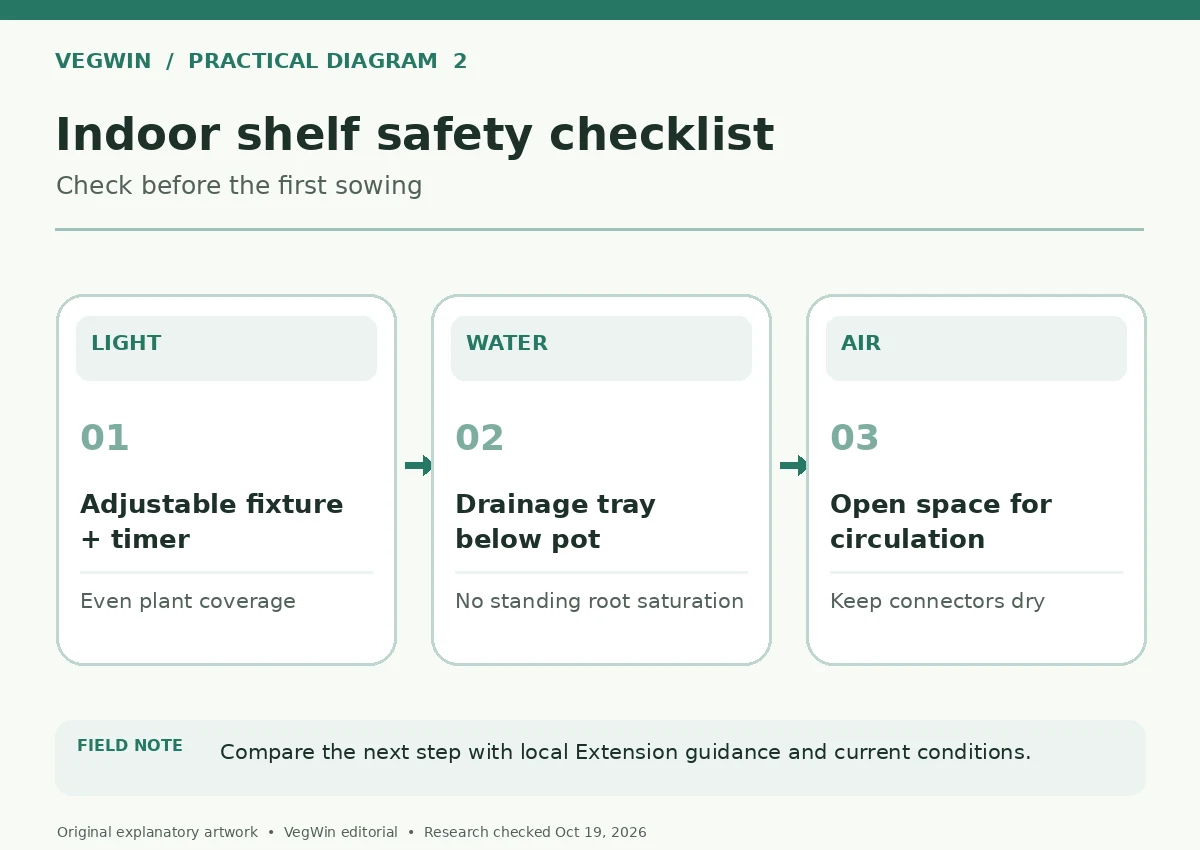
The most common indoor mistake is to assume a bright room is bright enough for strong vegetable growth. Windows vary by season, building orientation and obstructions. A practical shelf uses a stable LED or fluorescent grow light, an adjustable mounting system and a timer. Minnesota Extension describes white or balanced-spectrum lamps as a general-purpose option and explains why total daily light exposure matters. Do not apply a single lamp height to every fixture: intensity, beam shape and manufacturer directions are different. Check that leaves receive even coverage rather than bright centers and dark edges.
For microgreens, Maryland Extension describes around sixteen hours of combined daily light as a common starting point and a lamp distance that depends on the fixture. That recommendation is specific to those crops, not proof that fruiting tomatoes will thrive on the same setting. Set a reproducible on/off interval with a dark period, measure the usable lit footprint, and place growing trays within it. Use a tray with drainage holes nested over a catch tray, protect electrical connections from spills, and give leaves air circulation rather than sealing the shelf in a persistently wet enclosure.
| Goal | Reasonable starting crop | Watch-out |
|---|---|---|
| One quick cut | Mustard or radish microgreens | Single harvest; clean and reseed |
| Some repeat cuts | Lettuce or arugula baby greens | Thin plants; regrowth is limited |
| Full-season fruit | Tomato or pepper | Much higher light and space needs |
Keep Roots Moist Without Keeping Them Saturated
Use clean, lightweight soilless growing media; garden soil often compacts in shallow indoor containers and can introduce insects or pathogens. Pre-moisten the medium evenly before sowing. Fine seeds should be pressed or covered as directed for the species. Once roots develop, check the tray weight or feel beneath the surface rather than watering by the clock. A little moisture on the upper surface does not prove the root zone is hydrated, and a catch tray of standing water does not prove plants have access to oxygen.
Microgreens require enough moisture for dense seedlings while allowing ventilation. Baby greens need a more sustained root environment and should be thinned as they grow. Remove temporary germination covers as appropriate and inspect both leaf surfaces and media for mold-like growth or insects. If foliage wilts while the mix is wet, investigate drainage, root health and heat before adding more water. Resist the urge to add fertilizer to a microgreen tray automatically; the Maryland guide notes that seed reserves support this very short crop, whereas longer-lived baby greens need crop-appropriate ongoing care.
Build a Repeat-Harvest Calendar You Can Maintain
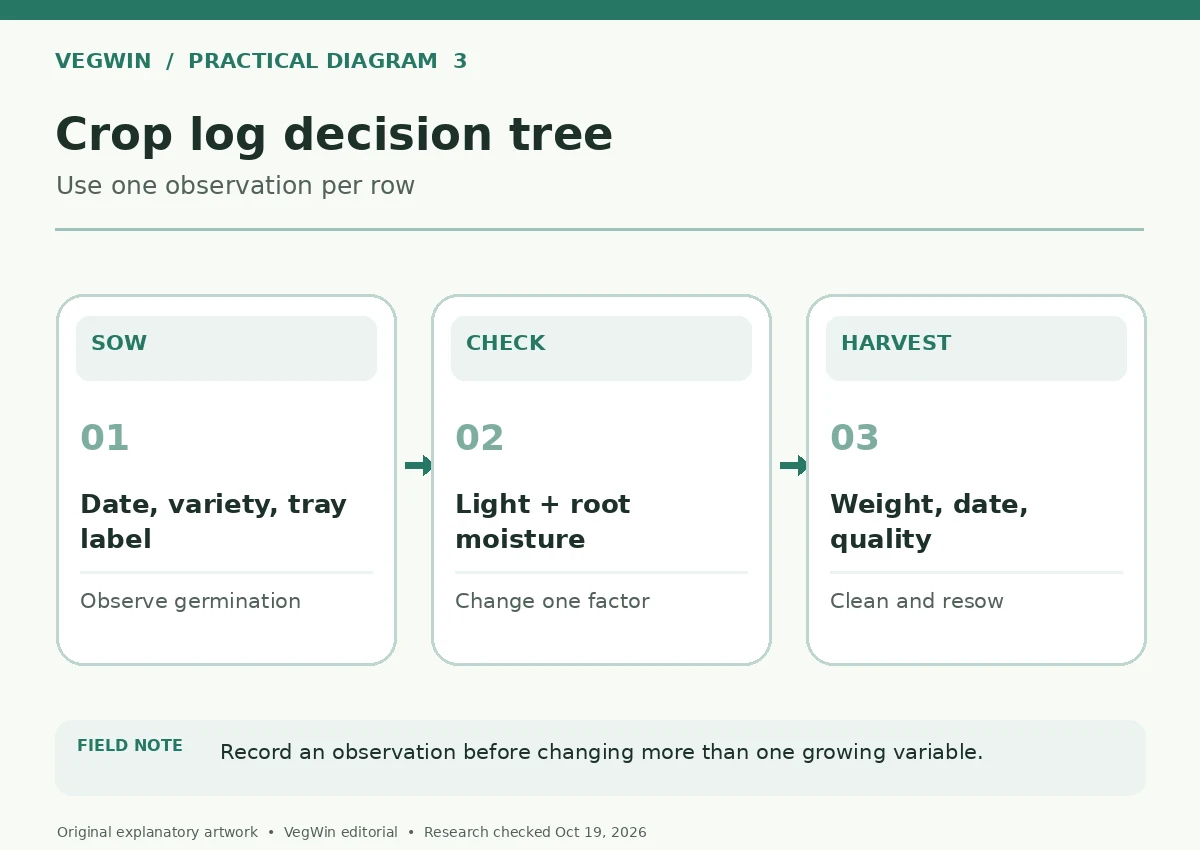
One tray sowed every week can be more practical than ten trays planted on the same day. The interval depends on what you eat, the crop and actual growth under your setup, so begin with a trial tray rather than assuming a catalog harvest date. For each sowing, write the crop and variety, date, light setting, first emergence, harvest stage and whether it regrew. After a few cycles you can decide whether to start a second tray before the first is ready or simply replant after harvest. A timer does not automate harvesting or cleaning.
Harvest microgreens by cutting edible stems above the medium with clean scissors. For baby greens, cut in a way that leaves the growing point intact if the variety can regrow, and monitor whether regrowth remains vigorous. Do not promise unlimited regrowth: Maryland Extension reports limited additional cuttings under suitable conditions. Wash harvesting tools and trays, follow food-safe handling for produce, refrigerate harvested leaves promptly, and discard plants with suspicious spoilage. A small, reliable harvest is more useful than an oversized system that becomes difficult to keep clean. Our guide “Grow Indoor Microgreens With Clean Trays and a Safe Harvest” adds more detail on this.
Diagnose Indoor Problems by Their First Observable Signal
Tall pale seedlings leaning toward a lamp suggest weak or uneven light, but temperature and crowding can contribute. Wet stems collapsing at the media line may involve damping-off conditions; improve cleanliness and drainage, and avoid treating without identifying the cause. Margins that brown under bright lamps might reflect dryness, heat or excess intensity. Sticky leaves and insects require identification before any response. Indoor gardening is not pest-free merely because there is no outdoor bed. Isolate troubled trays instead of spraying every plant reflexively.
Use a five-step diagnosis: identify the affected crop and growth stage; compare it with healthy trays; check lamp distance and photoperiod; inspect root-zone moisture and drainage; and photograph how symptoms change after one careful adjustment. Do not change light, fertilizer, watering and temperature simultaneously, because you will not know what helped. If the crop has little chance of recovering before a planned harvest, clean the tray and resow rather than adding an untested pesticide to fresh food leaves. Document that decision in your indoor crop log.
Know When Fruit Crops Are Not Worth the Indoor Cost
Tomatoes and peppers can be grown in controlled environments, but they do not behave like short-cycle salad greens. Flowering and fruiting require far more energy, suitable root volume and sometimes pollination support; maintaining those conditions across winter can make a home project costly. The Minnesota small-scale hydroponics guide explicitly notes the additional heat and light demands of warm-season crops indoors. A compact cultivar reduces physical size, not the basic need for usable photons or healthy roots. Keep expectations realistic if the objective is a weekly salad rather than a horticultural experiment.
If you want to explore indoor fruit crops later, calculate the shelf footprint, fixture electricity demand and maintenance before ordering equipment. Begin by proving you can harvest leaves on a consistent schedule and keep trays clean. Then compare the new crop’s mature canopy, temperature and harvest time with your real space. A staged investment protects both your budget and your learning: you can stop after a successful greens system instead of feeling obliged to scale up. This article deliberately does not duplicate transplant calendars or outdoor vegetable container sizing.
Related Guides
How We Research and Set the Scope
VegWin live URL inventory not accessible; recheck before manual publication. A web attempt to access the active VegWin.org article inventory did not succeed; therefore this is an editorial overlap screening, not verification that all live WordPress URLs are unique. Check the site and category assignment in WordPress before manually publishing. Biological claims depend on the crop, variety and region. No unverified affiliate program, product rating, pesticide recipe or fertilization rate is implied.
Sources checked 2026-10-19: University of Maryland Extension: Growing Microgreens and Baby Greens Indoors; University of Minnesota Extension: Lighting for Indoor Plants and Starting Seeds; University of Minnesota Extension: Small-Scale Hydroponics. Each institution supports a specific claim in the source record below; these sources do not sponsor VegWin. Their evidence should be interpreted in its own geographic and crop scope. For sponsorship policy, see the affiliate disclosure.
Yes, for suitable crops when a properly selected grow light provides adequate illumination; check the crop and fixture rather than assuming any desk lamp works.
They are distinct harvest stages. Microgreens are cut near the first true leaves, while baby greens are grown longer and may permit further harvests.
No. Microgreens are normally one-cut crops; baby greens can sometimes regrow for a limited number of additional cuts.
Usually not for this short crop in the Maryland Extension system; longer-lived plants have different nutrient needs.
Investigate light intensity and distribution along with crowding and temperature before changing several variables at once.