
Snow peas (Pisum sativum) rewards observation more than a rigid universal calendar. This practical guide follows the identifiable plant, its correct growth stage, and the next action a home gardener should take. Pay attention to which tissues are alive, what should remain above the soil, and whether leaves, pods or flowers have developed enough for the intended task. A garden in a cool northern spring and a warm southern winter may use very different sowing dates for the same crop. The illustrations are teaching views rather than promises that every cultivar will have identical colors, sizes or maturity dates. Use your seed packet, a local Extension calendar and actual growing conditions to make the final decision.
Identify snow peas by their flat pods
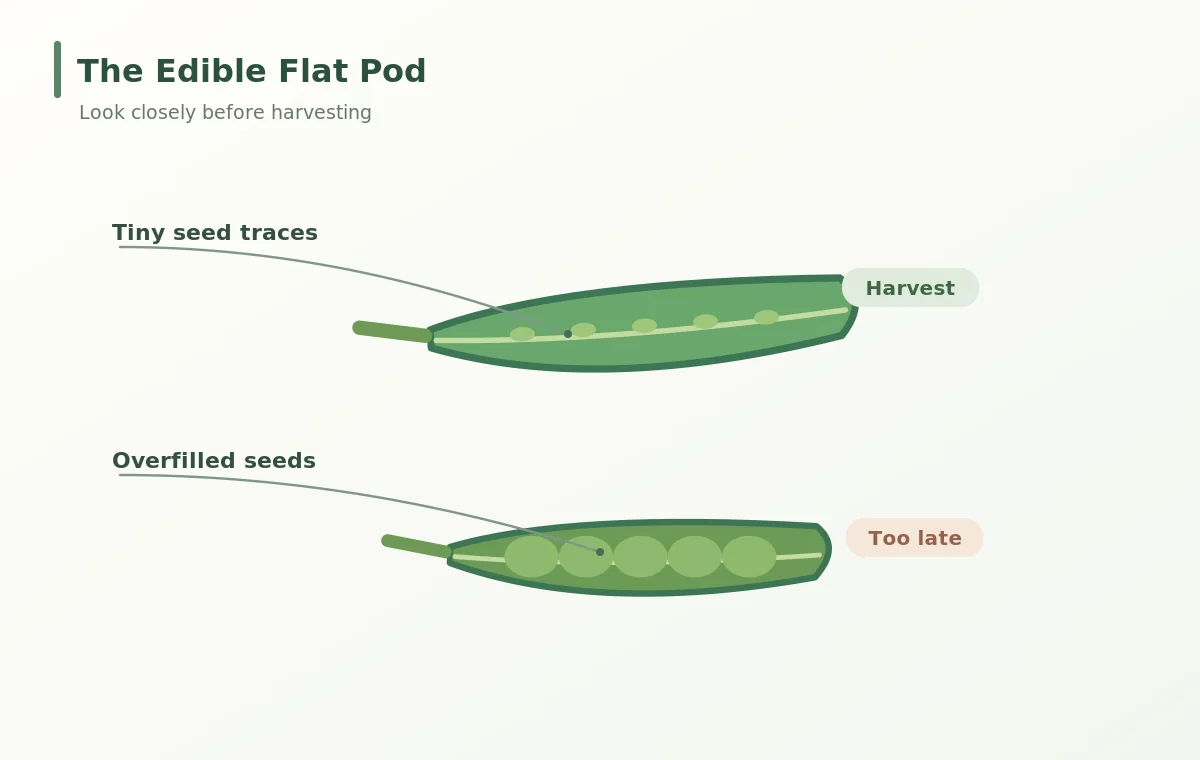
Snow peas are edible-podded forms of Pisum sativum harvested before seeds have enlarged much. Their best-known feature is a broad, flattened, tender green pod, often with only faint little pea outlines visible inside. This is different from a sugar snap pea, whose edible pod is thick-walled and rounded once the seeds fill. A shelling pea is usually allowed to develop substantial peas and then the pod is discarded.
Look for ordinary pea foliage: pairs of rounded leaflets, branched curling tendrils and white or sometimes colored pea-type blossoms. The tendrils grow from the leaf structure and wrap around supports; the main shoot itself is not the climbing organ as in runner beans. Variety descriptions may call snow peas mangetout. Check the packet rather than assuming every edible-podded pea is harvested at the same thickness.
Choose a cool growing window and suitable variety
Peas grow and flower most reliably in cool conditions. The University of Minnesota Extension notes good growth around 55–65°F and reduced performance under sustained hot weather. In cold-winter regions, sow as soon as workable soil is available, balancing the crop’s tolerance for cool weather against the risk of seed rot in persistently saturated soil. In warmer regions, choose an appropriate autumn or winter crop window instead of following a northern spring calendar.
Select a variety by eventual height and local season. Some short snow peas require only modest twig support, while tall varieties need a stout net or wire trellis. Read the packet for plant height and pod length before making the support. Do not plan to get the same production from summer heat as from a cool spring; flowers and tender pods may fail when plants are heat stressed.
Sow peas alongside the ready-made support
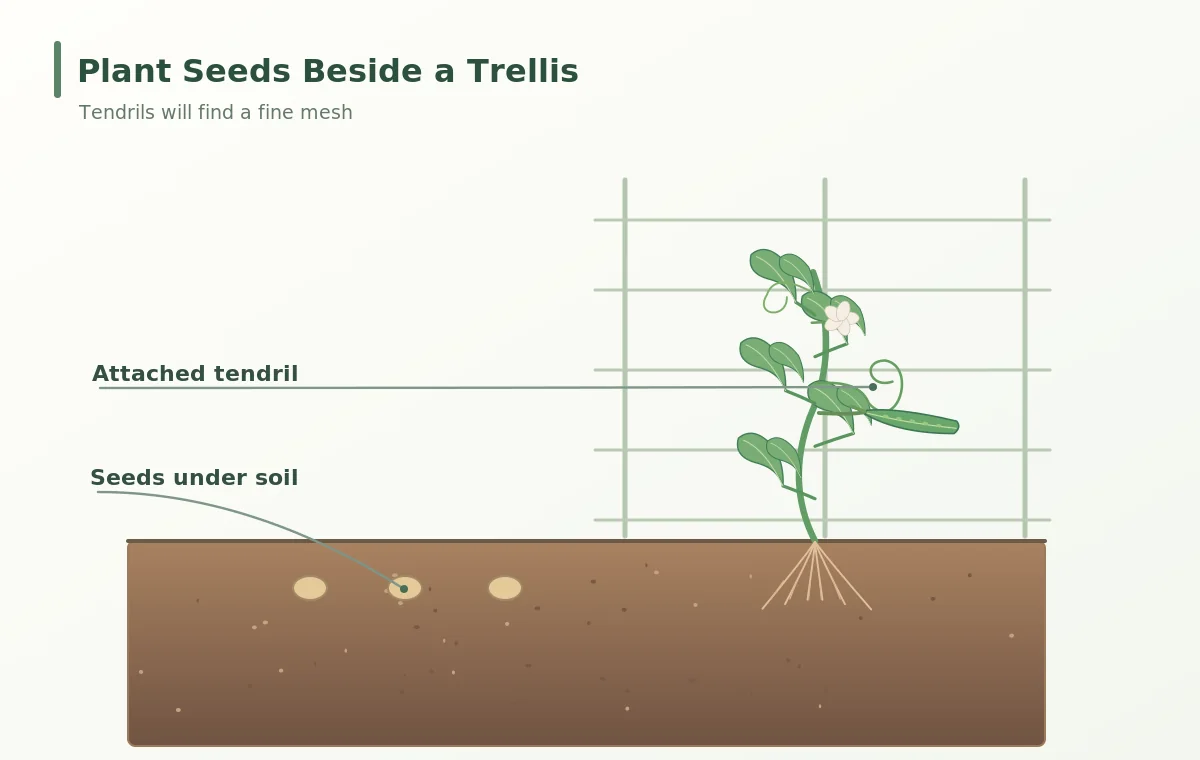
Install the trellis before roots and shoots fill the bed. Drive posts securely and stretch pea mesh or strings with openings that tendrils can grip. For taller cultivars provide anchors that resist wind when vines are heavy with foliage. Place sound whole pea seeds in a shallow furrow by the base; the University of Minnesota gives approximately one inch of soil over its recommended pea seed placement.
Firm the cover gently and water to provide even contact. Avoid soaking seeds in cold saturated soil, and do not confuse planting depth with the depth of the whole furrow. Keep the row marked so weed removal does not disturb emerging seedlings. Where seed has been damaged or cracked, germination may be poor. Delay unnecessary pulling until you can distinguish a newly emerging pea from a weed.
Guide tendrils without twisting the main stem
A pea shoot produces slender flexible tendrils that curl around nearby mesh or twigs. When a new plant reaches the bottom of the trellis, gently direct the tendrils to a reachable strand. Do not wind the thicker main stem forcibly around a pole; that can snap delicate growth. Loose ties may help a few tall plants initially, but should never constrict expanding stems or pinch leaves against abrasive wire.
As vines climb, keep netting accessible from both sides for harvesting. Wider airflow and light exposure help leaves dry after rain. Plants in a crowded tangle may still produce, but overlooked mature pods reduce the frequency of picking and make pest inspection harder. If supports sag, reinforce the structure rather than tugging the vines away from established attachments.
Maintain moisture as flowers and pods develop
Water roots steadily during bloom and pod development, especially when dry winds remove moisture. Peas fix some of their nitrogen with symbiotic bacteria; heavy nitrogen applications can encourage foliage without solving a poorly timed hot-season planting. Follow soil-test guidance and monitor drainage. Mulch may reduce splashing and drying but should not conceal a constantly soggy base.
White, pink or purple pea blossoms develop into pods supported by short stalks. A flower fading is a normal step toward a pod, not automatically disease. Inspect the foliage for aphids, mildew or damage and use a diagnosis-first IPM approach. Avoid spraying flowers indiscriminately or assuming every blemish requires chemicals. Follow local food-crop labeling if treatment is warranted.
Read the pod before the seeds swell
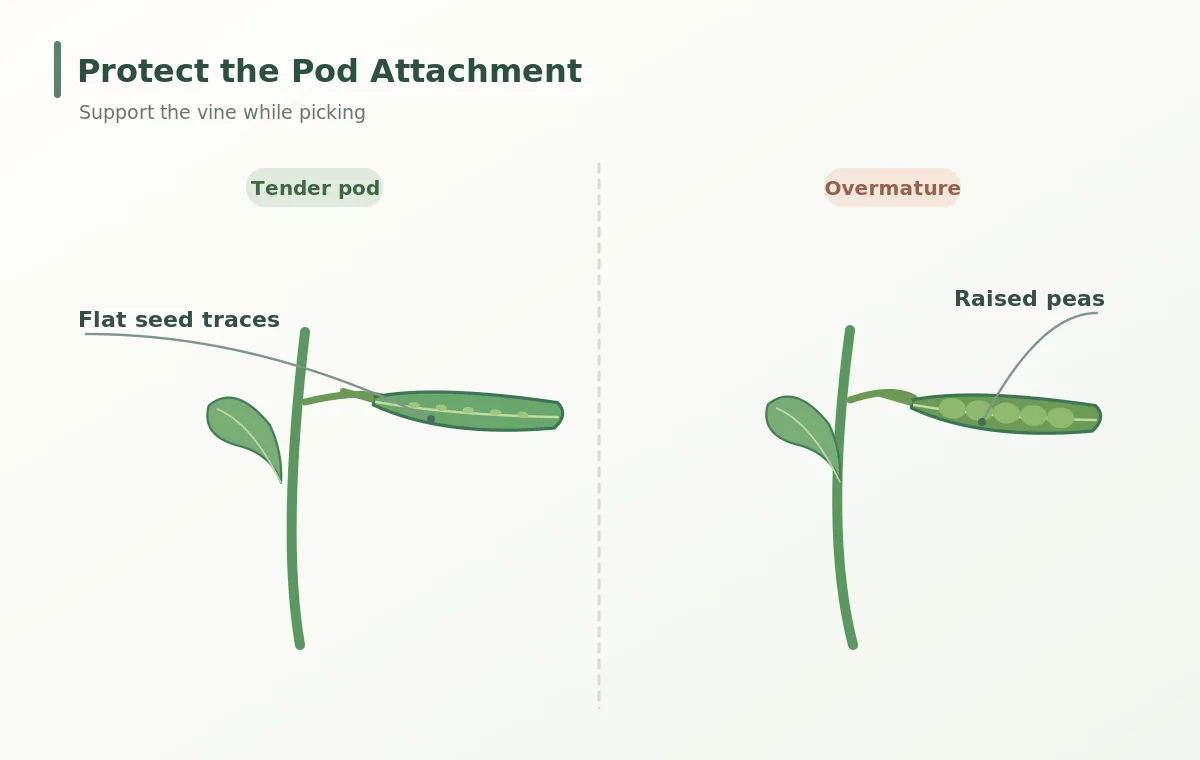
At harvest, a snow pea should be full length for its variety while still flat, with little raised pea shape inside. Test a few pods by feeling their flexibility and opening one to see the tiny developing seeds. A sweet, tender pod that snaps cleanly is ready; a thick, leathery pod with conspicuous round peas is past the best snow pea stage even if its leaves still look healthy.
This is the key difference from sugar snaps: snow peas are not supposed to become plump rounded pods. Pick frequently as the lower part of a vine begins to set pods, then check higher flower clusters. A few days of warm weather can change tenderness quickly. Record what mature usable pods look like on your selected cultivar rather than relying on one photo’s exact length.
Pick pods while protecting the vine
Hold the stem or the base of the pod stalk steady with one hand and gently lift or pinch the mature snow pea with the other. A thin vine can be pulled off a trellis or broken if the pod is yanked downward. Small clean scissors can be helpful for stubborn pedicels; the cut should separate the pod stalk without slicing the vine or leaf-bearing node.
Bring harvested pods out of sun and cool promptly, because sweetness and texture decline after picking. Wash and trim as appropriate; some varieties carry strings along pod seams. Remove strings as needed during cooking prep. Continue regular harvest so young pods do not sit on the plant until their seeds become hard and starchy.
Solve heat, poor pods and climbing failures
If seedlings grow but vines never flower, review season temperatures, sunlight, plant age and excess nitrogen before reaching for a fertilizer. A very hot period can end flowering and pod setting even on a vigorous vine. Sparse, malformed pods may also result from temperature or general plant stress. Check that roots receive moisture and that plants have not been damaged by insects.
If tendrils cannot grip smooth thick poles, attach finer mesh or strands within reach; do not force the whole vine into a knot. If pods are tough, the immediate solution is to pick younger, not to cut back healthy leaves. At season end, remove worn vines carefully and rotate crops according to local disease guidance. A photo of wilt alone cannot identify root disease or recommend a pesticide.
Related Guides
How We Research and Verify This Advice
We based the plant identification, growth-stage decisions and handling guidance on the following resources, accessed on 2026-10-29: extension.umn.edu; www.rhs.org.uk. Where a source gives a region-specific schedule, we describe it as an example, not a universal date. The independent editorial goal is to show recognizable plant organs and practical actions a reader can verify outdoors. Weather, variety, label directions and local Extension advice take precedence over any generalized timeline.
No product, paid partnership or affiliate link is recommended in this article. Our general policy is available at VegWin Affiliate Disclosure. Recommendations focus on plant stages, careful observation and documented university or RHS horticultural information rather than unsupported claims of guaranteed yield or food safety.
No. Snow peas are harvested flat; sugar snaps develop rounded, fleshy pods containing larger peas.
Before sowing or while seedlings are tiny, so you do not damage established roots.
University of Minnesota Extension describes covering pea seed with roughly one inch of soil.
No. For snow peas, pick full-length pods while the peas are still tiny and the pod remains flat.
Peas are cool-season plants; prolonged hot weather can stop flowers and pods even on leafy plants.