
Watercress, Nasturtium officinale, is the peppery leafy aquatic plant sold in fresh bunches, not the quick classroom crop usually called garden cress. Its small seed can germinate in consistently wet media, but an ordinary dry windowsill pot often stalls it. The opposite mistake is collecting shoots from a natural stream without considering water quality and contamination. The method below starts with correctly labelled seed, a container you can clean, and water you control. It then shows what the first true watercress leaves should look like and when to move seedlings without pulling apart their delicate roots.
Verify True Watercress Before You Sow
Check the scientific name on the packet: Nasturtium officinale is watercress, while garden cress is Lepidium sativum and ornamental nasturtiums are Tropaeolum. Despite common names, these do not have the same mature growth habit or water needs. RHS describes true watercress as a perennial aquatic plant with rooting stems, oval leaflets and small white four-petaled flowers. Start with a reliable, labelled seed lot rather than a mystery handful from a streamside plant.
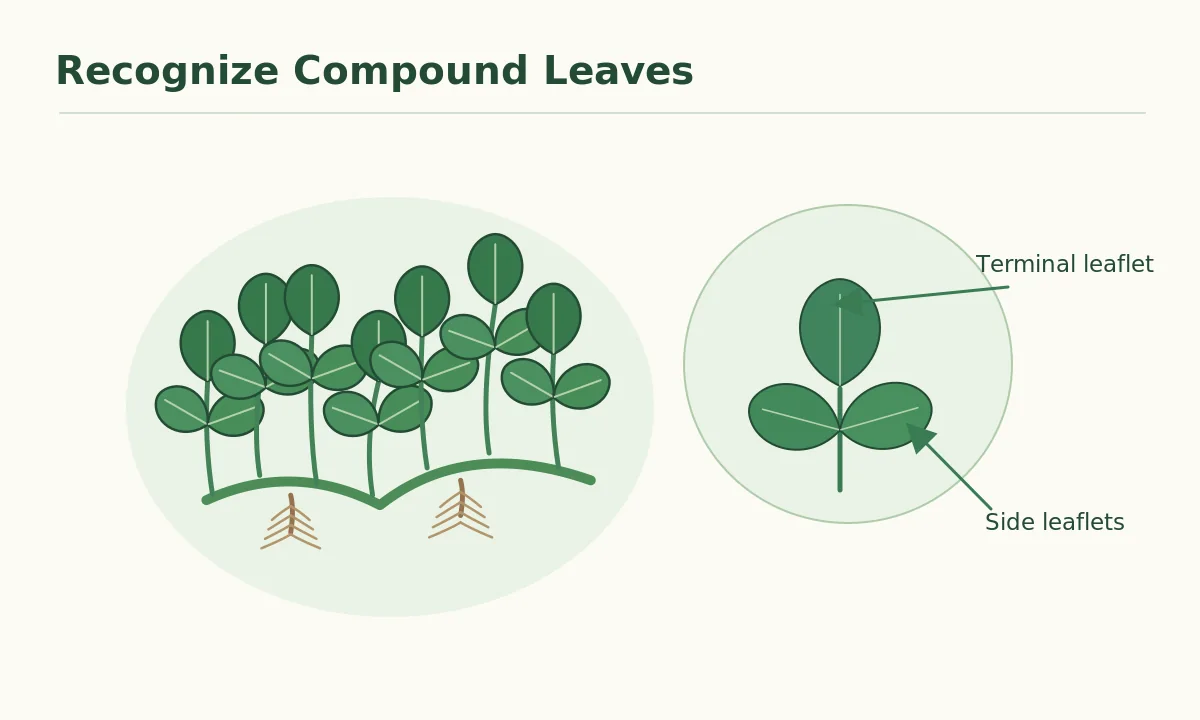
The first seed leaves will not immediately resemble the rounded, compound foliage of a mature grocery bunch. Watch for true leaves on short stems; established watercress often shows a larger terminal leaflet with smaller side leaflets. That is a better identification clue than seed size alone. A clean labelled tray also prevents confusing seedlings with volunteer weeds that happen to germinate in damp compost. Keep the date and source attached until the mature leaves confirm the expected species.
Prepare a Clean Container and Fine Wet Mix
Choose cells, a shallow pot, or a seed tray with holes for excess water, plus a second clean tray to catch or supply water beneath it. Use a fresh, fine potting medium, not muddy soil dug from a creek bank. Utah State Extension describes watercress as adapted to very wet conditions and advises saturating a container medium before planting. Pre-moisten the mix completely; dry patches can remain hidden under a damp-looking surface if the compost was not wetted evenly.
Use potable water for watering food plants and keep trays free of slime and fallen debris. Watercress tolerates wet root zones much better than Mediterranean herbs, yet a neglected container of foul-smelling, stagnant water is not a healthy food-growing system. If using a water reservoir, inspect it and refresh it regularly. Position the tray where you can see both seedlings and water level daily rather than hiding it in a dark cupboard. A clean set-up makes it easier to diagnose failure.
Sow Just Below the Surface and Prevent Drying
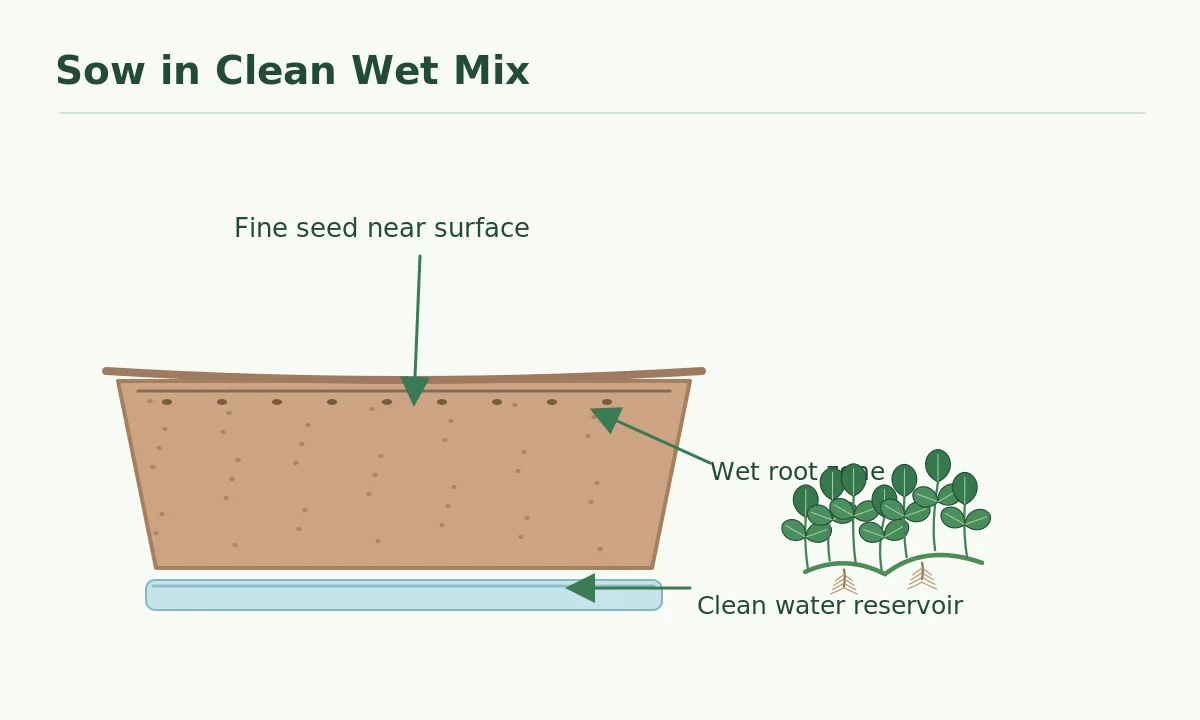
Scatter the fine seeds sparsely so roots and stems will not form an inseparable mat. Utah State Extension suggests sowing watercress seed just below the surface, roughly a quarter inch deep. In a seed tray, cover seeds with a thin layer of fine mix instead of pressing them into deep holes. Firm gently for good seed-to-medium contact and water from below or with a gentle spray. A forceful watering can wash the light seed into a corner or expose it altogether.
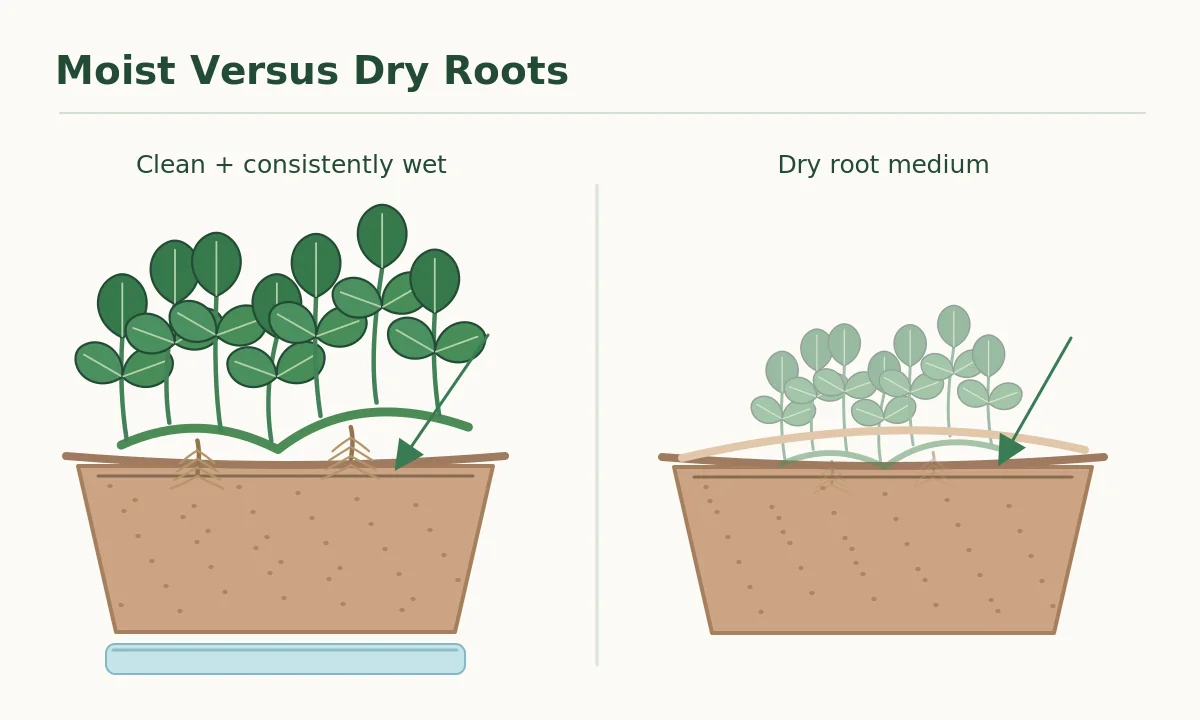
Maintain a wet medium throughout germination. The top few millimeters matter especially: a tray whose base remains damp can still have a dry crust on top. Check by touch and pot weight. A clear propagation cover can reduce evaporation before emergence, but vent it so droplets do not endlessly drip onto delicate seedlings. UC Davis uses carefully controlled moisture in its research protocol, underscoring consistency; ordinary home gardeners need not copy laboratory equipment, just keep conditions stable and observe them closely.
Provide Cool Bright Conditions for New Seedlings
Watercress tends to establish well in relatively cool conditions, unlike warm-season basil. Utah State Extension describes cool seed-starting temperatures for watercress. Avoid baking the tray on a south-facing windowsill above a heater, and do not interpret an indoor heat mat as necessary for every species. Bright indirect light is useful after emergence because tiny stems otherwise stretch and collapse. Make gradual changes when moving seedlings outdoors; young leaves can scorch if shifted suddenly into strong sun.
Once the seed leaves unfold, remove an overly humid lid and give seedlings light and air movement without letting the medium dry. Thin the weakest plants with small scissors if the surface has become crowded. Tugging a seedling from beside a neighbor can tear fine roots. The first pair of seed leaves may be simple, while later leaves develop the more useful compound structure. Take a photograph at this stage to compare growth rather than repeatedly uprooting seedlings to inspect roots.
Pot on Seedlings Without Tearing the Roots
Transplant when a seedling is strong enough to handle by its leaves and retains some growing medium around the roots. Moisten the destination pot first, make a broad shallow planting hole, and move a small rooted plug rather than pulling one stem upward. UC Davis describes carefully moving rooted watercress seedlings into wet compost. The stem base should remain at a sensible original level, not crushed under a mound of potting mix. Water gently to settle the media afterward.
For outdoor containers, keep the root medium thoroughly moist and provide a clean reservoir or a reliable watering schedule. Utah State describes pots standing in shallow water as one workable approach, with periodic water changes. The goal is a constantly available wet root zone, not tall standing water submerging all the leaves of a young plant. Observe fresh growth from leaf nodes as a better sign of success than whether a transplanted leaf briefly droops during the first afternoon.
Harvest Clean Tips and Keep Plants Healthy
Once stems branch and leaves are plentiful, cut clean leafy shoot tips while retaining healthy lower nodes for regrowth. Do not cut the only tiny growing tip from a seedling that has barely established. Regular observation will tell you if new side shoots are developing. Wash harvested leaves with safe water and refrigerate promptly according to food-safety guidance. Because watercress is eaten fresh so often, the cleanliness of water and growing containers is part of the cultivation method, not an optional finishing detail.
Avoid harvesting wild watercress from drainage ditches or livestock-exposed streams. A plant that looks botanically correct can still carry pathogens or parasites associated with contaminated water; rinsing alone is not a guarantee. Growing from labelled seed in a controlled setting does not eliminate food-safety responsibilities, but it avoids unknown source water. Do not apply unverified pesticide recipes to a leafy crop. If leaves develop rot, foul odors or unexplained contamination, discard questionable harvests rather than cutting around them.
Troubleshoot Seeds That Germinate Unevenly
If emergence is patchy, check the packet age, whether seeds washed together, surface moisture, light and temperature before adding fertilizer. Seeds sitting below an unnecessarily thick layer can struggle while uncovered seeds can dry. A clean comparison tray with a thinner cover and the same seed lot can reveal whether depth was the main problem. Record actual emergence dates, because seed lots and household temperatures differ. Do not substitute garden cress for watercress in the same trial and then assume the two germinate identically.
If seedlings fall over at the base, inspect air circulation, crowding and hygiene rather than automatically giving more water or an arbitrary fungicide. If plants stay pale or grow weakly, verify that they receive sufficient light and that the roots are not trapped in decaying medium. The useful decision sequence is species identity, viable seed, persistent moisture, clean water, and careful potting. When these conditions are right, the characteristic watercress shoots become easier to recognize and harvest responsibly.
Related Guides
- How to Grow Watercress in a Container With Clean Water
- Vegetables in Pots: Match Crops, Container Volume, Sun, and Water
How We Research and Verify These Steps
The linked horticultural references were checked on 2026-10-27: extension.usu.edu — Utah State Extension specifies shallow watercress sowing, wet media, cool establishment, and clean container growing. www.rhs.org.uk — The RHS describes common watercress as an aquatic perennial with oval leaflets and rooting stems. taylorlab.ucdavis.edu — UC Davis supplies a controlled, moisture-maintained seed germination and seedling potting protocol for watercress. Each guide separates confirmed growing practices from climate- and cultivar-dependent choices. A diagram illustrates the physical action, not a guarantee of identical results in every garden.
No paid product placement was used in preparing this article. For the site-wide policy, review the VegWin affiliate disclosure.
No. True watercress is Nasturtium officinale; common quick-growing garden cress is Lepidium sativum.
No. Utah State Extension advises shallow sowing, about a quarter inch below the soil surface.
Yes. Clean containers with wet growing mix and managed, refreshed water are suitable.
Seed leaves differ from the later compound true leaves, which become more characteristic as plants develop.
Do not assume so. Use controlled clean water and avoid harvesting from sources with uncertain contamination.