
Snowdrops (Galanthus) are small bulbs whose roots and seasonal foliage deserve gentle handling. Gardeners often move them “in the green”: after their white bell-shaped flowers have faded but while green leaves still identify living bulbs. That differs from storing dormant tulip or daffodil bulbs on a dry shelf. The safest transfer preserves the roots, keeps lifted clumps from drying and restores each bulb to the soil depth it occupied before lifting.
Recognize Snowdrop Leaves and Bulbs
A snowdrop typically shows a small white hanging bell with three prominent outer segments, shorter inner segments often marked with green, and narrow strap-like leaves. Beneath the short stem sits a small rounded bulb with roots arising from the basal plate. The exact leaf color ranges from bright green to gray-green depending on species and cultivar. Do not confuse Galanthus with summer snowflake, Leucojum, which has different flower form and growth timing. A clump may contain many bulbs of different sizes; the smallest pieces may not flower immediately. Identify the colony before lifting so you do not damage or remove a protected local species. Acquire bulbs and plants from responsibly propagated nursery stock rather than digging from wild populations.
Pick the Post-Flowering Green-Leaf Window
The RHS recommends lifting and moving snowdrops after flowering as their foliage starts to decline, or obtaining plants that still carry green leaves. This makes the bulbs easy to locate and reduces reliance on potentially desiccated dry stock. Do not wait until all foliage disappears and then excavate blindly. In climates with snow and frozen soil, the right week depends on spring thaw and local bloom time, not a fixed month copied from a UK calendar. Avoid lifting clumps during a hard freeze, exceptional heat or severe drought. If the soil is extremely wet, wait until it is workable so roots and soil structure are not smeared by the fork. The point is to preserve a living transplant, not to meet an arbitrary date.
Prepare a Shaded, Well-Drained Destination
Snowdrops thrive in soil that holds some spring moisture but does not stay waterlogged. Partial shade near deciduous shrubs and trees often suits them, because leafless branches permit early light while summer canopy moderates drying. RHS notes that excessively dry summer soil can be troublesome. Choose a place where routine mowing and digging will not destroy emerging leaves each spring. Work a little well-rotted organic matter into poor soil if appropriate, without burying the bulbs in a thick, soggy layer. Test drainage with local experience rather than a broad hardiness-zone label. Have the planting holes ready before lifting, especially if the clump must travel across the garden. Do not let bare roots bake on a bench while you decide where they belong.
Lift the Clump With Roots and Soil
Put a hand fork or small border fork into soil just outside the colony. Lift from below, bringing up an intact portion of soil around the small bulbs and roots. Their roots extend below the bulb’s basal plate and can tear when pulled by the green leaves. Crumble loose earth carefully between fingers rather than shaking the clump violently. Inspect for firm bulbs, white to tan roots, and any obvious decay. Keep root systems shaded and lightly moist during the brief move. If you are not replanting immediately, protect them from drying, but do not seal the roots into a hot, airless, waterlogged bag. A small fork correctly positioned beside—not through—the clump is much less risky than a spade pressed down through the middle.
Separate Bulbs Without Stripping Roots
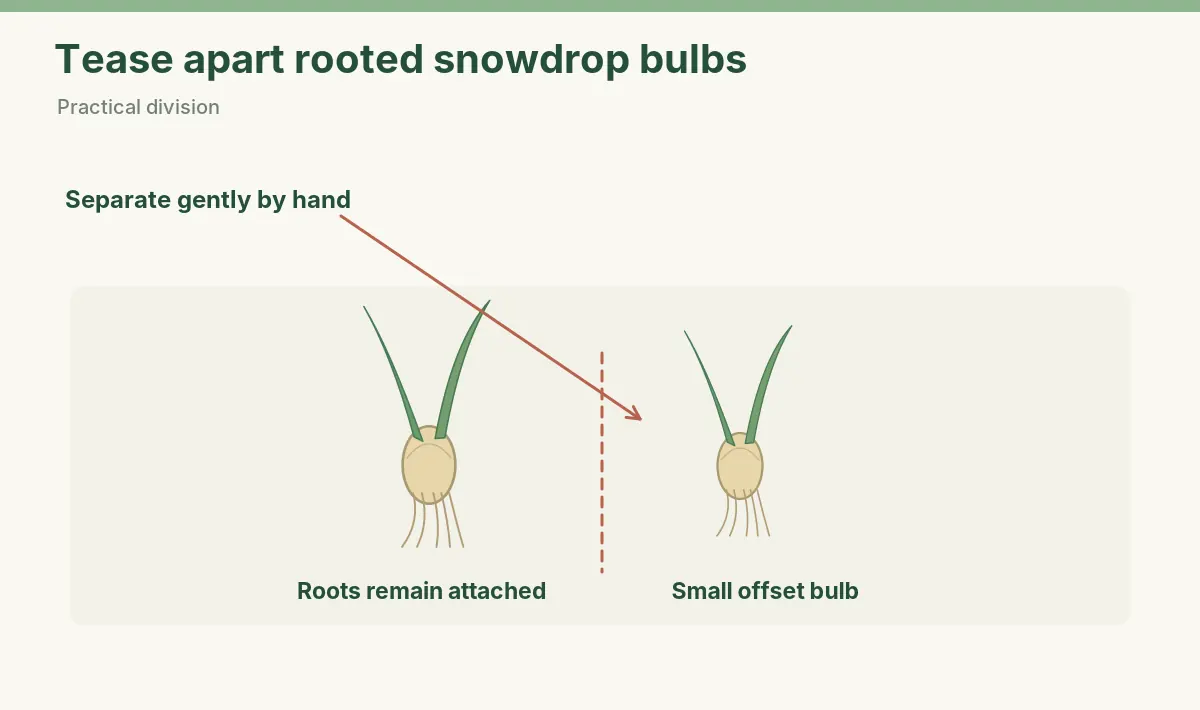
RHS advises teasing apart clumps by hand while keeping root damage as low as possible. Some bulbs will separate easily, while very small offsets may be best retained in a small group rather than forced apart. Do not slice every pair with a knife merely for a neat diagram. Each replanted piece should have a living bulb and, where present, healthy roots; a detached leaf without a bulb cannot establish as a conventional snowdrop division. Set out larger flowering-size bulbs and tiny offsets in groups if their different sizes affect how you want the planting to look. Keep them moist and out of direct drying wind as you work. Wash tools and discard soft rotting bulbs rather than moving obvious problems into clean planting beds.
Use the Stem Color Change to Match Depth
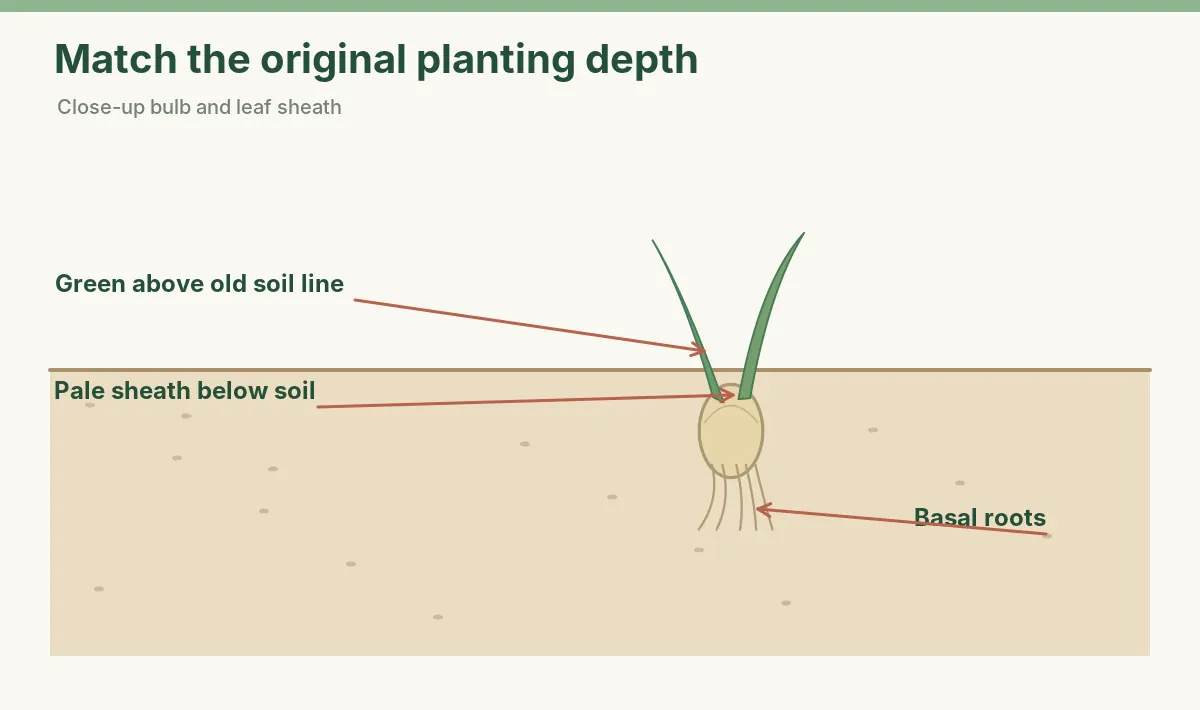
The useful depth guide is often visible on a freshly lifted snowdrop: green leaf sheaths above the old soil line change to pale or white below ground. RHS recommends replacing bulbs at the same depth indicated by this color transition. Make a hole deep enough for the roots to spread downward naturally, then settle the bulb at its previous position without bending roots sharply upward. Cover the bulb and roots; keep the green part above the soil. The correct depth is not to bury half the leaves or leave the bulb exposed on the surface. If the color mark is hard to see, compare against the remaining clump and local soil conditions. This practical living marker is more trustworthy than imposing one depth number on all bulb sizes.
Space and Water Newly Moved Snowdrops
RHS suggests setting separated bulbs at least about two bulb widths apart, with tiny seedlings or bulbs sometimes grouped together. That is a spacing guide, not a mandate for perfect rows: natural drifts can be more attractive and easier to protect. After planting, water thoroughly to close large air pockets around roots. In consistently wet weather, avoid repeatedly soaking already saturated ground. The first season is about re-establishment, so leave newly moved leaves in place and watch for unusual collapse. Mark the planting positions before the leaves disappear into summer dormancy. A small discreet marker prevents accidental later disturbance by routine weeding, bulb planting or spring cultivation.
Avoid Drying, Deep Burial, and Premature Cutting
Three common errors reduce success. First, leaving lifted bulbs exposed until roots dry; snowdrops are especially susceptible to desiccation. Second, transplanting so deeply that the green leaves are mostly buried or so shallowly that bulbs sit on the soil surface. Third, cutting the green leaves off immediately for tidiness. Foliage continues supplying the bulb after flowers are spent, so allow it to yellow naturally. A brief period of untidy grasslike leaves is normal and not a reason to dig again. If a planting struggles, check the site’s summer dryness, heavy winter wetness and whether bulbs were planted at the old line. Avoid concluding that healthy bulbs have failed only because small divisions skip a season of flowers.

Let the Colony Establish Over Future Springs
Do not expect every small snowdrop bulb to flower the first spring after division. Larger bulbs may bloom sooner than offsets, and weather or transplant stress can alter the display. Watch for emerging narrow leaves, not simply a fixed flower count. In a suitable moist but free-draining position, established groups can gradually multiply and be divided again when crowded. Choose a stable place to minimize repeated root disturbance. In a lawn, delay mowing until the leaves have died back. Note the planting date and the origin of each group to avoid mixing labeled cultivars. A successful move is a living colony that returns over subsequent springs, not an instantly full bed of white bells.
Sources and Further Reading
Primary references: www.rhs.org.uk; www.rhs.org.uk; www.rhs.org.uk; extension.umd.edu. These resources support the identified plant parts, timings, and management distinctions discussed above. Sources last reviewed 2026-10-26. Follow the linked original guidance where it differs for your climate or a specific cultivar.
How We Research and Check Advice
We reviewed the named institutional growing and pest-management references on 2026-10-26, cross-checked relevant plant identity and growth-stage claims, and kept the recommendations within what those sources support. We also compared available previous VegWin topics to reduce overlap. The diagrams are simplified educational drawings showing the indicated structure or action, not photographs of verified individual specimens. When a local extension recommendation, plant cultivar, or site condition differs, use the more specific advice. No laboratory diagnoses or live trials were conducted for this article.
Safety and Independent Editorial Disclosure
This independent educational guide does not claim commercial sponsorship, product testing, or affiliate approval. Category links are informational. Read the VegWin affiliate disclosure. Use clean, correctly sized tools, wear protective gloves as appropriate, and verify plant identity before eating any harvest. Seek locally registered and crop-labeled options if chemical management is considered; always follow the current label and harvest restrictions. Images cannot replace professional diagnosis when serious injury or disease is suspected.
It means moving them after flowering while leaves are still present and green or beginning to yellow.
Use the shift from green to pale leaf sheath on a freshly lifted bulb as a guide to the old soil line.
They are prone to drying; RHS favors freshly lifted or in-the-green material for establishment.
No. Let foliage yellow naturally so the bulb can continue storing energy.
Not necessarily. Ease apart bulbs with minimal root damage and leave very small ones in suitable small groups.