
Collards grow into large leafy plants. Use this illustrated transplant workflow to protect the crown, avoid root damage, and plan spacing for mature leaves. The steps below are based on plant-specific extension references, with limits and local decisions stated where they matter. Use the visual checkpoints to verify the actual plant rather than following a date or drawing blindly.
Identify the crown before you lift the seedling
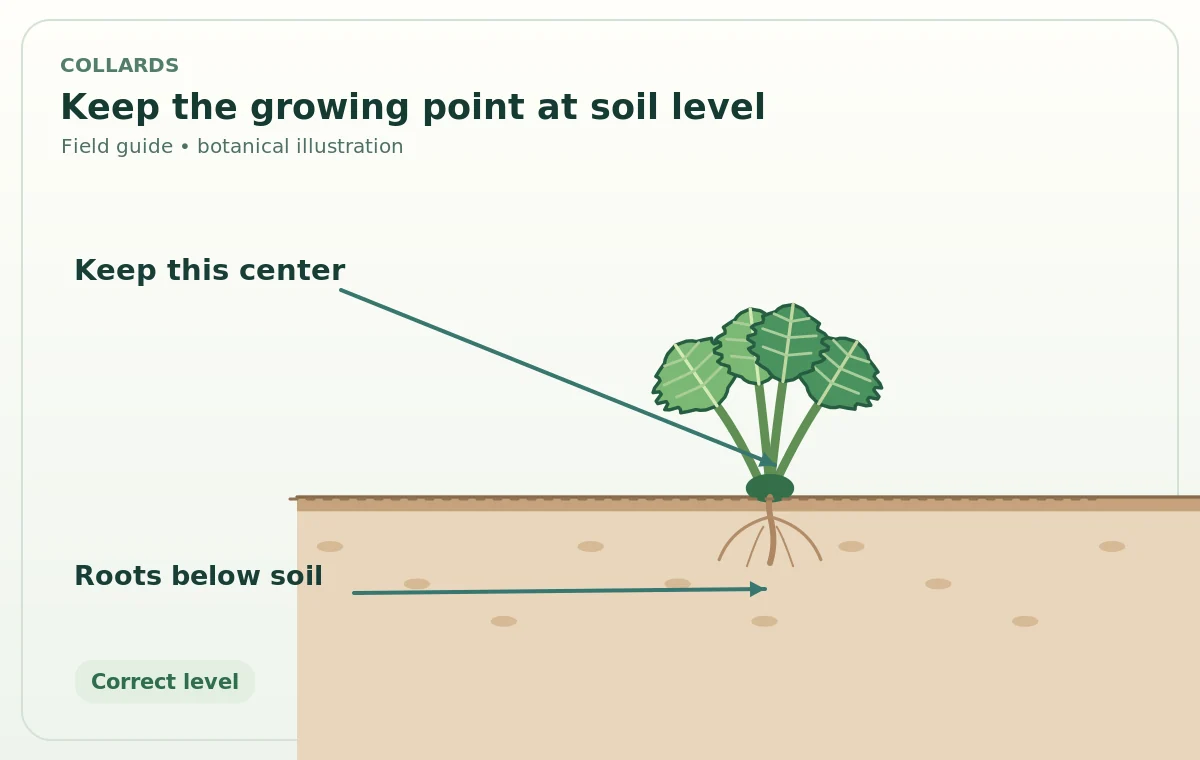
Collards are nonheading members of the cabbage family, not miniature cabbages waiting to form a tight heart. Their broad leaves arise from a growing center above the root system, and that center must stay clear when seedlings move from a cell or seedbed to garden soil. Find the point where the small leaf stalks meet the stem. That is the zone to protect. Loose potting mix may cover the roots, but do not pile soil into the cluster of emerging inner leaves. A plant can appear upright even when its growing point is buried. Check the crown from the side before firming the surrounding soil. This simple visual check matters more than making every leaf face the same direction.
Choose transplant weather instead of copying a date
Collards are cool-season greens suitable for spring and fall plantings, but a date printed for another state may be wrong in your yard. Look at daytime warmth, the forecast for strong freezes, the condition of the soil, and whether young seedlings have been hardened to outdoor wind and sun. The aim is active root growth rather than survival in saturated cold ground or harsh midday heat. If your seedling tray has spent its life indoors, give plants a gradual transition in sheltered outdoor conditions. Delay the move if the bed is muddy enough to smear into a solid lump when squeezed. Regional extension planting calendars should set the final timing, not an abstract hardiness-zone number.
Prepare a bed for adult-size leaves
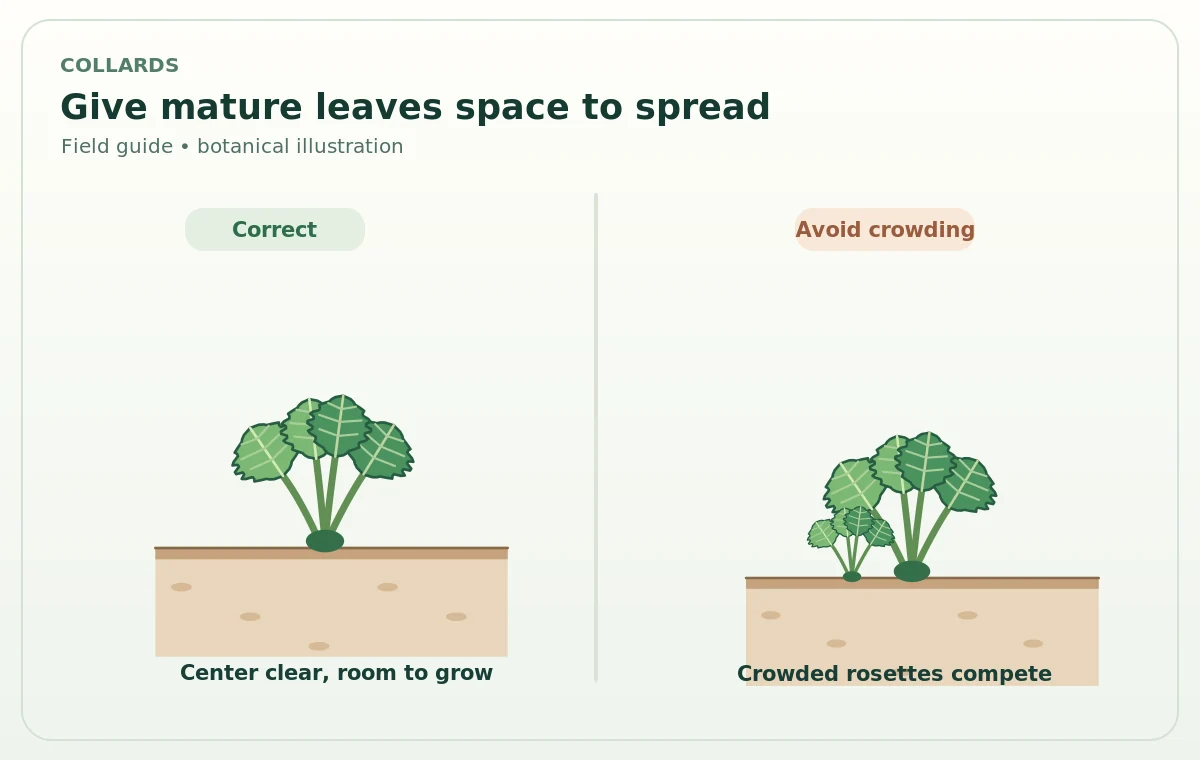
A transplant that looks widely spaced while it has four small leaves may soon shade its neighbors. Illinois Extension describes approximately 18 inches between collards retained to grow large, with other spacings possible for smaller plants. For a garden intended for repeated lower-leaf picking, give the mature rosette room to spread; for baby whole plants, denser rows can be thinned or harvested before they crowd. Set the bed where plants receive good light and the soil drains after watering. Incorporate amendments only when indicated by a soil test; extra nitrogen without a plan can produce unbalanced growth and does not replace space, drainage, or consistent moisture. Mark intended positions before removing plants from cells.

Lift each root ball without tearing the roots
Moisten the tray enough that the potting mix holds together, then squeeze a flexible cell gently and slide the root ball out. Hold the plug, not the tender stem or the broad leaf blade. If roots have begun spiraling tightly, ease only the outermost loops apart with your fingertips; avoid shredding an otherwise healthy root system. Reject plants with collapsed stems, severe spotting, or a broken growing point rather than planting them because you need to fill a gap. A healthy transplant has firm leaves and an intact root system, although some normal yellowing of the earliest seed leaves is possible. Transplant into a prepared hole immediately so roots do not dry in the sun.
Set the root ball even with garden soil
Dig a hole approximately as deep as the root ball and wide enough to set it down without forcing roots into a narrow cone. Keep the top of the root ball near the surrounding soil level, with the inner leaf cluster safely above the soil. Backfill along the sides and press lightly to remove large air pockets. Water at the base until the surrounding mix settles, then look again at the crown: soil sometimes washes inward as water moves. If the plant has sunk or leaned, correct it while the root zone is still moist. Do not mound compost against the growing center to make a shallowly placed plant seem more stable.
Help new transplants through the first week
Newly moved collards need an even supply of soil moisture while fine roots regain contact with the bed. Check a little below the surface rather than irrigating because the top crust looks pale. Water the soil, not the leaves, when possible. In strong sun, a temporary light shade for stressed transplants may help while they recover; remove it once leaves regain firmness so the planting does not remain dim. Minor drooping after a move is not automatically disease. Persistent wilting despite moist soil can reflect broken roots or poor drainage. Avoid cutting away most leaves to reduce transpiration: the plant needs foliage to rebuild its root system.
Inspect young leaves for brassica pests
Look under the growing leaves while plants are small and easy to examine. Caterpillars may chew round or irregular holes; aphids may cluster in protected leaf folds. Examine the plant and identify the pest before deciding on a response. Illinois Extension notes cabbage-family caterpillars as important collard pests, particularly after populations increase later in the season. Hand removal where practical, physical exclusion with appropriate insect mesh, and correct plant identification are sensible first steps. Keep covers from crushing the center and account for their effect on watering and ventilation. Do not substitute an indiscriminate pesticide schedule for scouting, and always follow local extension guidance for any treatment.
Decide whether to thin or keep every plant
Once leaves begin to touch, check your original harvest objective. A close-spaced planting harvested young is not the same layout as a row of mature collards that provide repeated outer leaves. Illinois Extension suggests staging early thinnings to leave approximately 18 inches between large plants. If the original spacing is much closer and you want full-size specimens, remove selected plants rather than hoping crowded collards will correct themselves. Thick plantings may grow tall and thin while keeping their leaf surfaces damp longer. Where there are gaps, replant promptly if the season allows; where plants are healthy but too crowded, harvest the surplus as young greens instead of damaging the roots of every neighbor.
Know when transplant recovery is complete
Watch the center rather than judging success only by old outer leaves. Fresh upright leaves extending from the crown show that the plant is actively growing again. Pale inner leaves, ongoing collapse, or a stem constricted at the soil line require a closer look at water, drainage, root condition, and possible damage. When strong growth resumes, manage leaf harvest using a separate method: remove selected mature outside leaves while leaving the central growing point and healthy inner leaves intact. If a plant bolts and produces a flowering stem, a planting-time or stress mismatch may be involved; avoid assuming that adding fertilizer will reverse the developmental change. Keep simple notes about transplant dates and weather for future seasons.
How We Research and Check These Recommendations
We reviewed the linked university Extension and botanical references for the species, growth stages, and practical decisions described above. These references support the general plant biology but cannot determine the weather, soil conditions, variety, or safety details in your own garden. For plant-specific reading, consult the first extension reference, the second botanical or extension reference and the additional extension reference. This article contains no paid affiliate recommendations. See our affiliate disclosure for the site policy.
No. Keep the inner growing crown above the finished soil level; cover the roots and root ball, not newly emerging leaves.
About 18 inches is one supported mature-plant reference, but harvest size, cultivar, and local guidance change the layout.
Temporary water stress or disturbed roots are common possibilities; check moisture and drainage before assuming disease.
Do not strip the seedling. Retain healthy foliage and let the plant rebuild active root growth.
Fall crops may be started during warmer periods in some regions, but use local calendars and shield new transplants from severe heat.